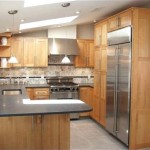
Kitchen Cabinet Lights Installation: A Step-by-Step Guide
Installing lights under your kitchen cabinets is a popular home improvement project that can dramatically enhance your kitchen's functionality and aesthetics. Not only do these lights provide ample illumination for food preparation and cleaning, but they also create a warm and inviting atmosphere, adding a touch of elegance to your culinary space. The process of installing under-cabinet lights is relatively simple, requiring basic tools and a bit of patience. This guide will walk you through the essential steps to ensure a successful installation.
1. Choosing the Right Lights
The first step in installing under-cabinet lights is selecting the right type of lighting for your kitchen. Consider the following factors when making your choice:
-
Light output:
Choose a light output that provides sufficient illumination for your needs. Consider the size of your kitchen and the amount of natural light it receives. -
Color temperature:
The color temperature of your lights can affect the mood of your kitchen. Warm white (2,700-3,200 Kelvin) is a popular choice for kitchens, as it creates a cozy and inviting atmosphere. Cool white (4,000-4,500 Kelvin) provides brighter, more clinical lighting, often preferred for task lighting. -
Light fixture type:
There are various types of under-cabinet light fixtures available, including LED strips, puck lights, and recessed lights.-
LED strips:
Offer a sleek and modern aesthetic, and are highly efficient and long-lasting. They are available in various colors and lengths. -
Puck lights:
Small, round lights that provide focused illumination. They are easy to install and offer a classic look. -
Recessed lights:
Offer a more integrated look, but require more work to install, as they involve cutting into your cabinetry.
-
-
Power source:
The power source for your under-cabinet lights can be hardwired or battery-operated.-
Hardwired:
Provide continuous power, but require electrical wiring expertise. -
Battery-operated:
Offer ease of installation and flexibility, but require regular battery replacement.
-
-
Dimmability:
Consider the option for dimming your lights to create different moods and atmospheres in your kitchen.
2. Planning and Preparation
Once you've selected your lights, it's time to plan and prepare for the installation. This includes:
-
Measuring and marking:
Determine the placement of your lights and mark the locations on your cabinets. Consider the size of your light fixtures and the distance between them. -
Gathering tools:
Assemble the necessary tools for installation, such as:- Screwdriver or drill
- Level
- Measuring tape
- Pencil
- Wire strippers (if hardwiring)
- Electrical tape (if hardwiring)
-
Turning off power:
Most importantly, turn off the power to the circuit that will supply your kitchen lights. You can do this by switching off the corresponding circuit breaker in your electrical panel.
3. Installation Process
The installation process will vary depending on the type of under-cabinet lights you've chosen. Here's a general guide for installing LED strip lights, a popular and widely used option for kitchen cabinets:
-
Attach the mounting strip:
Most LED strips come with an adhesive backing. Clean the underside of your cabinets with rubbing alcohol to ensure a secure bond. Attach the mounting strip to the underside of your cabinet along the marked line. -
Install the LED strip:
Carefully peel the protective backing from the LED strip and press it firmly onto the mounting strip. Ensure the strip is aligned with the marked line and is evenly spaced. -
Connect the power supply:
Connect the power supply to the LED strip. The connection point will be marked on the strip. -
Connect to the electrical outlet:
For battery-operated lights, install the batteries according to the manufacturer's instructions. For hardwired lights, connect the power supply to a nearby electrical outlet using the appropriate wiring. Consult a licensed electrician if you are unfamiliar with electrical wiring. -
Test the lights:
Turn on the power to the circuit and test the lights. Make sure they are working properly and are properly positioned before securing them. -
Secure the lights:
Secure the LED strip to the cabinet using clips or screws, depending on the type of lights you have installed.
For other types of under-cabinet lights, refer to the manufacturer's instructions for specific installation guidelines.
Installing under-cabinet lights is a straightforward home improvement project that can significantly enhance your kitchen's functionality and aesthetics. By following these steps, you can create a well-lit and inviting space where you can cook, prepare food, and enjoy meals with ease and style.

How To Install Wired Under Cabinet Lighting True Value

Installing Your Own Under Cabinet Lighting Young House Love

How To Install Kitchen Cabinet Lighting The Honeycomb Home

Guide To Undercabinet Lighting

Installing Under Cabinet Lighting

How To Choose And Install Led Strip Lights For Kitchen Cabinets

How To Install Led Under Cabinet Lighting In Kitchen Furniture Design Light Sp Z O

9 Best In Cabinet Lighting Options And Ideas

How To Install Led Under And Above Cabinet Lighting Hooked A Wall Dimmer Switch

How To Install Under Cabinet Lighting For A Brighter Kitchen Step B Govee


