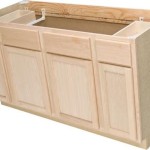
Kitchen Cabinets Restaining: A Comprehensive Guide to Enhance Your Space
Kitchen cabinets are a significant part of any kitchen's design and functionality. Over time, their finish may fade or become outdated, making the kitchen look less appealing. Restaining kitchen cabinets is a budget-friendly way to update their appearance and restore their original beauty.
However, to achieve successful results, it's essential to understand the key steps and techniques involved in kitchen cabinets restaining. This comprehensive guide will provide you with everything you need to know about restaining your kitchen cabinets, from preparation to application to finishing touches.
1. Preparation: Laying the Groundwork for Success
Adequate preparation is crucial for a seamless restaining process. Begin by emptying the cabinets and removing all hardware, including handles, knobs, and hinges. Thoroughly clean the cabinets with a degreaser to remove any dirt, grease, or debris that may interfere with the stain's adhesion.
Next, sand the cabinets lightly with fine-grit sandpaper to create a smooth surface for the stain to penetrate. Be cautious not to over-sand, as this could damage the wood. Remove sanding dust with a tack cloth to ensure a clean surface.
2. Choosing the Right Stain: Understanding the Options
Selecting the right stain is essential to achieve the desired look. Water-based stains are less toxic and easier to clean up but may not penetrate the wood as deeply as oil-based stains. Gel stains are thicker and provide more control over the color intensity.
To determine the stain color, test it on an inconspicuous area of the cabinet or on a separate piece of wood. Allow the stain to dry completely to assess the true color before applying it to the entire surface.
3. Application Techniques: Applying the Stain Evenly
Stir the stain thoroughly before using it. Apply the stain evenly with a brush, sponge, or staining pad, following the grain of the wood. Avoid applying too much stain, as this could lead to uneven results.
Allow the stain to penetrate for several minutes, as per the manufacturer's instructions. Wipe off any excess stain with a clean cloth to prevent streaks or blotches. Repeat the process if desired, allowing more time for penetration each time to achieve a deeper color.
4. Finishing Touches: Protecting the New Finish
Once the stain has dried completely, apply a clear finish to protect the new color and enhance durability. Polyurethane is a popular choice due to its resistance to wear and water damage. Apply two to three coats, sanding lightly between coats to ensure a smooth finish.
Allow ample drying time between each coat and after the final coat to ensure a proper cure. Install the hardware and put items back into the cabinets to complete the project.
Additional Tips for Success
* Wear gloves and a mask during the restaining process. * Test the stain and finish on an inconspicuous area first. * Allow plenty of drying time between steps. * Use good quality materials for best results. * If you're not confident in your ability to restain your cabinets, consider hiring a professional.
Repainting Vs Restaining Kitchen Cabinets Kitchens Redefined

Cabinet Refinishing Guide

How To Make Rustic Kitchen Cabinets By Refinishing Them The Best Stain Color Amanda Katherine

Staining Your Wood Cabinets Darker Young House Love

Restaining Cabinets Give A New Life To The Dated Kitchen

Cabinet Refinishing An 8 Step Guide For Pro Painters Ppc

Kitchen Cabinet Makeover 2 Coats Of Minwax Polyshade Tudor Satin On Cabinets Restaining Oak

How To Refinish Wood Cabinets The Easy Way Love Remodeled

Refinishing Kitchen Cabinets Modern Refacing Made Easy Wisewood

Cabinet Color Change N Hance Of Lowcountry
Related Posts


