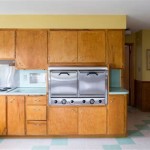
Kitchen Cupboard Carousel Installation: A Comprehensive Guide
The kitchen cupboard carousel, often referred to as a lazy susan, is a highly effective storage solution designed to maximize accessibility and organization within kitchen cabinets. This rotating shelving system provides a practical way to reach items stored deep inside corner or blind cabinets, eliminating wasted space and reducing the need to rummage through cluttered shelves. Installing a kitchen cupboard carousel can significantly improve the functionality and user-friendliness of a kitchen.
This article provides a detailed, step-by-step guide to installing a kitchen cupboard carousel, covering the necessary tools and materials, pre-installation preparations, and the entire installation process itself. By following these instructions, individuals with basic DIY skills can successfully install a carousel and reap the benefits of enhanced kitchen organization.
Key Point 1: Preparing for Installation
Before commencing the installation process, it is crucial to gather the necessary tools and materials and to thoroughly prepare the cabinet. This pre-installation phase ensures a smooth and efficient installation, minimizing potential issues and ensuring a professional result.
The required tools typically include a measuring tape, a pencil, a power drill with various drill bits, a screwdriver (both Phillips and flathead), a level, safety glasses, and potentially a jigsaw or hole saw if modifications to the cabinet are required. Essential materials include the kitchen cupboard carousel kit itself, screws appropriate for the cabinet material, wood shims (if leveling is needed), and potentially wood filler and paint or stain for any necessary touch-ups.
Begin by emptying the cabinet completely. This allows for unrestricted access and a clear view of the interior. Next, accurately measure the interior dimensions of the cabinet, specifically the width, depth, and height. These measurements are critical for selecting the correct size carousel and ensuring a proper fit. Compare these measurements to the carousel kit specifications to confirm compatibility. Note any obstructions within the cabinet, such as pipes, wiring, or structural supports that might interfere with the carousel’s rotation. These obstructions may require modifications to the cabinet or a modified installation approach.
Carefully inspect the cabinet interior for any imperfections, such as uneven surfaces or loose panels. Address any issues before proceeding. If the cabinet floor is uneven, use wood shims to create a level surface for the carousel base. Secure the shims with construction adhesive or small screws. Clean the cabinet interior thoroughly, removing dust, debris, and any existing adhesive residue. This ensures a clean surface for the carousel components to adhere to and prevents contamination.
Familiarize oneself with the components included in the carousel kit. Most kits include the rotating shelves, a central post or support structure, mounting hardware, and installation instructions. Review the instructions carefully to understand the specific installation process for the chosen carousel model. If the cabinet requires modifications, such as drilling holes for the central post or cutting out a section of the shelf to accommodate pipes, mark the areas to be modified with a pencil. Use a jigsaw or hole saw to make the necessary cuts, ensuring accuracy and precision. Sand down any rough edges to prevent splinters or damage.
Key Point 2: Installing the Carousel Components
The core of the installation process involves securely mounting the carousel components within the cabinet. This requires careful alignment, precise drilling, and proper fastening techniques to ensure stability and smooth rotation.
Begin by installing the central post or support structure. The method for installing this component varies depending on the carousel model. Some models require attaching the post to the cabinet floor and ceiling, while others mount to the cabinet walls. Follow the manufacturer's instructions meticulously. Typically, this involves positioning the post in the center of the cabinet, marking the locations for the mounting screws, and pre-drilling pilot holes. Ensure the post is perfectly vertical using a level before securing it with screws. Use appropriate screws for the cabinet material, and avoid over-tightening, which can strip the screw holes or damage the cabinet.
Next, install the rotating shelves onto the central post. Most carousels use a clip-on or friction-fit system for attaching the shelves to the post. Align the shelves carefully, ensuring they are evenly spaced and level. Rotate the shelves to confirm they rotate freely and do not rub against the cabinet walls or any obstructions. If the shelves do not rotate smoothly, check the alignment of the central post and the shelf attachments. Minor adjustments may be necessary to achieve optimal rotation.
Some carousel models feature adjustable shelves, allowing for customization of the storage space. Adjust the shelf height according to individual needs and preferences. This is particularly useful for accommodating items of varying heights. Secure the shelves in their desired positions using the locking mechanisms provided in the kit. Double-check the stability of the shelves by applying slight pressure. Ensure they are firmly attached to the central post and can support the weight of stored items.
If the carousel includes a door-mounting kit, install it according to the manufacturer's instructions. This typically involves attaching brackets to the inside of the cabinet door and connecting them to the rotating shelves. When the door is opened, the shelves rotate out, providing easy access to the contents. Align the door brackets carefully to ensure the door closes properly and the shelves rotate smoothly without binding. Test the door mechanism thoroughly to confirm it operates correctly.
Key Point 3: Addressing Common Installation Challenges
Even with meticulous planning and careful execution, unexpected challenges can arise during the installation process. Being prepared to address these common challenges can prevent frustration and ensure a successful outcome.
One common challenge is dealing with uneven cabinet floors. As previously mentioned, wood shims can be used to level the surface. However, if the unevenness is significant, consider using a self-leveling compound to create a perfectly flat base. This requires careful application and drying time, but it can provide a more stable and professional-looking result. Another challenge involves obstructions within the cabinet, such as pipes or wiring. In some cases, it may be possible to relocate these obstructions. However, if relocation is not feasible, consider modifying the carousel shelves to accommodate the obstructions. This may involve cutting out a section of the shelf or using a smaller carousel model.
Difficulty in aligning the central post is another frequent issue. Ensure the post is perfectly vertical using a level. If the post is not stable, consider adding additional support brackets to the cabinet walls or floor. Stripped screw holes can also pose a challenge. To repair stripped screw holes, use wood filler to fill the hole and allow it to dry completely. Then, pre-drill a new pilot hole and install a slightly larger screw. Avoid over-tightening the screws to prevent further damage.
If the carousel shelves rub against the cabinet walls, check the alignment of the central post and the shelf attachments. Minor adjustments may be necessary to achieve optimal rotation. If the shelves are too large for the cabinet, consider trimming them down using a jigsaw. Be sure to sand down any rough edges after trimming. Difficulties with the door-mounting mechanism can also occur. Ensure the door brackets are properly aligned and securely attached to the door and the rotating shelves. If the door does not close properly, adjust the hinges or the door latch. Lubricating the rotating mechanism with a silicone-based lubricant can also improve its performance.
Finally, after installation, thoroughly test the carousel to ensure it functions properly. Rotate the shelves to confirm smooth and unrestricted movement. Load the shelves with items to test their weight-bearing capacity. Check the stability of the central post and the shelf attachments. Address any issues immediately to prevent further problems. Clean up any debris or sawdust from the installation process. If any modifications were made to the cabinet, consider touching up the paint or stain to match the existing finish.
By carefully following these instructions and addressing any challenges that arise, individuals can successfully install a kitchen cupboard carousel and enjoy the benefits of improved kitchen organization and accessibility. The carousel will provide a more efficient and user-friendly storage solution, making it easier to retrieve items stored within the cabinet.

Solved 4 Instead Of 2 Tiered Corner Cabinet Carousel Ers

Carousel Corner Installation Spitze By Everyday

Three Quarter Kitchen Carousel Unit Warehouse

3 4 Carousel To Suit 800 900mm Corner Units Grey Plastic Alu 54285550

Kitchen Carousels Homelane Blog

1 2 Carousel Plus To Suit 900 1000mm Wide Blind Corner Base Unit Universal Fixing 450 500mm Door Opening Fittingsco

Pull Out Corner Carousel Lee Valley Tools

Kesseböhmer Corner Cabinet Carousel W 925mm Diy At B Q

Kitchen Space Organizers Swivel Carousels

Three Quarter Circle Carousel Fitting Corner Cabinet For 90 Folding Door At HÄfele
Related Posts