Kitchen Cupboard Contact Paper: A Practical Guide to Transformation
Kitchen cupboards often bear the brunt of daily use, leading to wear and tear that can detract from the overall aesthetic of the kitchen. Replacing entire cabinet sets can be a costly and disruptive undertaking. Kitchen cupboard contact paper offers a budget-friendly and relatively simple alternative for refreshing and revitalizing these essential storage spaces. This material, typically a thin, self-adhesive vinyl, provides a decorative and protective layer that can significantly improve the appearance of aged or damaged cabinets. Contact paper comes in a wide variety of colors, patterns, and textures, allowing for diverse design possibilities to suit individual preferences and kitchen styles.
The application of kitchen cupboard contact paper requires careful preparation and execution to achieve a professional-looking finish. While the process is generally straightforward, attention to detail is crucial for avoiding bubbles, wrinkles, and other imperfections. This article provides a comprehensive guide to understanding, selecting, and applying contact paper to kitchen cupboards, ensuring a successful and visually appealing transformation.
Understanding the Benefits of Using Contact Paper
Kitchen cupboard contact paper offers a range of benefits beyond simply covering up imperfections. Its protective qualities, aesthetic versatility, and cost-effectiveness make it a compelling option for many homeowners and renters alike. Understanding these advantages allows for a more informed decision regarding its suitability for a particular kitchen renovation project.
One of the primary benefits is its affordability. Compared to the cost of replacing or even professionally painting cabinets, contact paper provides a significantly cheaper alternative. This makes it particularly attractive for those on a tight budget or for renters who want to personalize their space without making permanent changes. The relatively low material cost allows for experimentation with different designs and textures without the commitment of a major investment.
Furthermore, contact paper offers a degree of protection to the underlying cabinet surface. It acts as a barrier against spills, stains, scratches, and general wear and tear. This can be particularly useful in high-traffic areas or in homes with young children or pets. The protective layer helps to extend the lifespan of the cabinets by preventing damage from everyday use. This is especially important for cabinets made of less durable materials or those with delicate finishes.
The ease of application is another significant advantage. While patience and precision are required, the process is generally straightforward enough for most homeowners to undertake as a DIY project. Unlike painting, which requires extensive preparation and can be messy, applying contact paper involves simpler tools and techniques. This accessibility makes it a viable option for those with limited experience in home improvement projects. The ability to complete the project independently also contributes to the overall cost savings.
Finally, the versatility of design options is a major draw for contact paper. It is available in a vast array of colors, patterns, and textures, ranging from solid colors and realistic wood grains to intricate geometric designs and faux finishes like marble or stainless steel. This allows for a high degree of customization to match existing kitchen décor or to create a completely new look. The wide selection ensures that there is a contact paper option to suit virtually any aesthetic preference, from modern and minimalist to traditional and rustic.
Selecting the Right Contact Paper for Your Kitchen
Choosing the appropriate contact paper is crucial for achieving the desired aesthetic and ensuring long-lasting results. Factors such as the type of adhesive, the material's durability, and the intended style of the kitchen should all be considered when making a selection. A poorly chosen contact paper can result in bubbles, peeling, or a finish that does not complement the overall kitchen design. This section outlines the key considerations for selecting the right contact paper for a specific kitchen project.
The type of adhesive is a vital factor to consider. Some contact papers have a stronger adhesive than others, and the strength of the adhesive will affect how well the paper adheres to the cabinet surface and how easily it can be repositioned during application. For uneven or textured surfaces, a stronger adhesive is generally recommended. Repositionable contact paper is a good option for beginners, as it allows for corrections to be made during the application process without damaging the paper or the cabinet. Reading product reviews and specifications can provide valuable insights into the adhesive properties of different contact paper brands and types.
The durability of the material is another important consideration, particularly for cabinets in high-use areas. Thicker contact papers are generally more durable and resistant to scratches, tears, and water damage. Consider the material's resistance to heat and moisture, especially for cabinets near the stove or sink. Vinyl contact paper is a popular choice due to its durability and water resistance, but other materials, such as laminate or paper-based options, may be suitable for less demanding applications. Evaluate the level of use the cabinets will experience and choose a contact paper that can withstand the wear and tear.
The pattern and color of the contact paper should be carefully chosen to complement the overall kitchen design. Consider the existing colors of the walls, countertops, and appliances. Solid colors can provide a clean and minimalist look, while patterns can add visual interest and personality. Wood grain contact paper can mimic the look of real wood, while faux finishes like marble or stainless steel can add a touch of elegance. It is advisable to obtain samples of different contact papers and test them in the kitchen to see how they look in the actual lighting conditions. This will help to avoid choosing a color or pattern that clashes with the existing décor.
Finally, consider the ease of cleaning and maintenance. Some contact papers are easier to clean than others. Look for options that are resistant to stains and can be easily wiped down with a damp cloth. Textured contact papers may require more effort to clean, as dirt and grime can accumulate in the crevices. Consider the amount of time and effort you are willing to dedicate to cleaning the cabinets and choose a contact paper that aligns with your maintenance preferences. A low-maintenance option will help to keep the cabinets looking their best for longer.
Step-by-Step Guide to Applying Contact Paper
The successful application of kitchen cupboard contact paper hinges on meticulous preparation and a systematic approach. Rushing the process or skipping steps can result in a less-than-desirable outcome. This section provides a detailed, step-by-step guide to applying contact paper, ensuring a smooth, bubble-free, and professional-looking finish.
The first step is to thoroughly clean the cabinet surfaces. Remove all hardware, such as knobs and handles. Use a degreasing cleaner to remove any grease, dirt, or grime. Rinse the surfaces with clean water and allow them to dry completely. Any imperfections on the cabinet surface, such as dents or scratches, should be filled with wood filler and sanded smooth before applying the contact paper. A clean and smooth surface is essential for ensuring proper adhesion and a flawless finish. Skipping this step can lead to bubbling and peeling.
Next, measure the cabinet surfaces accurately. Use a measuring tape to determine the width and height of each cabinet door or drawer. Add a few extra inches to each dimension to allow for trimming and adjustments. This is particularly important for cabinets with rounded edges or irregular shapes. Precise measurements will ensure that the contact paper fits properly and minimizes waste. It is better to have too much contact paper than too little, as it can always be trimmed to size.
Cut the contact paper to size using a sharp utility knife or scissors. Use a cutting mat or a flat, stable surface to protect the underlying area. Transfer the measurements from the cabinet surfaces to the contact paper, using a ruler or straight edge to ensure accurate cuts. For patterned contact paper, pay attention to the alignment of the pattern when cutting multiple pieces. Consistent pattern alignment will create a more visually appealing and professional-looking finish. Cutting the contact paper accurately is crucial for preventing gaps or overlaps.
Peel back a small portion of the backing paper, exposing the adhesive side of the contact paper. Align the edge of the contact paper with the edge of the cabinet surface. Slowly and carefully smooth the contact paper onto the cabinet surface, using a smoothing tool or a credit card to press out any air bubbles. Work in small sections, gradually peeling back more of the backing paper as you go. Maintaining a slow and deliberate pace is crucial for preventing wrinkles and creases. If bubbles or wrinkles do appear, gently peel back the contact paper and smooth it out again. Patience and attention to detail are key to achieving a bubble-free finish.
Once the contact paper is fully applied, use a sharp utility knife or scissors to trim any excess material around the edges of the cabinet. Use a straight edge to ensure clean and precise cuts. For rounded edges or corners, use a curved blade or a sharp pair of scissors to carefully trim the contact paper to fit the contours of the cabinet. A clean and professional-looking trim is essential for achieving a finished look. Take your time and pay attention to detail to ensure that the edges are smooth and even.
Finally, reattach the hardware, such as knobs and handles. Use a screwdriver to securely fasten the hardware to the cabinet doors and drawers. Ensure that the hardware is aligned properly and that it is not loose or wobbly. Clean the contact paper with a damp cloth to remove any fingerprints or smudges. Step back and admire the transformed kitchen cupboards. With proper preparation and execution, the application of contact paper can significantly enhance the appearance of the kitchen at a fraction of the cost of a full renovation.

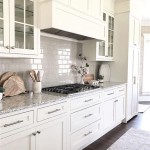
How To Update Cabinets Using Contact Paper Al Kitchen Makeover Cover Apartment

Diy Contact Paper Kitchen Counters The Interior Diyer

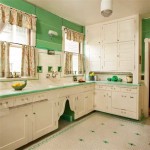
Contact Paper In The Kitchen 5 Places

I Used Contact Paper On My Whole Kitchen Makeover And Al S Part 2

Temporary Contact Paper Kitchen Cabinet Decorations Pink Stripey Socks

Spruce Up The Outside Of Your Kitchen Cabinets With Contact Paper Offbeat Home Life Diy Makeover

I Used Contact Paper On My Whole Kitchen Makeover And Al S Part 2

7 Super Fast Mini Makeovers Kitchen Cabinets Makeover Diy Contact Paper

How To Update Cabinets With Contact Paper The Handyman S Daughter

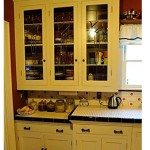
Contact Paper Covered Cabinets Mox Fodder
Related Posts