Kitchen Cupboards Chalk Paint: A Comprehensive Guide to Transformation
The kitchen is the heart of the home, where culinary delights are created and memories are made. Often, the kitchen cupboards serve as the focal point, and their appearance can significantly impact the overall ambiance of the space. Chalk paint has emerged as a popular choice for revamping kitchen cupboards, offering a versatile and budget-friendly approach to achieving a fresh and stylish look.
Choosing the Right Chalk Paint
The first step in transforming your kitchen cupboards with chalk paint is selecting the appropriate paint. Opt for a high-quality chalk paint specifically designed for furniture and cabinetry. This type of paint adheres well to various surfaces and provides a durable finish.
Chalk paint comes in a wide array of colors, allowing you to match the existing decor or create a striking contrast. If you're unsure about the color choice, consider purchasing sample pots to test different shades before committing to a larger quantity.
Preparing the Kitchen Cupboards
Prior to applying chalk paint, it's crucial to prepare the kitchen cupboards thoroughly. This involves cleaning the surfaces to remove any dirt or grease, followed by light sanding to create a smooth and even base for the paint to adhere to.
If the cupboards have any hardware, such as handles or knobs, remove them temporarily to ensure a seamless painting process. It's also advisable to protect the surrounding areas, such as countertops and floors, using drop cloths or painter's tape.
Applying Chalk Paint
When applying chalk paint, use a high-quality paintbrush specifically designed for furniture painting. Start by painting the edges and corners of the cupboards, then move on to the larger surfaces, working in small sections.
Apply thin, even coats of paint, allowing each coat to dry completely before applying the next. The number of coats required may vary depending on the desired coverage and the opacity of the paint. For a more distressed look, consider sanding between coats to create a weathered effect.
Finishing Touches
Once the final coat of chalk paint has dried, you can add finishing touches to enhance the look of your kitchen cupboards.
Adding a coat of clear wax or sealant will help protect the paint and make it more durable. You can also use wax to highlight certain areas of the cupboards, creating a subtle distressed effect.
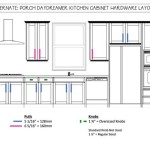
If desired, you can also change the hardware to complement the new look of your cupboards. New handles or knobs can provide a refreshing accent and tie the entire design together.
Transforming your kitchen cupboards with chalk paint is a cost-effective way to refresh and revitalize your kitchen space. With careful preparation, the right paint, and a bit of patience, you can achieve a stunning and personalized look that reflects your unique style.

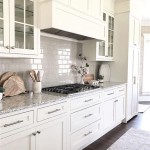
Chalk Painted Kitchen Cabinets 2 Years Later Our Storied Home

Painting Kitchen Cabinets With Chalk Paint Simply Today Life

Chalk Paint Kitchen Cabinets 2 Amazing Before Afters And How To The Interiors Addict

Why I Repainted My Chalk Painted Cabinets Sincerely Sara D Home Decor Diy Projects

Chalk Paint Furniture Kitchen Cabinets Painting Remodel

Kitchen Cabinet Refresh With Chalk Paint By Annie Sloan Stylish Patina

Chalk Painted Kitchen Cabinets 2 Years Later Our Storied Home

How To Paint A Kitchen With Chalk Maison De Pax

Annie Sloan Chalk Paint Kitchen Cabinets A Créé Une Peintu Painting

Why I Repainted My Chalk Painted Cabinets Sincerely Sara D Home Decor Diy Projects
Related Posts

