Rejuvenating Your Old Kitchen Cabinets with a Fresh Coat of Paint
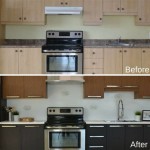
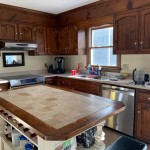
Old kitchen cabinets can often feel outdated, dull, and in need of a refresh. However, replacing them can be a costly and time-consuming endeavor. A more budget-friendly and sustainable solution is to repaint your existing cabinets, giving them a new lease on life and transforming the look of your kitchen. Here are some essential aspects to consider when repainting old kitchen cabinets:
1. Preparation is Key
Before you start painting, it is crucial to prepare the cabinets thoroughly. This involves removing all hardware, hinges, and doors. Clean the surfaces with a degreaser to remove any dirt, grease, or grime that could interfere with the paint adhesion. Once cleaned, sand the cabinets lightly with fine-grit sandpaper to smooth out any rough edges or imperfections. This will create a better surface for the paint to adhere to.
2. Choose the Right Paint
Not all paints are created equal, and when it comes to painting kitchen cabinets, you need a durable and moisture-resistant finish. Opt for a high-quality cabinet paint specifically designed for this purpose. These paints are typically more expensive than standard wall paints but offer superior adhesion, durability, and resistance to wear and tear.
3. Apply Primer
Before applying paint, it is essential to use a primer. Primer helps to seal the surface, block stains, and ensure even paint coverage. Choose a primer compatible with the paint you are using and apply it in thin, even coats. Allow the primer to dry completely before proceeding with the paint.
4. Paint with Care
When painting, use a high-quality brush or roller designed for painting cabinets. Apply the paint in thin, even strokes, using a light hand. Start with the edges and corners, then move on to the flat surfaces. Allow each coat to dry completely before applying the next. Depending on the color and finish desired, you may need multiple coats of paint.
5. Seal for Protection
Once the paint has dried, it is important to seal it for protection. A clear polyurethane finish is an excellent choice, as it is highly durable and resistant to scratches, stains, and moisture. Apply the polyurethane in thin, even coats, allowing each coat to dry completely before applying the next. Allow the final coat to cure for several days before using the cabinets.
6. Reassemble and Enjoy
Once the paint and sealer have completely dried, reassemble the cabinets by attaching the doors, hinges, and hardware. Step back and admire your refreshed kitchen cabinets. With a little effort and care, you have given your old cabinets a new lease on life and transformed the look of your kitchen.
Conclusion
Repainting old kitchen cabinets is a cost-effective and rewarding project that can breathe new life into your kitchen. By following these essential steps, you can achieve a professional-looking finish that will make your cabinets look like new. Remember to use high-quality materials, prepare the surfaces properly, and apply the paint and sealer with care. With a little patience and attention to detail, you can enjoy the beauty and functionality of your rejuvenated kitchen cabinets for years to come.

Avoid These Mistakes How To Paint Cabinets That Are Already Painted Grace In My Space

How To Paint Kitchen Cabinets In 7 Simple Steps

Cabinet Refinishing Guide

My Painted Cabinets Two Years Later The Good Bad Ugly

How To Prep And Paint Kitchen Cabinets Lowe S

How To Paint Your Kitchen Cabinets Houzz

Painting Your Kitchen Cabinets Is Easy Just Follow Our Step By Tutorial

Behr Premium 1 Gal 23 Antique White Semi Gloss Enamel Interior Exterior Cabinet Door Trim Paint 712001 The Home Depot

How To Paint Kitchen Cabinets In 7 Simple Steps

Painted Kitchen Cabinets One Year Later The Palette Muse
Related Posts


