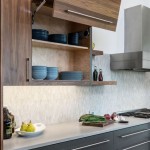
Old Wooden Kitchen Cabinets Makeover
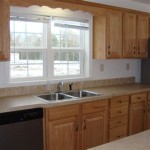
Old wooden kitchen cabinets, often passed down through generations or simply relics of a bygone era, possess a unique charm and character. While their age may bring a vintage appeal, their outdated finishes and worn surfaces can detract from the overall aesthetics of a modern kitchen. A makeover can breathe new life into these cabinets, transforming them into stylish focal points that enhance the functionality and ambiance of the space.
1. Repainting and Refinishing
One of the most transformative ways to revitalize old wooden kitchen cabinets is through repainting or refinishing. A fresh coat of paint can completely change the appearance of the cabinets, allowing for a modern update or a cohesive color scheme with the rest of the kitchen. To achieve a smooth, professional finish, proper preparation is key. This involves cleaning the cabinets thoroughly, sanding down any uneven surfaces, and applying a primer to ensure optimal paint adhesion.
For a more classic look, consider refinishing the cabinets with a stain or varnish. Staining allows the wood grain to show through, adding depth and warmth, while varnishing creates a protective layer that enhances the natural beauty of the wood. A combination of paint and stain can also be employed, such as painting the cabinet doors while leaving the frames in their original wood finish. To ensure a successful refinishing project, choose high-quality products and follow the manufacturer's instructions carefully.
2. Hardware Upgrades
Cabinet hardware plays a significant role in determining the overall style of the kitchen. Updating old, outdated hardware can instantly elevate the cabinets' appearance and add a modern touch. From sleek, contemporary handles to ornate, vintage-inspired pulls, there is a wide range of options to choose from. Consider the existing cabinet style and the overall design of the kitchen when selecting new hardware. For a cohesive look, choose hardware that complements the chosen paint or stain color. It's also important to ensure that the new hardware is compatible with the existing cabinet holes.
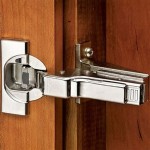
Beyond handles and pulls, consider upgrading the cabinet hinges. Old hinges may be worn out or rusted, leading to doors that sag or stick. Modern hinges offer smooth operation and a more aesthetically pleasing appearance. Replacing the hinges can enhance the functionality and visual appeal of the cabinets.
3. Incorporating Open Shelving
Open shelving is a popular trend that adds a sense of airiness and functionality to kitchens. If the cabinets are in good structural condition, consider removing some doors and creating open shelves. This can provide a display area for decorative items, cookbooks, or frequently used kitchenware. Open shelving can also help to create a more spacious feel, especially in smaller kitchens.
When incorporating open shelving, it's essential to consider the items that will be displayed. Group similar items together to create a cohesive look. It's also important to choose shelving materials that complement the cabinet finishes and overall design of the kitchen. For a rustic look, consider using reclaimed wood or metal shelving, while for a modern aesthetic, sleek acrylic or glass shelves are ideal.

What To Do With Oak Cabinets Designed Kitchen Remodel Renovation Decor

15 Diy Kitchen Cabinet Makeovers Before After Photos Of Cabinets

8 Low Cost Diy Ways To Give Your Kitchen Cabinets A Makeover Decoist

How To Paint Kitchen Cabinets Like The Pros

25 Easy Ways To Update Kitchen Cabinets

10 Simple Ideas To Update Your Kitchen Cabinets Jenna Sue Design

21 Diy Affordable Ways To Redo Kitchen Cabinets Extra Space Storage

Shaker Style Cabinet Door Makeover Diy Kitchen Remodel Cabinets

15 Diy Kitchen Cabinet Makeovers Before After Photos Of Cabinets

Budget Kitchen Renovation With Diy Shaker Painted Cabinets I
Related Posts

