Paint Kitchen Cabinets Austin TX: A Comprehensive Guide
Kitchen cabinets are a significant element of any Austin, TX home, impacting both functionality and aesthetic appeal. Over time, cabinets can become worn, outdated, or simply no longer align with evolving design preferences. Rather than replacing cabinets, a cost-effective alternative is to paint them. The process of painting kitchen cabinets involves meticulous preparation, careful application, and a clear understanding of the appropriate materials to achieve a professional and enduring finish. This article presents a detailed guide to painting kitchen cabinets in Austin, TX, with an emphasis on factors relevant to the local climate and design trends.
Choosing to paint kitchen cabinets offers several advantages. Firstly, it is generally more economical than a full cabinet replacement, allowing homeowners to update the look of their kitchens without incurring substantial expenses. Secondly, painting provides considerable flexibility in terms of color selection and finish, enabling customization that aligns with individual tastes and the overall design scheme of the home. Finally, painting is a less disruptive process than cabinet replacement, minimizing inconvenience and downtime in the kitchen.
However, successful cabinet painting requires careful planning and execution. Skipping crucial steps, such as proper surface preparation or using inadequate paint products, can lead to unsatisfactory results, including peeling, chipping, or an uneven finish. Therefore, a thorough understanding of the process is essential, whether the project is undertaken as a DIY endeavor or entrusted to professional painters in Austin.
Key Point 1: Preparation is Paramount
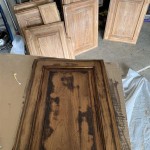
The foundation of a successful cabinet painting project lies in meticulous preparation. This phase encompasses several crucial steps, each contributing to the final quality and longevity of the painted finish. The first step is removing all cabinet doors and drawers. Labeling each door and drawer is essential to ensure correct reinstallation after painting. This labeling can be done using painter's tape and a permanent marker, noting the cabinet's location and any corresponding hardware.
Next, all hardware, including hinges, knobs, and handles, must be removed. These items can be cleaned and reused, replaced with new hardware to further enhance the updated look, or simply set aside for reinstallation. After removing the hardware, thoroughly clean the cabinet doors, drawers, and frames. This cleaning process removes grease, grime, and other contaminants that can interfere with paint adhesion. A degreasing cleaner, such as TSP (trisodium phosphate) or a phosphate-free alternative, is effective for this purpose. Rinse the surfaces thoroughly with clean water and allow them to dry completely before proceeding.
Once cleaned and dried, the surfaces require sanding. Sanding creates a slightly textured surface that allows the primer and paint to adhere properly. For previously painted cabinets, a light sanding using 220-grit sandpaper is typically sufficient. For cabinets with a glossy finish or those that have been varnished or lacquered, a coarser grit sandpaper (e.g., 120-grit) may be necessary to break the surface. After sanding, remove all sanding dust using a tack cloth or a vacuum cleaner with a brush attachment. Dust particles can compromise the smoothness of the painted finish. Finally, protect surrounding areas by using painter's tape to mask off countertops, backsplashes, walls, and appliances. Drop cloths should be placed on the floor to protect against paint spills.
Addressing imperfections before painting is also important. Fill any holes or dents with wood filler, allow the filler to dry completely, and then sand it smooth. This ensures a uniform surface for painting and prevents imperfections from being visible through the finished paint job. Consider using a high-quality primer for cabinets, especially those that have been stained or varnished. Primer creates a uniform surface and prevents the original finish from bleeding through the paint. It also improves the adhesion of the paint, resulting in a more durable finish. Applying two thin coats of primer is generally preferable to one thick coat, as it reduces the risk of drips and runs.
In Austin, TX, the climate can present specific challenges. High humidity can affect drying times, so it's crucial to follow the paint manufacturer's recommendations for drying times and temperature ranges. Adequate ventilation is also important, especially when using oil-based paints or primers. Open windows and use fans to ensure proper air circulation.
Key Point 2: Selecting Appropriate Paint and Materials
Choosing the right paint and materials is crucial for achieving a durable and aesthetically pleasing finish on kitchen cabinets. Several types of paint are suitable for cabinets, each with its own advantages and disadvantages. Latex paint is a popular choice due to its ease of use, low odor, and water-based cleanup. It is also relatively durable and resistant to chipping and scratching. However, latex paint may not be as hard-wearing as some other options and may require multiple coats to achieve full coverage.
Oil-based paint offers excellent durability and a smooth, hard finish. It is also resistant to stains and scratches. However, oil-based paint has a strong odor, requires mineral spirits for cleanup, and takes longer to dry than latex paint. It is also more prone to yellowing over time, especially in areas that are not exposed to sunlight. Alkyd paint is a synthetic resin paint that combines some of the benefits of both latex and oil-based paints. It offers good durability, a smooth finish, and easier cleanup than oil-based paint. It also has a lower odor than oil-based paint and dries faster. Acrylic paint dries to a flexible finish that is less prone to cracking than more rigid formulas. It is available in a variety of sheens to suit different requirements.
One-part epoxy paints offer good hardness and durability. Two-part epoxies are the most durable coatings available for cabinets, at a higher cost. Epoxy coatings are very stain resistant and offer good resistance to moisture penetration.
When choosing paint, consider the existing finish on the cabinets. If the cabinets are currently painted with a latex paint, another coat of latex paint is generally suitable. If the cabinets are painted with an oil-based paint, it is best to use an oil-based primer before applying a latex topcoat, or to stick with oil-based paint throughout. It is also crucial to choose the appropriate sheen. Semi-gloss or gloss paints are commonly used for kitchen cabinets because they are durable and easy to clean. However, these sheens can also highlight imperfections in the surface. Satin or eggshell paints offer a softer look and are more forgiving of imperfections, but may not be as easy to clean. The correct sheen will provide the best balance of ease of washing and scratch resistance.
In addition to paint, other essential materials include high-quality brushes, rollers, paint trays, and sandpaper. For achieving a smooth finish, consider using a fine-bristled brush or a foam roller. A paint sprayer can also be used to apply paint to cabinets, but it requires more skill and preparation to avoid drips and uneven coverage. Also, be certain to maintain your tools properly. Clean them immediately after each use by following the paint manufacturer's instructions. This practice will prolong the life of your tools, and ensure that they perform as expected the next time that you use them.
Specific primers are specially formulated for use on cabinets. Choosing the correct primer will improve paint adhesion and prevent issues such as staining or tannin bleed-through on wood cabinets. Always follow the manufacturer's instructions regarding drying times and recoating intervals. In Austin's climate, high humidity can affect these times, requiring adjustments to the schedule.
Key Point 3: Application Techniques and Finishing Touches
Proper paint application techniques are essential for achieving a professional-looking finish on kitchen cabinets. After priming, apply two or more thin coats of paint, allowing each coat to dry completely before applying the next. Avoid applying thick coats of paint, as this can lead to drips, runs, and uneven coverage. Use smooth, even strokes when applying paint with a brush or roller. If using a paint sprayer, maintain a consistent distance from the surface and use overlapping passes to ensure uniform coverage.
Between coats of paint, lightly sand the surfaces with fine-grit sandpaper (e.g., 320-grit or 400-grit) to remove any imperfections or brush marks. This step will help to create a smooth, flawless finish. After sanding, remove all sanding dust with a tack cloth or a vacuum cleaner. Following the final coat of paint, allow the cabinets to dry completely before reassembling them. The drying time will vary depending on the type of paint used and the ambient temperature and humidity. Refer to the paint manufacturer's instructions for recommended drying times.
Once the cabinets are dry, carefully reattach the hardware and reinstall the doors and drawers. Ensure that the hinges are properly aligned and that the doors and drawers open and close smoothly. If desired, consider adding new decorative hardware to further enhance the updated look of the cabinets. A top coat is also a valuable addition to painted cabinets. A top coat can be wax, polyurethane or another specialty product sold especially for this purpose. Using a topcoat will increase the durability of the painted finish, and make them easier to keep clean. A top coat should be applied after the final coat of paint has thoroughly dried, usually a minimum of 24 hours. Follow the top coat manufacturer's specifications for drying times.
Thoroughly inspect the finished cabinets for any imperfections, such as drips, runs, or uneven coverage. Touch up any imperfections with a small brush and allow the touch-up paint to dry completely. A final inspection is always recommended to ensure that the painting project meets the desired standards and expectations. If the painted surface becomes damaged, always address it right away. Promptly repairing cracks, chips, or water damage to painted surfaces will prevent future issues, and maintain the longevity of the finish.
Austin, TX, experiences significant temperature variations throughout the year. Therefore, selecting paint and finishes that are resistant to cracking and peeling due to expansion and contraction is important. Consulting with local paint suppliers or professional painters can provide valuable insights into the most suitable products for the specific conditions in Austin.

Cabinet Painting Services Austin Tx Certapro Painters

Cabinet Painting Services Austin Tx Certapro Painters

Austin Painting Cabinets Tx

Austin Painting Cabinets Tx

Cabinet Painting Services Austin Tx Certapro Painters

Cabinet Painting Services Austin Tx Certapro Painters

Painting Cabinets How The Pros Do It Paper Moon

Kitchen Painting Projects Before And After Paper Moon

Cabinet Painting Services Austin Tx Certapro Painters

Kitchen Cabinet Painting Contractors In Austin Tx Surepro

