Paint Kitchen Cabinets Before and After: Transforming Your Kitchen on a Budget
Upgrading your kitchen can be a costly endeavor, but painting your kitchen cabinets is an affordable way to achieve a dramatic transformation. Whether you're looking to freshen up the look of your existing cabinets or give them a complete makeover, painting is an excellent solution. Here are the essential aspects to consider when painting kitchen cabinets before and after.
Choosing the Right Paint and Supplies
Selecting the right paint is crucial for a successful paint job. Opt for a high-quality, durable paint that is specifically designed for kitchen cabinets. It should be moisture-resistant to withstand splashes and humidity. Consider semi-gloss or high-gloss finishes that are easy to clean and provide a more polished look.
In addition to paint, you'll need other supplies like brushes, rollers, sandpaper, primer, putty, and a cleaning solution. Ensure you have all the necessary tools before starting the project.
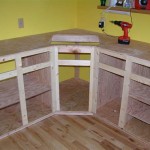
Preparing the Cabinets
Thoroughly cleaning the cabinets is essential before painting. Remove all hardware and clean the surfaces with a degreasing cleaner to remove dirt, grease, and dust. Sand down any imperfections or rough edges using sandpaper.
Fill any holes or dents with wood putty and let it dry. Once the putty is dry, sand it smooth. Apply a primer to the cabinets to create a smooth base for the paint and improve adhesion.
Applying the Paint
Start by painting the edges and corners of the cabinets using a brush. Use smooth, even strokes and avoid applying too much paint at once. Once the edges are painted, use a roller to apply the paint to the larger surfaces of the cabinets.
Apply two to three thin coats of paint, allowing each coat to dry completely before applying the next. This will help ensure a smooth, durable finish.
Finishing Touches
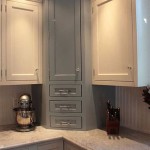
Once the paint has dried, reattach the hardware and inspect the cabinets for any touch-ups or imperfections. If necessary, touch up any missed spots or areas that require additional sanding. Seal the cabinets with a clear polyurethane finish to protect the paint and enhance its durability.
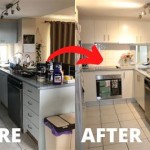
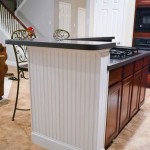
Before and After Comparison
Before painting your kitchen cabinets, take "before" pictures to track the progress and appreciate the transformation after painting. The "after" pictures will showcase the dramatic improvement in the aesthetics of your kitchen.
Conclusion
Painting kitchen cabinets before and after is a rewarding project that can transform the look of your kitchen on a budget. By carefully preparing the cabinets, choosing the right paint and supplies, and following the steps outlined, you can achieve a professional-looking finish. Remember to take "before" and "after" pictures to capture the dramatic improvement and enjoy the updated ambiance of your kitchen for years to come.

15 Diy Kitchen Cabinet Makeovers Before After Photos Of Cabinets

Painted Cabinets Nashville Tn Before And After Photos

How To Paint Kitchen Cabinets So They Look Amazing And Last Weekend Diy Projects

20 Pictures Of Before And After Kitchen Makeovers With Cost Painting Cabinets

Should I Paint My Kitchen Cabinets

How To Paint Kitchen Cabinets The Love Notes Blog

Painting Kitchen Cabinets Sometimes Homemade

Kitchen Cabinet Colors Before After The Inspired Room

Pa Wedding Photographer Diy Painted Kitchen Cabinets Before After

Painted Cabinets Nashville Tn Before And After Photos
Related Posts