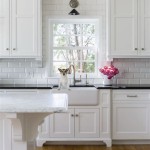
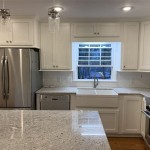
Painting Over Kitchen Cabinets: A Comprehensive Guide
Kitchen cabinets are a focal point in any home. Over time, they can become worn, outdated, or simply no longer align with a homeowner's aesthetic preferences. Replacing cabinets can be a significant investment, making painting them a more appealing and cost-effective alternative. Successfully painting kitchen cabinets, however, requires meticulous preparation, appropriate materials, and a systematic approach.
This article provides a detailed guide on how to paint over kitchen cabinets, covering everything from preparing the surfaces to selecting the right paint and application techniques. By following these instructions, homeowners can achieve a professional-looking finish and revitalise their kitchen without the expense of a full remodel.
Key Point 1: Thorough Preparation is Paramount
The success of any paint job, especially on kitchen cabinets, hinges on the quality of the preparation. This involves several crucial steps, each designed to create a clean, smooth, and receptive surface for the new paint to adhere to. Skipping or rushing these steps can lead to peeling, chipping, and an overall unprofessional result.
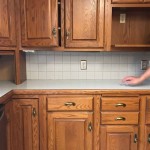
The first step is to remove all cabinet doors and drawers. Label each door and drawer front with painter's tape corresponding to its location in the kitchen. This ensures that everything is reinstalled in the correct place after painting. Remove all hardware, including knobs, pulls, hinges, and any other decorative elements. Store the hardware in a secure location to prevent loss or damage. If planning to replace the hardware, this is an ideal time to do so.
Next, thoroughly clean all cabinet surfaces. Kitchen cabinets accumulate grease, dirt, and food splatters over time. Use a strong degreaser and warm water to remove these contaminants. A solution of trisodium phosphate (TSP), available at most hardware stores, is highly effective for this purpose. Follow the manufacturer's instructions carefully and wear appropriate protective gear, such as gloves and eye protection. Rinse the cabinets thoroughly with clean water to remove any residue from the cleaning solution. Allow the cabinets to dry completely before proceeding.
Once the cabinets are clean and dry, inspect them for any damage, such as dents, scratches, or chips. Fill these imperfections with wood filler or spackle, following the manufacturer's instructions. Allow the filler to dry completely and then sand it smooth with fine-grit sandpaper (220-grit or higher). Feather the edges of the filled areas to blend them seamlessly with the surrounding surface. This ensures a smooth and even finish after painting.
Sanding the entire surface of the cabinets is the next critical step. Even if the cabinets appear smooth, sanding creates microscopic scratches that provide a better grip for the primer and paint. Use medium-grit sandpaper (120-grit to 150-grit) to lightly sand all surfaces. Focus on areas with existing finishes or imperfections. Avoid sanding too aggressively, as this can damage the wood or veneer. After sanding, remove all dust with a vacuum cleaner or tack cloth. A tack cloth is a cheesecloth impregnated with beeswax or resin, which effectively picks up fine dust particles.
Masking off areas that should not be painted is the final preparation step. Use painter's tape to protect countertops, backsplashes, walls, and any other surfaces adjacent to the cabinets. Ensure the tape is applied firmly and smoothly to create a clean line. Consider using a drop cloth to protect the floor from paint splatters.
Key Point 2: Selecting the Right Primer and Paint
Choosing the appropriate primer and paint is crucial for achieving a durable and aesthetically pleasing finish on kitchen cabinets. The primer acts as a bonding agent between the existing surface and the new paint, while the paint provides the desired color and sheen. Using the wrong products can lead to poor adhesion, uneven coverage, and a finish that is prone to scratching or chipping.
An oil-based or shellac-based primer is generally recommended for kitchen cabinets. These primers provide excellent adhesion to most surfaces, including wood, laminate, and metal. They also seal in stains and odors, preventing them from bleeding through the new paint. Water-based primers are also available, but they may not be as effective on glossy or oily surfaces. Ensure the primer is compatible with the chosen paint type.
For paint, consider using a high-quality acrylic latex paint designed for interior use. Acrylic latex paints are durable, washable, and resistant to chipping and fading. They also dry quickly and are easy to clean up with water. Alkyd paints, which are oil-based, offer excellent durability and a smooth finish, but they require more time to dry and clean up with mineral spirits. Selecting the paint type is a matter of preference, weighing durability and application considerations.
The sheen of the paint will also affect the overall look and feel of the cabinets. Semi-gloss or gloss finishes are typically recommended for kitchen cabinets because they are durable and easy to clean. Matte or eggshell finishes are less reflective and can hide imperfections, but they are also more difficult to clean. Sample different sheens in the kitchen's environment to determine the most suitable finish based on lighting and aesthetic preferences.
Consider tinted primer. Having the primer tinted towards the final color of the paint can improve coverage and require fewer coats of the finish paint to achieve a uniform color. This saves time and materials. Ensure the primer is thoroughly mixed before application and follow the manufacturer's instructions regarding drying time.
Key Point 3: Application Techniques for a Professional Finish
The application of the primer and paint is just as important as the preparation and product selection. Employing the correct techniques can result in a smooth, even, and professional-looking finish. Rushing the application or using improper tools can lead to drips, brush marks, and an uneven appearance.
Apply the primer in thin, even coats using a high-quality brush, roller, or spray gun. A brush is ideal for painting intricate details and corners, while a roller is suitable for larger, flat surfaces. A spray gun can provide the smoothest finish, but it requires more skill and practice. Regardless of the application method, avoid applying the primer too thickly, as this can lead to runs and drips. Allow the primer to dry completely according to the manufacturer's instructions before proceeding to the next step. Lightly sand the primed surface with fine-grit sandpaper (220-grit or higher) to remove any imperfections and create a smooth base for the paint. Clean the surface with a tack cloth to remove any dust from sanding.
Apply the paint in the same manner as the primer, using thin, even coats. Work in small sections and maintain a wet edge to prevent lap marks. If using a brush, use long, smooth strokes in the direction of the wood grain. If using a roller, use a consistent pressure and overlap each stroke slightly. If using a spray gun, maintain a consistent distance and speed to achieve an even coating. Allow each coat of paint to dry completely before applying the next coat. Most projects will require two coats of paint for full coverage and durability. Lightly sand between coats with fine-grit sandpaper (320-grit or higher) to remove any imperfections and create a smooth surface.
When painting cabinet doors, consider using a paint sprayer for a factory-like finish. This method eliminates brush strokes and roller stipple, resulting in a perfectly smooth surface. If using a sprayer, thin the paint according to the manufacturer's instructions and practice on a piece of cardboard before applying it to the cabinets. Wear appropriate respiratory protection when spraying paint.
After the final coat of paint has dried completely, carefully remove the painter's tape. Score the edge of the tape with a utility knife to prevent the paint from chipping or peeling. Reinstall the hardware, hinges, and cabinet doors and drawers. Ensure everything is properly aligned and secured. Clean up any paint splatters or spills immediately. Allow the paint to cure completely before using the cabinets. Curing time can vary depending on the type of paint and the environmental conditions, but it is generally recommended to wait at least 24 to 72 hours.
Proper ventilation is a vital consideration throughout the entire painting process. Ensure adequate airflow in the work area by opening windows or using a fan. This helps to dry the paint faster and reduce the risk of inhaling harmful fumes. Wear appropriate protective gear, such as gloves, eye protection, and a respirator, to protect yourself from paint and fumes.

How To Paint Kitchen Cabinets In 7 Simple Steps

How To Paint Kitchen Cabinets Without Sanding Or Priming

Painted Kitchen Cabinets One Year Later The Palette Muse

Avoid These Mistakes How To Paint Cabinets That Are Already Painted Grace In My Space

How To Prep And Paint Kitchen Cabinets Lowe S

How To Paint Kitchen Cabinets In 7 Simple Steps

How To Paint Kitchen Cabinets Best Color Ideas Cost

How To Paint Your Kitchen Cabinets In Six Easy Steps The Home Depot

How To Paint Kitchen Cabinets

How To Repaint Kitchen Cabinets Painted By Kayla Payne
Related Posts