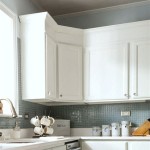
Paint White Kitchen Cupboards: A Comprehensive Guide
Repainting kitchen cupboards is a cost-effective way to revitalize the heart of the home. Choosing white paint for this project offers numerous advantages, including brightening the space, creating a clean aesthetic, and providing a versatile backdrop for various design styles. This article provides a comprehensive guide to painting kitchen cupboards white, covering preparation, painting techniques, and material selection to ensure a professional-looking and durable finish.
The decision to paint kitchen cupboards white often stems from a desire to update an outdated kitchen without undertaking a complete renovation. White is a classic and timeless color that complements virtually any décor, from modern minimalist to traditional farmhouse. It reflects light, making smaller kitchens appear larger and more open. Moreover, white cupboards provide a blank canvas for incorporating colorful accents through accessories, backsplash tiles, or countertop materials.
Proper preparation is paramount to achieving a successful paint job. Rushing through this stage can lead to adhesion problems, an uneven finish, and ultimately, a less durable result. The following steps outline the essential preparation process for painting kitchen cupboards white.
Thorough Cleaning and Degreasing
The first step in preparing kitchen cupboards for painting involves removing all hardware, including knobs, pulls, hinges, and any decorative elements. This ensures a clean surface for painting and prevents paint from getting on the hardware itself. Store the hardware in a labeled container to avoid confusion during reassembly.
Next, thoroughly clean the cupboards to remove grease, grime, and any accumulated residue. Kitchens are naturally prone to grease buildup, especially around cooking areas. Using a degreasing cleaner specifically designed for kitchen surfaces is crucial. Trisodium phosphate (TSP) is a powerful cleaner that effectively removes grease but requires careful handling due to its caustic nature. Wear gloves and eye protection when using TSP and follow the manufacturer's instructions meticulously. Alternatives to TSP include commercial degreasers and a mixture of warm water and dish soap. Apply the cleaning solution with a sponge or cloth, scrubbing gently to loosen any stubborn dirt. Rinse the cupboards thoroughly with clean water and allow them to dry completely before proceeding.
For particularly grimy areas, a scraper or putty knife can be used to gently remove caked-on residue. Exercise caution to avoid scratching or damaging the cupboard surface. Once the cupboards are clean and dry, inspect them for any signs of damage, such as chips, dents, or scratches. These imperfections should be addressed before painting to ensure a smooth and uniform finish.
Sanding for Adhesion
Sanding is a critical step in preparing kitchen cupboards for painting, as it creates a slightly rough surface that allows the primer and paint to adhere properly. Without sanding, the paint may peel or chip over time, especially in high-traffic areas. The type of sandpaper to use depends on the existing finish of the cupboards. For glossy or previously painted surfaces, a medium-grit sandpaper (around 120-180 grit) is recommended. For bare wood or surfaces with a matte finish, a finer-grit sandpaper (around 220 grit) may suffice.
Sanding should be done evenly and consistently, using light pressure to avoid damaging the cupboard surface. Focus on areas that are particularly smooth or glossy, as these will require more sanding to create sufficient adhesion. After sanding, remove all sanding dust with a tack cloth or a damp cloth. Vacuuming the area can also help to remove any residual dust particles. It is essential to ensure that the cupboards are completely free of dust before moving on to the priming stage.
Consider using a sanding block or power sander for larger surfaces to expedite the process and ensure a more uniform finish. When using a power sander, be careful not to apply too much pressure, as this can create uneven surfaces. Always wear a dust mask or respirator when sanding to protect yourself from inhaling harmful dust particles.
Priming: The Foundation for Success
Priming is an essential step in painting kitchen cupboards white. Primer serves as a bridge between the existing surface and the paint, creating a uniform base and improving adhesion. It also helps to block stains and prevent the underlying color from bleeding through the white paint. Choosing the right primer is crucial for achieving a durable and professional-looking finish.
For painting kitchen cupboards, an oil-based or a stain-blocking primer is generally recommended. Oil-based primers provide excellent adhesion and stain-blocking properties but require mineral spirits for cleanup. Stain-blocking primers are effective at preventing tannin bleed-through from wood and covering dark stains. Water-based primers are also an option, particularly if you are using water-based paint. They are easier to clean up and have lower VOCs (volatile organic compounds), making them a more environmentally friendly choice.
Apply the primer in thin, even coats, using a high-quality brush or roller. A foam roller is ideal for achieving a smooth, brush-stroke-free finish. Allow the primer to dry completely according to the manufacturer's instructions before proceeding to the painting stage. Depending on the type of primer and the environmental conditions, drying time can range from a few hours to overnight. Once the primer is dry, lightly sand it with fine-grit sandpaper (around 220-320 grit) to create an even smoother surface for the paint. Remove all sanding dust with a tack cloth before painting.
For areas that are difficult to reach with a brush or roller, consider using a spray primer. Spray primers provide a uniform and seamless finish, especially on intricate details and moldings. When using spray primer, work in a well-ventilated area and wear a respirator to protect yourself from inhaling fumes.
Selecting the Right White Paint
Choosing the right white paint for kitchen cupboards involves considering several factors, including the desired sheen, the type of paint, and the durability required. White paint comes in a wide range of shades, from cool whites with blue undertones to warm whites with yellow undertones. The choice of white depends on the overall color scheme of the kitchen and personal preferences. Sample several shades of white on a test area to see how they look in the kitchen's lighting conditions before making a final decision.
The sheen of the paint also affects the appearance and durability of the finish. For kitchen cupboards, a semi-gloss or gloss finish is generally recommended. These sheens are more durable and easier to clean than matte or eggshell finishes, which are more porous and susceptible to staining. However, higher sheens also tend to highlight imperfections in the surface, so it is essential to ensure that the cupboards are properly prepared before painting. Alternatively, satin finishes offer a good balance between durability and aesthetics, providing a subtle sheen that is easy to clean and less likely to show imperfections.
Latex (water-based) and alkyd (oil-based) paints are the two main types of paint available for kitchen cupboards. Latex paints are easier to clean up, have lower VOCs, and dry more quickly than alkyd paints. Alkyd paints, on the other hand, offer superior durability, adhesion, and resistance to chipping and scratching. They also provide a smoother, more enamel-like finish. Hybrid alkyd paints combine the benefits of both latex and alkyd paints, offering good durability and ease of cleanup.
Consider using a paint specifically formulated for cabinets and trim. These paints are designed to provide a hard, durable finish that can withstand the wear and tear of daily use. They also tend to level better than standard paints, resulting in a smoother and more professional-looking finish. When selecting paint, choose a high-quality brand known for its durability and color retention. Investing in good-quality paint will ensure that the finish lasts longer and requires less frequent touch-ups.
Applying the Paint: Techniques for a Flawless Finish
Applying the paint correctly is crucial for achieving a professional-looking finish on kitchen cupboards. Use high-quality brushes and rollers specifically designed for the type of paint you are using. For latex paint, use synthetic brushes and rollers. For alkyd paint, use natural bristle brushes and mohair rollers. A foam roller is ideal for achieving a smooth, brush-stroke-free finish on large, flat surfaces.
Apply the paint in thin, even coats, working in the direction of the wood grain. Avoid applying too much paint at once, as this can lead to drips and runs. It is better to apply several thin coats than one thick coat. Allow each coat of paint to dry completely according to the manufacturer's instructions before applying the next coat. Drying time can vary depending on the type of paint, the humidity, and the temperature.
Lightly sand the painted surface with fine-grit sandpaper (around 320-400 grit) between coats to remove any imperfections and create a smoother surface for the next coat. Remove all sanding dust with a tack cloth before applying the next coat of paint. Pay attention to edges and corners, ensuring that they are evenly coated and free of drips. Use a small brush to touch up any areas that are difficult to reach with a roller.
For a truly professional-looking finish, consider using a paint sprayer. Paint sprayers provide a uniform and seamless finish, especially on intricate details and moldings. However, they require practice and skill to use effectively. When using a paint sprayer, work in a well-ventilated area and wear a respirator to protect yourself from inhaling fumes. Thin the paint according to the manufacturer's instructions to ensure proper atomization and flow.
After applying the final coat of paint, allow it to dry completely before reassembling the cupboards. This may take several days, depending on the type of paint and the environmental conditions. Handle the painted cupboards with care to avoid scratching or damaging the finish. Once the cupboards are fully dry, reattach the hardware and reinstall them in the kitchen. Enjoy your newly transformed white kitchen cupboards.
Protecting the Painted Surface
Once the kitchen cupboards are painted white, it is essential to implement measures to protect the finish and prolong its lifespan. Regular cleaning and maintenance are crucial for preventing dirt and grime from accumulating, which can dull the paint and make it difficult to remove. Use a mild soap and water solution to clean the cupboards regularly, avoiding harsh chemicals or abrasive cleaners that can damage the paint. Wipe the cupboards dry with a soft cloth to prevent water spots.
Protect the painted surface from scratches and scuffs by using felt pads on the inside of cupboard doors and drawers. These pads will cushion the impact and prevent the doors and drawers from rubbing against the frame. Avoid slamming the cupboard doors, as this can cause the paint to chip or crack over time. Use bumpers or door closers to cushion the impact and prevent damage.
Be mindful of heat and moisture, especially around the stove and sink. Excessive heat can cause the paint to bubble or peel, while moisture can lead to mildew growth. Use a range hood to vent steam and cooking fumes away from the cupboards. Wipe up spills immediately to prevent them from staining the paint. Consider applying a sealant to the painted surface to provide extra protection against moisture and stains.
Regularly inspect the painted surface for any signs of damage, such as chips, scratches, or peeling. Touch up any damaged areas promptly to prevent the damage from spreading. Use the same paint and techniques that were used for the original paint job to ensure a seamless repair. With proper care and maintenance, your newly painted white kitchen cupboards will look beautiful for years to come.

Our Favorite White Kitchen Cabinet Paint Colors Christopher Scott Cabinetry

Best Paint For Kitchen Cabinets Owatrol Direct

How To Paint Your Kitchen Cabinets White Colors And Craft

Pros And Cons Of Painting Kitchen Cabinets White De Manor Farm By Laura Janning

The Best White Cabinet Paint Colors Amy Sadler Designs

How To Paint Kitchen Cabinets White In 5 Days For 150 The Nutritionist Reviews

Top 10 White Paint Colours For Kitchen Cabinets Pamela Lynn

Painting Your Kitchen Cabinets White

What Is The Best Spray Paint On Kitchen Cabinets

Painting Kitchen Cabinets Popular Cabinet Color Ideas
Related Posts

