Paint Your Own Kitchen Cupboards: A Comprehensive Guide
Kitchen cabinets are a significant element in the design and functionality of any kitchen. Over time, they can become worn, outdated, or simply no longer align with evolving aesthetic preferences. Replacing kitchen cabinets can be a substantial financial investment. An alternative and cost-effective solution is to paint existing kitchen cupboards. This process, while requiring time and effort, can dramatically transform the appearance of a kitchen at a fraction of the cost of replacement. Achieving a professional-looking result necessitates careful planning, proper preparation, and the use of appropriate materials and techniques.
Planning and Preparation: The Foundation for Success
Before commencing the painting process, it is crucial to develop a detailed plan. This phase involves assessing the current condition of the cabinets, selecting the appropriate paint and supplies, and preparing the work area. The outcome of the project hinges on the thoroughness of this initial stage. Neglecting any aspect of preparation can lead to unsatisfactory results and increased time expenditure later in the process.
The first step is to thoroughly inspect the existing cabinets. Identify any areas of damage, such as chips, dents, or water damage. These imperfections will need to be addressed before painting to ensure a smooth and even finish. Note the type of material the cabinets are made from (wood, laminate, metal) as this will influence the choice of primer and paint. Finally, consider the existing hardware (knobs, pulls, hinges). Decide whether to replace them, paint them, or reuse them. This decision will impact the steps required during the painting process.
Selecting the right paint and supplies is paramount. For most kitchen cabinets, an acrylic latex paint is recommended due to its durability, ease of cleaning, and low odor. Opt for a paint specifically formulated for cabinets or trim, as these tend to be more resistant to chipping and scratching. A semi-gloss or gloss finish is generally preferred for kitchen cabinets as it is easier to clean and provides a more durable surface. Consider the color carefully, taking into account the overall kitchen design and lighting. Undertones in the paint color can appear different under various lighting conditions, so test paint samples in the kitchen before committing to a specific color. In addition to paint, you will need primer, sandpaper (various grits), degreaser, tack cloths, paintbrushes, rollers, paint trays, painter’s tape, and drop cloths. A quality primer is essential for adhesion, especially on glossy or laminate surfaces. Consider using a bonding primer designed for challenging surfaces.
Preparing the workspace is essential to protect surrounding areas from paint splatters and dust. Cover countertops, floors, and appliances with drop cloths. Use painter's tape to mask off areas that you do not want to paint, such as walls, backsplashes, and the inside edges of the cabinet frames. Ensure adequate ventilation in the workspace. Open windows and use fans to circulate air and prevent the buildup of paint fumes. Remove all cabinet doors and drawers. Label each door and drawer with its corresponding location in the kitchen. This ensures that they can be reinstalled correctly after painting.
The Painting Process: Step-by-Step Execution
With the planning and preparation completed, the actual painting process can begin. This phase involves cleaning, sanding, priming, and painting the cabinets. Each step must be executed with precision and care to achieve a professional-looking finish.
Begin by thoroughly cleaning all cabinet surfaces with a degreaser. This removes grease, dirt, and grime that can interfere with paint adhesion. Rinse the cabinets with clean water and allow them to dry completely. Next, sand the cabinet surfaces to create a slightly rough texture for the primer to adhere to. Use medium-grit sandpaper (120-180 grit) for the initial sanding, followed by fine-grit sandpaper (220 grit) to smooth out any imperfections. Pay particular attention to edges and corners. After sanding, remove all dust with a tack cloth. Vacuuming the surrounding area can also help minimize dust settling on the cabinets.
Apply a coat of primer to all cabinet surfaces. Use a brush for corners and detailed areas, and a roller for larger, flat surfaces. Ensure that the primer is applied evenly and without drips or runs. Allow the primer to dry completely according to the manufacturer's instructions. Once the primer is dry, lightly sand the surface with fine-grit sandpaper (220 grit) to smooth out any imperfections. Remove any dust with a tack cloth. If the cabinets have a very dark or stained finish, you may need to apply a second coat of primer to provide adequate coverage.
Apply the first coat of paint to the cabinets. Use the same technique as with the primer, applying paint evenly and without drips or runs. Allow the paint to dry completely according to the manufacturer's instructions. Once the first coat is dry, lightly sand the surface with fine-grit sandpaper (220 grit) to smooth out any imperfections. Remove any dust with a tack cloth. Apply a second coat of paint to ensure complete coverage and a durable finish. Again, allow the paint to dry completely. For cabinets that are heavily used or exposed to moisture, consider applying a third coat of paint or a clear topcoat for added protection. When painting cabinet doors, consider painting the back of the doors first, allowing them to dry, and then flipping them over to paint the front. This helps to avoid accidentally marring the freshly painted surface.
Reassembly and Finishing Touches: Completing the Transformation
Once the paint has completely dried, the cabinets can be reassembled and the finishing touches can be applied. This phase involves reattaching hardware, reinstalling doors and drawers, and cleaning the workspace. Attention to detail during this final stage is crucial for achieving a polished and professional look.
Before reattaching hardware, inspect it for any damage or wear. Clean or replace hardware as needed. If painting the hardware, ensure that the paint is completely dry before reattaching it to the cabinets. Use the original screws or replace them with new ones if necessary. Be careful not to overtighten the screws, as this can damage the cabinet doors or drawers. If you chose to replace the hardware, ensure the new hardware fits the existing holes or that the new holes are drilled precisely and cleanly.
Carefully reinstall the cabinet doors and drawers. Use the labels that were applied during the disassembly process to ensure that each door and drawer is returned to its correct location. Adjust the hinges as needed to ensure that the doors hang straight and close properly. If the drawers have runners, lubricate them with a silicone lubricant to ensure smooth operation. Examine the painted surfaces for any imperfections, such as drips, runs, or missed spots. Touch up these areas with a small brush. Be sure to allow the touch-up paint to dry completely before handling the cabinets.
Remove the painter's tape carefully, pulling it away at a 45-degree angle to prevent paint from peeling. Clean up any paint splatters or drips on the surrounding surfaces. Sweep or vacuum the floor and wipe down the countertops and appliances. Dispose of paint cans, rollers, brushes, and other materials properly. Allow the paint to fully cure for several days before using the cabinets heavily. This allows the paint to harden and become more resistant to scratches and chips. During this curing period, it is advisable to avoid placing heavy items on the shelves or slamming the cabinet doors.
By following these comprehensive steps, homeowners can successfully paint their own kitchen cupboards, transforming the look of their kitchen without incurring the high cost of replacement. The key to a successful project lies in meticulous planning, careful execution, and attention to detail throughout the entire process. The result will be a refreshed and revitalized kitchen that adds value and enjoyment to the home.

How To Paint Kitchen Cabinets In 7 Simple Steps

How To Paint Kitchen Cabinets In 7 Simple Steps

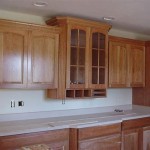
How To Paint Kitchen Cabinets A Step By Guide Confessions Of Serial Do It Yourselfer

How To Paint Kitchen Cabinets Best Color Ideas Cost

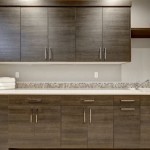
Painting Kitchen Cabinets

How To Paint Laminate Kitchen Cabinets Perfect Finish Tips

Home Dzine Kitchen Should I Paint My Cabinets

Painting Our Kitchen Cupboards Black Swoon Worthy

Kitchen Cupboard Paint How To Your Cupboards

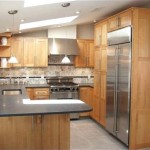
How To Paint Kitchen Cabinets
Related Posts