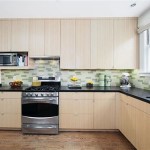
Painting Already Painted Kitchen Cabinets: A Comprehensive Guide
Repainting kitchen cabinets is a popular and cost-effective way to refresh the look of a kitchen without undergoing a complete remodel. However, painting cabinets that have already been painted presents unique challenges and requires careful preparation and execution to achieve a durable and aesthetically pleasing finish. This article provides a comprehensive guide to painting already painted kitchen cabinets, covering essential pre-painting steps, necessary materials, application techniques, and troubleshooting common issues.
Key Point 1: Essential Preparation for Repainting
Proper preparation is arguably the most crucial step in ensuring a successful paint job on previously painted cabinets. Skimping on preparation can lead to poor adhesion, peeling paint, and an overall unprofessional appearance. The following steps are critical:
Cleaning: The first step is to thoroughly clean the cabinets to remove grease, grime, and any other contaminants that may interfere with paint adhesion. Use a degreasing cleaner specifically designed for kitchen surfaces. Trisodium phosphate (TSP) cleaner, or a TSP substitute, is a viable option, but be sure to follow the manufacturer's instructions carefully. Wear gloves and eye protection when using these types of cleaners.
After cleaning with a degreaser, rinse the cabinets thoroughly with clean water to remove any residue. Allow the cabinets to dry completely before proceeding to the next step.
Inspection and Repair: Inspect the cabinets for any damage, such as chips, dents, or cracks. Repair these imperfections using wood filler or spackle. Apply the filler smoothly and allow it to dry completely according to the manufacturer's instructions. Once dry, sand the filled areas until they are flush with the surrounding surface. Remove any dust created by sanding with a tack cloth.
Sanding: Sanding is essential for creating a surface that the new paint can properly adhere to. The goal is not to remove the existing paint entirely, but rather to scuff the surface to provide "tooth" for the new paint to grip. Use a medium-grit sandpaper (around 120-180 grit) to sand the entire surface of the cabinets. Focus on areas with glossy finishes or imperfections. After sanding, thoroughly remove all dust with a vacuum cleaner and a tack cloth.
Priming: Primer is crucial for adhesion, blocking stains, and ensuring a uniform finish. Choosing the right primer depends on the existing paint and the desired finish. An oil-based primer is a good option for cabinets that were previously painted with oil-based paint. A latex primer is suitable for cabinets that were previously painted with latex paint. A bonding primer is recommended for glossy surfaces or when adhesion is a concern. Apply the primer evenly, following the manufacturer's instructions. Allow the primer to dry completely before proceeding to the next step. Lightly sand the primed surface with fine-grit sandpaper (220 grit or higher) to create an even smoother surface for painting. Be sure to remove all dust with a tack cloth after sanding.
Masking and Protection: Protect surrounding surfaces from paint splatters by masking off areas with painter's tape. Cover countertops, floors, and appliances with drop cloths or plastic sheeting. Remove cabinet doors and drawers and label them so you can easily reassemble them in the correct positions. Remove hardware, such as knobs and pulls, and store them in a safe place.
Key Point 2: Selecting the Right Paint and Application Tools
The choice of paint and application tools significantly impacts the final result. Selecting high-quality products and using appropriate application techniques will contribute to a professional and durable finish.
Paint Selection: For kitchen cabinets, choose a paint that is durable, washable, and resistant to moisture and grease. Alkyd or oil-based paints offer excellent durability and a smooth finish, but they require mineral spirits for cleanup and have a stronger odor. Latex or water-based acrylic paints are easier to clean up, have lower VOCs (volatile organic compounds), and are a good option if you prefer a more environmentally friendly choice. Consider using a paint specifically formulated for cabinets and trim for added durability. Satin or semi-gloss finishes are commonly used for kitchen cabinets because they are durable and easy to clean. Flat or matte finishes are generally not recommended for kitchen cabinets because they are more difficult to clean and may show fingerprints and stains more easily.
Application Tools: The choice of application tools depends on the desired finish and the type of paint being used. High-quality brushes provide good control and are suitable for detailed areas and trim. Foam rollers are ideal for creating a smooth, even finish on larger surfaces. A paint sprayer can provide the most uniform finish, but it requires more skill and setup. If using a paint sprayer, be sure to thin the paint according to the manufacturer's instructions and practice on a scrap piece of wood before painting the cabinets.
Brush Selection: For oil-based paints, use a natural-bristle brush. For latex paints, use a synthetic-bristle brush. Choose a brush with a comfortable handle and bristles that are securely attached to the ferrule. A 2-inch angled brush is versatile for painting both flat surfaces and detailed areas.
Roller Selection: Use a high-density foam roller with a short nap (around 1/4 inch) for the smoothest finish. Foam rollers are less likely to leave stipple marks than nap rollers. Be sure to use a roller frame that is compatible with the roller cover.
Sprayer Selection: An airless sprayer provides the most professional finish. Ensure the sprayer is clean and properly maintained before use. Use the appropriate tip size for the type of paint being used. Practice spraying on a piece of cardboard to adjust the sprayer settings and technique before painting the cabinets.
Key Point 3: Painting Techniques and Troubleshooting
Applying the paint correctly is crucial for achieving a professional-looking finish. Proper technique and attention to detail will help avoid common problems, such as drips, runs, and uneven coverage.
Application Techniques: Apply the paint in thin, even coats. Avoid applying too much paint at once, as this can lead to drips and runs. Use a "wet edge" technique, overlapping each brush stroke or roller pass slightly to avoid creating visible lap marks. Work in small sections and maintain consistent pressure on the brush or roller. If bubbles appear while applying the paint, lightly go over the area with a clean, dry brush or roller to pop the bubbles.
Allow each coat of paint to dry completely before applying the next coat. Follow the manufacturer's instructions for drying times. Lightly sand between coats with fine-grit sandpaper (220 grit or higher) to remove any imperfections and create a smoother surface. Be sure to remove all dust with a tack cloth after sanding.
Troubleshooting: Drips and runs can be corrected by sanding them smooth after the paint has dried. Use fine-grit sandpaper and feather the edges of the repaired area into the surrounding paint. Touch up the area with another thin coat of paint.
If the paint is not adhering properly, it may be due to inadequate surface preparation. Ensure the cabinets are thoroughly cleaned, sanded, and primed before painting. If the problem persists, consider using a bonding primer to improve adhesion.
Uneven coverage can be caused by using too little paint or by applying the paint unevenly. Apply additional coats of paint until the desired coverage is achieved. Use a consistent application technique and maintain even pressure on the brush or roller.
Reassembly: Once the paint is completely dry, carefully reassemble the cabinets. Reattach the hardware and adjust the doors and drawers as needed. Avoid slamming the doors or drawers to prevent damaging the new paint finish.
By following these guidelines, anyone can successfully repaint their already painted kitchen cabinets and achieve a professional-looking finish that will enhance the appearance of their kitchen.

Avoid These Mistakes How To Paint Cabinets That Are Already Painted Grace In My Space

Painted Kitchen Cabinets One Year Later The Palette Muse

How To Paint Veneer Cabinets For A Long Lasting Finish Anika S Diy Life

How To Repaint Painted Cabinets

How To Prep And Paint Kitchen Cabinets Lowe S

How To Repaint Kitchen Cabinets Painted By Kayla Payne

Ultimate Guide To Painting Cabinets Bbfrosch

Painted Kitchen Cabinets Three Years Later Confessions Of A Serial Do It Yourselfer

How To Paint Your Kitchen Cabinets The Prairie Homestead

How To Paint Kitchen Cabinets A Step By Guide Confessions Of Serial Do It Yourselfer
Related Posts


