Painting and Glazing Oak Kitchen Cabinets: Achieving a Refined Finish
Painting and glazing oak kitchen cabinets are essential aspects of refinishing or remodeling kitchen spaces, offering versatility, style, and longevity. By understanding the crucial elements of these techniques, homeowners and professionals can achieve a refined and aesthetically pleasing result.
Transition: To guide you through the process, this article will explore the fundamental aspects of painting and glazing oak kitchen cabinets, ensuring a successful transformation that meets your specific needs and preferences.
1. Surface Preparation and Cleaning
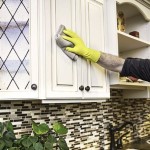
Thoroughly cleaning the cabinet surfaces is paramount before painting or glazing. Remove any dirt, grease, or debris using a degreasing cleaner to ensure proper adhesion of the paint or glaze.
2. Sanding and Smoothing
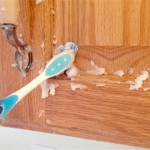
Sand the cabinet surfaces lightly to smooth out any imperfections and create a textured surface for better paint or glaze adherence. Use a fine-grit sandpaper and sand in the direction of the wood grain.
3. Applying Primer
Applying a primer acts as a base coat, creating a uniform surface, enhancing paint adhesion, and preventing wood tannins from bleeding through the paint or glaze.
4. Choosing the Right Paint and Glaze
Selecting high-quality paint and glaze is essential for a durable and visually appealing finish. Opt for paints specifically formulated for kitchen use, and choose a glaze that complements the paint color and the desired aesthetic.
5. Painting Technique
Apply the paint using even, overlapping strokes and avoid drips. Use a brush or roller suitable for the paint type and surface texture. Allow each coat to dry completely before applying the next.
6. Applying Glaze
Glazing involves applying a thin, translucent layer over the painted surface, creating depth and dimension. Use a brush to apply the glaze and work it into the recesses of the wood grain.
7. Finishing and Protection
Once the glaze has dried, seal the finish with a clear topcoat, such as polyurethane or lacquer. This protects the paint and glaze from wear and tear, ensuring a long-lasting finish.
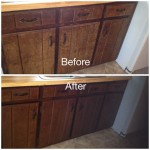
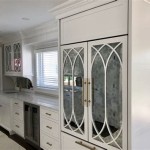
Conclusion: By mastering the essential aspects of painting and glazing oak kitchen cabinets, you can transform your kitchen into a stylish and inviting space. With careful planning and execution, you can achieve a professional-looking finish that reflects your personal taste and enhances the overall appeal of your home.

How To Glaze Kitchen Cabinets

How To Glaze Cabinets Oak Kitchen Painting

How To Glaze Cabinets At Home With The Barkers

How To Glaze Cabinets With Gel Stain Adventures Of A Diy Mom

How To Glaze Cabinets At Home With The Barkers

3 Steps To Glaze Cabinets Correctly Painted Furniture Ideas Distressed Kitchen Glazed Chalk Paint

How To Glaze Kitchen Cabinets Diyer S Guide Bob Vila

Rescuing And Reviving A Glazed Distressed Kitchen Bella Tucker

How To Glaze Cabinets At Home With The Barkers

How To Glaze Kitchen Cabinets Diyer S Guide Bob Vila
Related Posts