Painting Fake Kitchen Cabinets: A Step-by-Step Guide for a Flawless Finish
Transforming your fake kitchen cabinets from drab to fab is easier than you think. With a little preparation and the right techniques, you can achieve a professional-looking finish that will enhance the overall look of your kitchen.
Before diving into the painting process, remember these essential aspects:
1. Cabinet Preparation
Thoroughly clean your cabinets using a degreaser or TSP cleaner. This ensures the removal of any grease, dirt, or grime that could interfere with the paint's adhesion.
If necessary, sand any uneven surfaces or imperfections with fine-grit sandpaper. This step creates a smoother surface for the paint to adhere to.
2. Primer Selection
Applying primer is crucial as it acts as a bonding agent between the cabinet surface and the paint, enhancing paint adhesion and coverage.
Choose a primer specifically formulated for non-porous surfaces or slick finishes, such as Zinsser Bullseye 1-2-3, Kilz Adhesion Primer, or Rust-Oleum Cabinet Transformations Primer.
3. Paint Choice
Select a durable and high-quality paint designed for cabinetry. Consider options like Benjamin Moore Advance, Sherwin-Williams ProClassic, or Rust-Oleum Cabinet Transformations paint.
For a more budget-friendly choice, Behr Cabinet & Trim Enamel offers good coverage and a smooth finish.
4. Brush and Roller Techniques
Use a high-quality brush for corners and edges, and a small dense foam roller for larger surfaces. Apply thin, even coats of paint, allowing each coat to dry completely before applying the next.
When rolling, maintain a straight line to avoid visible brushstrokes. Feather the brush strokes when connecting roller passes.
5. Hardware Removal
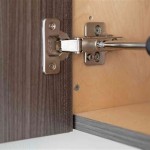
Remove cabinet hardware before painting. This prevents paint from getting stuck in the hinges and handles, ensuring a cleaner and more professional finish.
For drawers, you can slide a cardboard shim underneath them to keep paint off the tracks.
6. Drying Time
Proper drying time is essential for a strong and long-lasting finish. Refer to the manufacturer's instructions for specific drying times, but generally allow at least 12 hours before using the cabinets or reattaching hardware.
Open windows and turn on fans to improve air circulation and accelerate drying.
7. Finishing Touches
After the final coat of paint has dried, reattach the cabinet hardware and add finishing touches to complete the transformation.
Consider complementary elements like new drawer liners, decorative knobs or handles, and even under-cabinet lighting to enhance the overall look.

Faux Painting Kitchen Surfaces Walls Cabinets Floors Countertops

Faux Painting Kitchen Surfaces Walls Cabinets Floors Countertops

Faux Painting Kitchen Surfaces Walls Cabinets Floors Countertops

How To Paint Pressed Wood Kitchen Cabinets Choice Cabinet

How To Paint Fake Wood Kitchen Cabinets Simple Made Pretty 2024

Faux Painting Kitchen Surfaces Walls Cabinets Floors Countertops

How To Paint Fake Wood Kitchen Cabinets Simple Made Pretty 2024

How To Paint Fake Wood Kitchen Cabinets Simple Made Pretty 2024

Faux Painting Kitchen Surfaces Walls Cabinets Floors Countertops

How To Paint Laminate Kitchen Cabinets Angela Marie Made
Related Posts

