Painting Kitchen Cabinets: A Before and After Transformation
Kitchen cabinets often represent a significant portion of the visual landscape within a home. Their appearance directly impacts the overall aesthetic of the kitchen, influencing the perceived value and ambiance of the space. Over time, cabinets can become worn, outdated, or simply no longer align with evolving design preferences. Choosing to repaint existing cabinets instead of replacing them presents a cost-effective and sustainable method for revitalizing a kitchen. Observing the before and after effects of such a project highlights the transformative potential of a fresh coat of paint.
This article will explore the process of painting kitchen cabinets, focusing on what can be achieved from a visual perspective. It will outline key steps, preparation techniques, and paint selection considerations, while detailing how these factors contribute to a successful and aesthetically pleasing outcome. Examples of before and after transformations will vividly demonstrate the impact of updating cabinet finishes.
Assessing the Existing Cabinets: A Foundation for Success
Before embarking on the painting process, a thorough assessment of the existing cabinets is crucial. This involves evaluating the cabinet material (wood, laminate, or metal), identifying any existing damage (chips, dents, scratches, or water damage), and considering the existing finish. The material dictates the type of primer and paint required for optimal adhesion and durability. For instance, laminate cabinets necessitate specialized primers designed to grip non-porous surfaces. Similarly, wood cabinets may require wood filler to repair blemishes and create a smooth, even surface.
The current finish – whether it's paint, stain, or varnish – will influence the preparation steps. High-gloss finishes, for example, require thorough sanding to create "tooth" for the new primer to adhere to. Understanding the initial state of the cabinetry provides a roadmap for the entire project, allowing for informed decisions regarding materials, techniques, and expected results. Identifying potential challenges early allows for proactive solutions, preventing issues down the line. This initial assessment forms the foundation for a successful and visually stunning transformation.
Beyond the material and existing finish, understanding the construction method is also important. Are the doors solid panels or are they raised panel? The design of the cabinet doors and drawers impacts the amount of time spent prepping and painting. More intricate designs require more precise work to avoid paint drips and ensure even coverage.
Preparation is Paramount: Achieving a Flawless Finish
The quality of the preparation work directly correlates with the quality of the final painted finish. Skipping or skimping on preparation is a common mistake that leads to unsatisfactory results, including peeling paint, uneven coverage, and visible imperfections. This phase encompasses several critical steps, each contributing to a smooth, durable, and aesthetically pleasing surface.
The first step is removing all hardware, including knobs, handles, hinges, and drawer pulls. This ensures a clean surface for painting and prevents paint from adhering to the hardware, which can compromise its functionality and appearance. Labeling each piece of hardware and its corresponding cabinet door or drawer is essential for easy reassembly. Next, the cabinets must be thoroughly cleaned to remove grease, grime, and dust. A degreasing cleaner is typically recommended for kitchen cabinets, as they tend to accumulate grease buildup over time. After cleaning, a thorough rinse with clean water and drying is necessary.
Sanding is a crucial step in the preparation process. It roughens the surface, creating better adhesion for the primer. The level of sanding required depends on the existing finish. For glossy surfaces, sanding with a medium-grit sandpaper (around 120-150 grit) is necessary to dull the shine. For surfaces with minor imperfections, a light sanding with a fine-grit sandpaper (around 220 grit) may suffice. After sanding, all surfaces must be meticulously wiped down with a tack cloth to remove any remaining dust. This ensures that the paint adheres properly and prevents any debris from becoming trapped in the finish. Finally, gaps and cracks should be filled with wood filler and caulked to create a seamless and professional look.
Proper masking and protection are also vital preparation steps. Surrounding areas, such as countertops, backsplashes, and flooring, should be covered with drop cloths or painter's tape to prevent paint splatters and drips. The masking tape should be carefully applied along edges and corners to create clean lines and prevent paint from bleeding onto unwanted surfaces. Taking the time to properly prepare the cabinets and the surrounding area may seem tedious, but it significantly contributes to a professional-looking and long-lasting result.
Choosing the Right Paint and Primer: Ensuring Durability and Aesthetics
Selecting the appropriate paint and primer is paramount for achieving both a beautiful and durable finish on kitchen cabinets. The type of paint and primer should be chosen based on the cabinet material, the desired aesthetic, and the expected level of use and wear. Using the wrong products can lead to poor adhesion, chipping, peeling, and ultimately, a disappointing outcome.
Primer serves as a critical base coat, creating a uniform surface for the paint to adhere to. It also helps to block stains and prevent bleed-through from the existing finish. For wood cabinets, an oil-based primer is often recommended, as it provides excellent adhesion and stain-blocking properties. However, oil-based primers have a longer drying time and require mineral spirits for cleanup. Water-based primers are a more eco-friendly option, offering good adhesion and easy cleanup. For laminate or melamine cabinets, a specialized bonding primer is necessary to ensure proper adhesion to the non-porous surface. These primers contain chemicals that create a mechanical bond between the paint and the slick surface. Tinting the primer to a similar color as the topcoat can also improve color coverage and reduce the number of paint coats required.
When choosing paint, consider both the aesthetics and the durability. Alkyd or oil-based paints offer a hard, durable finish that resists scratches and stains, making them a popular choice for kitchen cabinets. However, they have a stronger odor and require mineral spirits for cleanup. Water-based acrylic or latex paints are a more eco-friendly and user-friendly option. They have low VOCs (volatile organic compounds), are easy to clean up with soap and water, and come in a wider range of colors and finishes. For kitchen cabinets, a semi-gloss or satin finish is generally recommended, as these sheens are durable, easy to clean, and resistant to moisture. Matte finishes, while stylish, tend to be more susceptible to staining and are harder to clean. Ultimately the type of paint chosen will have an effect on the longevity of the project.
Several coats of paint may be necessary to achieve full and consistent coverage. Allow each coat to dry thoroughly before applying the next, following the manufacturer's recommendations for drying time. Lightly sanding between coats with fine-grit sandpaper can also help to smooth the surface and improve adhesion. Careful attention to paint selection and application techniques will result in a professional-looking finish that enhances the beauty and longevity of the painted cabinets.
Application Techniques: Brush, Roller, or Sprayer?
The method of paint application significantly impacts the final appearance of the kitchen cabinets. The most common techniques are using a brush, a roller, or a sprayer. Each method has its own advantages and disadvantages, and the best choice depends on the desired finish, the skill level of the painter, and the type of paint being used.
Brushing is a traditional method that allows for precise control and is well-suited for intricate details and small areas. High-quality brushes with synthetic bristles are recommended for water-based paints, while natural bristles are better suited for oil-based paints. When brushing, it is essential to apply thin, even coats and avoid overloading the brush, which can lead to drips and brushstrokes. Feathering the edges of each stroke helps to blend them together and create a smooth finish. However, brushing can be time-consuming and may leave visible brushstrokes, especially on large, flat surfaces.
Rolling is a faster method for covering large areas, such as cabinet doors and side panels. Using a small, high-density foam roller or a microfiber roller can help to achieve a smooth, even finish with minimal stippling. Like brushing, it is important to apply thin, even coats and avoid overloading the roller. Rolling is best suited for flat surfaces and may be difficult to use on intricate details. Combining rolling with brushing, using a roller for the large flat surfaces and a brush for detailing, can provide the best of both worlds.
Spraying provides the most professional-looking finish, as it creates a smooth, even surface with no brushstrokes or roller marks. Spraying is ideal for cabinets with intricate details or for achieving a factory-like finish. However, spraying requires more equipment (a paint sprayer, air compressor, and proper ventilation) and a higher level of skill. It also requires extensive masking and protection of surrounding areas to prevent overspray. There are several types of paint sprayers available, including airless sprayers, HVLP (high volume, low pressure) sprayers, and aerosol spray cans. Airless sprayers are the most powerful and are best suited for large projects, while HVLP sprayers offer more control and are ideal for achieving a fine finish. Aerosol spray cans are a convenient option for small touch-up jobs.
Hardware and Reassembly: The Finishing Touches
Once the paint has fully cured, replacing the hardware is a crucial step in completing the kitchen cabinet transformation. The choice of hardware can dramatically affect the overall aesthetic, whether it's restoring the original hardware or selecting new pieces that complement the updated paint color. Restoring original hardware involves cleaning and polishing existing knobs, pulls, and hinges, which can maintain a sense of history and character. New hardware offers an opportunity to modernize the kitchen's style, with a wide array of designs, finishes, and materials available.
Before reassembling, carefully inspect each piece of hardware and the corresponding cabinet doors and drawer fronts. Ensure that the screw holes are clean and free of any paint buildup. If necessary, use a small drill bit or a screw to re-tap the holes and ensure a secure fit. When attaching the hardware, use the original screws whenever possible. If the screws are damaged or stripped, replace them with new screws of the same size and type. Avoid over-tightening the screws, as this can damage the cabinet doors or strip the screw holes. Double-check that all hardware is aligned properly and securely fastened before closing the cabinet doors or drawers.
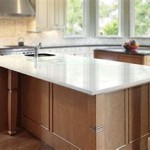
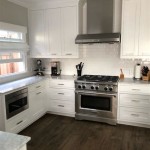
After the hardware is installed, carefully inspect the painted surfaces for any imperfections or touch-up needs. Use a small brush or a cotton swab to apply a thin coat of paint to any areas that require touch-ups. Allow the touch-up paint to dry completely before using the cabinets. Clean the surrounding areas, removing any masking tape or drop cloths. Finally, stand back and admire the transformed kitchen cabinets. The combination of fresh paint and updated hardware can create a dramatic and visually appealing result, enhancing the overall look and feel of the kitchen.

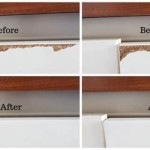
Painted Cabinets Nashville Tn Before And After Photos

15 Diy Kitchen Cabinet Makeovers Before After Photos Of Cabinets

How To Paint Kitchen Cabinets So They Look Amazing And Last Weekend Diy Projects

Painted Cabinets Nashville Tn Before And After Photos

Should I Paint My Kitchen Cabinets

Painted Cabinets Nashville Tn Before And After Photos Brown Kitchen Painting White

How To Paint Kitchen Cabinets The Love Notes Blog

Kitchen Painting Projects Before And After Paper Moon

Kitchen Cabinet Colors Before After The Inspired Room

How To Paint Oak Cabinets And Hide The Grain Tutorial
Related Posts