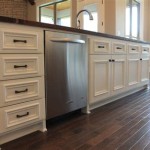
Painting Kitchen Cabinets: A Before and After Transformation
Your kitchen is the heart of your home, where meals are prepared, memories are made, and life unfolds. But over time, even the most beautiful kitchens can start to show their age. If your kitchen cabinets are looking tired, dated, or simply not reflecting your personal style, a fresh coat of paint can be a transformative solution. Painting kitchen cabinets is a cost-effective and impactful way to revitalize your kitchen, creating a space that is both functional and aesthetically pleasing.
The Power of Paint: A Visual Makeover
Before embarking on your cabinet painting project, it's essential to consider the transformative power of paint. A simple change in color can completely alter the feel and atmosphere of your kitchen. Here's how:
-
Lighten Up:
If your kitchen feels dark or cramped, painting cabinets in lighter shades, such as white, cream, or soft pastels, can instantly create a feeling of spaciousness and brightness. These colors can also make the room feel cleaner and more inviting. -
Add Depth and Warmth:
Warm colors like beige, tan, or soft grays can add depth and warmth to your kitchen. These colors can also be combined with accent walls or backsplashes to create a cohesive and inviting feel. -
Create a Bold Statement:
If you are looking for a dramatic transformation, consider painting your cabinets in bold colors like navy blue, deep green, or black. These colors can create a focal point in your kitchen and act as a backdrop for your kitchen accessories and décor.
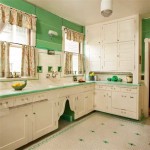
Before and after photos are a powerful tool to illustrate the potential of a paint transformation. The difference is often striking, showcasing how a fresh coat of paint can breathe new life into tired cabinetry. Seeing the results can help you envision your own kitchen remodel and inspire you to take the leap.
The Steps to a Successful Cabinet Painting Project
Painting cabinets is a DIY project that can be accomplished with adequate preparation and patience. Here's a step-by-step guide:
-
Preparation:
Thorough preparation is key to a successful paint job. This includes removing all cabinet doors and drawers, cleaning the surfaces with a degreaser, sanding to create a smooth finish, and taping off surrounding areas to protect them from paint splashes. -
Priming:
Priming is crucial for ensuring the paint adheres properly to the cabinet surfaces. Choose a primer that is compatible with the type of paint you'll be using. Apply the primer evenly and let it dry completely before moving on to the next step. -
Painting:
Apply two to three thin coats of paint, allowing each coat to dry completely before applying the next. For the best results, use a high-quality paint specifically formulated for cabinets. Consider a brush or roller for applying paint, depending on your preference. -
Finishing Touches:
Once the paint is dry, remove any tape and reinstall the doors and drawers. Adding new hardware like handles or knobs can further enhance the overall look of your cabinets.
Considerations and Tips for Success
While painting cabinets is a DIY project within reach of many homeowners, there are some important considerations and tips for maximizing success:
-
Time Commitment:
Be realistic about the time commitment involved. Cabinet painting requires time for preparation, priming, painting, and drying. Allow for ample drying time between coats. -
Safety Precautions:
Always wear a mask and gloves when sanding and painting. Ensure proper ventilation while working with paint. -
Quality Materials:
Don't skimp on quality. Invest in high-quality paints, brushes, and primers for a professional finish. -
Patience:
Painting cabinets requires patience. Take your time, and don't try to rush the process. A well-done paint job will last for years to come.
Painting your kitchen cabinets is a rewarding project that can transform the entire look and feel of your kitchen. With proper planning, preparation, and attention to detail, you can create a beautiful and functional space that you'll enjoy for years to come. The before and after photos will serve as a testament to your hard work and the incredible transformation you've achieved.

15 Diy Kitchen Cabinet Makeovers Before After Photos Of Cabinets

9 Inspiring Kitchen Cabinet Makeovers Before And After Builder Grade Remodel Small Renovation

20 Pictures Of Before And After Kitchen Makeovers With Cost Painting Cabinets

Diy Painting Your Kitchen Cabinets The Right Way

Painted Cabinets Nashville Tn Before And After Photos

How To Paint Kitchen Cabinets So They Look Amazing And Last Weekend Diy Projects

Update On Our Diy White Painted Kitchen Cabinets 2 Years Later

Our Painted Cabinets Five Years Later Nina Hendrick Home

Kitchen Cabinet Colors Before After The Inspired Room

Painted Kitchen Cabinet Ideas And Makeover Reveal The Polka Dot Chair
Related Posts

