Painting Kitchen Cabinets Black Distressed White: A Comprehensive Guide
The aesthetic of a kitchen can significantly impact a home's overall ambiance and perceived value. One popular design choice involves painting kitchen cabinets, offering a cost-effective alternative to complete replacement. A particularly striking style involves a two-toned approach, specifically painting kitchen cabinets black with a distressed white finish. This technique combines the boldness of black with the rustic charm of distressed white, creating a visually interesting and often timeless look.
This approach blends contemporary sophistication with vintage appeal. The black provides a grounded, modern base, while the distressed white overlay introduces texture and a sense of history. This combination can work effectively in various kitchen styles, from modern farmhouse to industrial chic, depending on the specific distressing techniques applied.
Understanding the Appeal of Black and Distressed White
The popularity of black and distressed white kitchen cabinets stems from several factors. Black cabinets, in general, exude elegance and can make a statement in any kitchen. They can be paired with light countertops and backsplashes to create a high-contrast, visually appealing space. The addition of distressed white softens the harshness of the black, providing visual interest and preventing the kitchen from feeling too stark.
Distressing adds character and depth to the cabinets. It prevents the kitchen from appearing sterile or overly manufactured. The distressed effect gives the impression that the cabinets have aged gracefully over time, contributing to a warmer, more inviting atmosphere. This is particularly appealing to those seeking a farmhouse or vintage-inspired kitchen design.
Furthermore, this color combination is versatile. It can complement various hardware finishes, from brushed nickel to antique brass, allowing for customization and personalization. The neutral palette also provides a flexible backdrop for other decorative elements in the kitchen, such as colorful appliances or patterned textiles.
Materials and Tools Required
Successfully painting kitchen cabinets black with a distressed white finish requires careful planning and the appropriate materials. The following is a comprehensive list of necessary supplies:
- Cleaning Supplies: Degreaser, TSP (trisodium phosphate) cleaner, sponges, and cloths for removing dirt, grease, and grime.
- Sandpaper: Various grits (e.g., 120, 220) for surface preparation and distressing. Sanding blocks or an electric sander can also be beneficial.
- Primer: A high-quality bonding primer specifically designed for kitchen cabinets. This crucial step ensures proper adhesion and prevents bleed-through.
- Paint: Two types of paint are required: a black paint for the base coat and a white paint for the topcoat. Opt for a paint formulated for cabinets and trim, typically a satin or semi-gloss finish for durability and ease of cleaning. Consider using acrylic or alkyd paints.
- Paintbrushes and Rollers: High-quality paintbrushes for detailed areas and a foam roller for smooth surfaces. Consider using an angled brush for corners and edges.
- Painter's Tape: For masking off areas that need to be protected, such as walls, countertops, and hardware.
- Drop Cloths: To protect the flooring and surrounding areas from paint spills.
- Putty Knife and Wood Filler: For filling any holes or imperfections in the cabinets.
- Distressing Tools: Various tools can be used to create the distressed effect, including sandpaper, steel wool, a scraper, or even a hammer. The choice of tool will influence the final look.
- Topcoat/Sealer (Optional): A clear topcoat or sealer can be applied to protect the painted finish and enhance durability, especially in high-traffic areas.
- Safety Gear: Eye protection, gloves, and a respirator mask are essential for protecting against dust and fumes.
- Screwdriver or Drill: For removing and reinstalling cabinet doors, drawers, and hardware.
The selection of high-quality materials is paramount to achieving a professional and long-lasting finish. Skimping on materials, such as using inexpensive primer or paint, can lead to peeling, chipping, and an overall unsatisfactory result.
Step-by-Step Painting Process
The process of painting kitchen cabinets black with a distressed white finish involves several steps, each requiring attention to detail. A methodical approach is essential for achieving a desirable outcome.
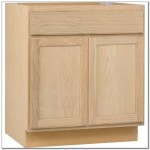
- Preparation: The most crucial step is preparing the cabinets properly. Remove all cabinet doors and drawers. Label each one to ensure correct reinstallation. Remove all hardware, such as knobs and hinges. Thoroughly clean all surfaces with a degreaser and TSP cleaner to remove grease, dirt, and grime. Rinse well with water and allow to dry completely.
- Sanding: Once the cabinets are clean and dry, sand all surfaces with 120-grit sandpaper to create a slightly rough surface for the primer to adhere to. Focus on removing any existing glossy finishes. Fill any holes or imperfections with wood filler and allow to dry completely. Sand the filled areas smooth with 220-grit sandpaper.
- Priming: Apply a thin, even coat of high-quality bonding primer to all surfaces. Allow the primer to dry completely according to the manufacturer's instructions. A second coat of primer may be necessary if the cabinets are particularly dark or have a strong existing finish.
- Painting the Base Coat (Black): Apply two thin, even coats of black paint to all surfaces, allowing each coat to dry completely before applying the next. Use a brush for detailed areas and a foam roller for smooth surfaces. Ensure that the paint is applied evenly to avoid drips or runs.
- Applying the Topcoat (White): Once the black paint is completely dry, apply a single coat of white paint. The color and type of white paint will influence the overall outcome.
- Distressing: This is the key step that defines the distressed look. There are several techniques for distressing cabinets. One common method involves using sandpaper to lightly sand through the white topcoat, revealing the black paint underneath. Focus on areas that would naturally show wear and tear, such as edges, corners, and raised panels. Experiment with different grits of sandpaper to achieve the desired level of distress. Other methods include using steel wool, a scraper, or even lightly tapping the cabinets with a hammer to create small dents and imperfections.
- Sealing (Optional): After distressing, consider applying a clear topcoat or sealer to protect the painted finish and enhance durability. This is especially important for cabinets that are frequently used or exposed to moisture.
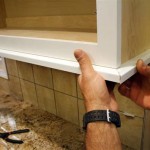
- Reinstallation: Once the paint and sealer (if used) are completely dry, reinstall the hardware, doors, and drawers. Ensure that all hinges are properly aligned and that the doors and drawers open and close smoothly.
Patience is crucial throughout the painting process. Allowing each coat of primer and paint to dry completely before proceeding to the next step will ensure a durable and professional finish. Rushing the process can lead to imperfections and an overall unsatisfactory result.
Achieving Different Distressed Looks
The level and style of distressing can be tailored to match individual preferences and the overall design aesthetic of the kitchen. There are numerous techniques for achieving different distressed looks, each with its unique characteristics.
Subtle Distressing: This involves lightly sanding the edges and corners of the cabinets to reveal the black paint beneath. The goal is to create a subtle hint of wear and tear, without making the cabinets look overly aged. This technique is well-suited for kitchens with a more contemporary or transitional style.
Moderate Distressing: This involves sanding more extensively, focusing on areas that would naturally experience wear and tear, such as around knobs, handles, and raised panels. Small dents and scratches can also be added to create a more aged and worn appearance. This technique is appropriate for farmhouse or vintage-inspired kitchens.
Heavy Distressing: This involves aggressively sanding and scraping the cabinets to create a heavily worn and aged appearance. Large areas of the black paint may be exposed, and the cabinets may have numerous dents, scratches, and imperfections. This technique is ideal for kitchens with a rustic or industrial style.
Experiment with different distressing tools and techniques to find the look that best suits the desired aesthetic. Practice on a scrap piece of wood or an inconspicuous area of the cabinet before committing to the entire project. Consider using layering techniques, such as applying multiple coats of white paint and sanding between coats, to create a more complex and nuanced distressed effect.
Ultimately, the success of painting kitchen cabinets black with a distressed white finish hinges on meticulous preparation, careful application, and a clear understanding of the desired aesthetic. By following these guidelines, homeowners can transform their kitchens into visually appealing and functional spaces.

Distressed Kitchen Cabinets How To Distress Your

Distressed Kitchen Cabinets How To Distress Your

Farmhouse Kitchen Two Tone Distressed Cabinets Large Island Black Painting Rustic

The Black Kitchen Cabinet Trend Heather Hungeling Design

Black Kitchen Cabinets The Ugly Truth At Home With Barkers

An Example Of A Distressed White Dresser For The Bedroom Kitchen Cabinets Rustic

Affordable And Stylish Black White Kitchens

The Black Kitchen Cabinet Trend Heather Hungeling Design

Black Kitchen Cabinets The Next Big Trend Welsh Design Studio

Rescuing And Reviving A Glazed Distressed Kitchen Bella Tucker
Related Posts