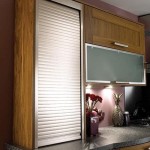
Painting Kitchen Cabinets Espresso: A Comprehensive Guide
Espresso kitchen cabinets offer a rich, sophisticated aesthetic, adding depth and warmth to any kitchen. Achieving this dramatic look involves careful planning, preparation, and execution. This guide provides a detailed overview of the process of painting kitchen cabinets espresso, covering everything from choosing the right paint and tools to achieving a professional-looking finish.
Choosing the Right Espresso Paint
Selecting the right paint is crucial for a successful outcome. Oil-based paints offer superior durability and a smooth, even finish, making them a preferred choice for kitchen cabinets. However, they require longer drying times and necessitate the use of mineral spirits for cleanup. Alternatively, high-quality acrylic latex paints formulated for cabinets provide a good balance of durability and ease of use, drying quickly and cleaning up with water. When selecting an espresso shade, consider the existing kitchen decor and lighting. Test different shades on sample boards in the actual kitchen environment to ensure the chosen espresso complements the overall design.
Gathering the Necessary Supplies
Proper preparation is essential for a professional-looking finish. Gather all necessary supplies before beginning the project. This includes: screwdrivers for removing hardware, painter's tape, drop cloths, sanding blocks with various grits (150-220 grit), tack cloths, wood filler, primer, paintbrushes designed for cabinets, foam rollers, a paint tray, and mineral spirits or water for cleanup, depending on the chosen paint type. Investing in high-quality brushes and rollers specifically designed for cabinets will ensure a smooth, even finish.
Preparing the Cabinets for Painting
Thorough preparation is the key to a long-lasting and professional-looking paint job. Begin by removing all cabinet doors, drawers, and hardware. Label each piece and its corresponding location to facilitate reassembly. Clean the cabinet surfaces thoroughly with a degreasing cleaner to remove any grease or grime. Fill any holes or imperfections with wood filler, allowing it to dry completely before sanding smooth.
Sanding and Priming
Sanding is crucial for creating a smooth surface that allows the primer and paint to adhere properly. Using a sanding block, sand all surfaces lightly with 150-220 grit sandpaper. This process creates a slightly roughened texture, which promotes better adhesion. After sanding, thoroughly clean all surfaces with a tack cloth to remove any dust. Apply a high-quality primer designed for adhesion to the sanded surfaces. Primer creates a uniform base for the espresso paint and helps to prevent bleed-through from the existing finish. Allow the primer to dry completely according to the manufacturer's instructions.
Applying the Espresso Paint
Once the primer is dry, lightly sand again with fine-grit sandpaper (220 grit) to remove any imperfections and create a smooth surface for the paint. Clean the surfaces with a tack cloth to remove any sanding dust. Begin applying the espresso paint to the cabinet frames, using a high-quality brush for detailed areas and a foam roller for larger surfaces. Apply thin, even coats, allowing each coat to dry completely before applying the next. Multiple thin coats will result in a smoother, more durable finish than one or two thick coats.
Painting the Cabinet Doors and Drawers
Paint the cabinet doors and drawers using the same technique as the cabinet frames. Lay the doors and drawers flat on a protected surface to prevent drips and runs. Begin by painting the backs of the doors and drawer fronts. Once dry, flip them over and paint the fronts. Apply thin, even coats, allowing each coat to dry thoroughly before applying the next. For a professional finish, consider using a paint sprayer for the doors and drawers, as this method can provide a smoother, more even application than brushing or rolling.
Reassembly and Finishing Touches
After the final coat of paint has dried completely, reattach the hardware and reinstall the doors and drawers. Be careful not to overtighten screws, which could damage the newly painted surface. Inspect the finished cabinets for any imperfections or missed spots. Touch up any areas as needed with a small brush. Allow the paint to cure completely before subjecting the cabinets to regular use. The curing time allows the paint to harden fully and achieve its maximum durability.
Maintaining Espresso Kitchen Cabinets
Proper maintenance will help preserve the beauty and longevity of the espresso finish. Clean the cabinets regularly with a soft cloth and a gentle, non-abrasive cleaner. Avoid using harsh chemicals or abrasive cleaning pads, which could damage the finish. Address any spills or splatters promptly to prevent staining. By following these maintenance tips, espresso kitchen cabinets will continue to enhance the kitchen's aesthetic appeal for years to come.

Behr Premium 1 Gal Ppu5 01 Espresso Beans Satin Enamel Interior Exterior Cabinet Door Trim Paint 752301 The Home Depot

Updating Your Kitchen Cabinets Color Smith

Espresso Kitchen Cabinets Pictures Ideas Tips From

Just Paint The Top Kitchen Cabinets Tuesday S Treasures Funcycled

30 Painted Kitchen Cabinet Ideas New Cabinets Best Painting

Rust Oleum Cabinet Gloss Espresso And Furniture Paint Kit In The Department At Com

Painting Kitchen Cabinets Sometimes Homemade

Staining Oak Cabinets An Espresso Color Diy Tutorial Monica Benavidez

Ask Maria Help My White Painted Kitchen Cabinets Look Bad Advice For Homeowners

Everything You Need To Know About Espresso Cabinets Cabinetcorp
Related Posts

