Painting Kitchen Cabinets Using Chalk Paint: A Comprehensive Guide
Transforming your kitchen cabinets with chalk paint can be a satisfying and budget-friendly home improvement project. Whether you're updating the look of your existing cabinets or giving them a complete makeover, this guide will provide you with all the essential aspects to consider for a successful outcome.
Benefits of Using Chalk Paint
Chalk paint offers several advantages over traditional paint for kitchen cabinet refinishing:
- Easy to Apply: Chalk paint requires minimal preparation and can be applied with a brush or roller. It's self-leveling, eliminating brush strokes or lap marks.
- Durable and Long-Lasting: Once cured, chalk paint creates a hard, protective finish that resists scratches, dents, and wear.
- Versatile and Customizable: Chalk paint comes in a wide range of colors and can be easily mixed to create custom shades. Its matte finish provides a rustic or vintage aesthetic.
Preparation and Materials
Before painting, ensure your cabinets are thoroughly cleaned and free of dirt, grease, or old paint. Remove hardware and doors for easier access. Gather the following materials:
- Chalk paint (quantity varies depending on cabinet size)
- Sandpaper (120-grit for rough surfaces, 220-grit for smooth surfaces)
- Cleaning solution (TSP or denatured alcohol)
- Paintbrushes or rollers
- Painter's tape (optional)
- Topcoat (polyurethane or wax) (optional)
Painting Process
- Clean the Cabinets: Wipe down the cabinets with a cleaning solution to remove any dirt or residue.
- Sanding (Optional): For smoother cabinets, lightly sand the surface with 120-grit sandpaper for rough surfaces or 220-grit for smooth surfaces.
- Applying Paint: Apply a thin, even coat of chalk paint using a brush or roller. Allow the paint to dry completely.
- Second Coat: Apply a second coat of chalk paint for better coverage and durability. Let dry thoroughly.
- Protecting the Finish: To enhance the durability and longevity of your paint, apply a topcoat of polyurethane or wax. Allow it to dry according to the manufacturer's instructions.
- Use a light touch when sanding to avoid damaging the cabinet surface.
- Apply thin coats of paint to prevent dripping or running.
- Let each coat dry completely before applying the next to ensure proper adhesion.
- Protect your paint finish with a topcoat, especially in areas exposed to moisture or wear.
Tips for Success
Conclusion
Painting kitchen cabinets using chalk paint is a rewarding and affordable way to update your kitchen's style. By following these essential aspects, you can achieve a professional-looking finish that will last for years to come.

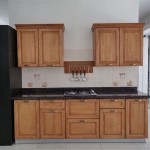
Painting Kitchen Cabinets With Chalk Paint Simply Today Life

Chalk Painted Kitchen Cabinets 2 Years Later Our Storied Home

How To Paint A Kitchen With Chalk Maison De Pax

Why I Repainted My Chalk Painted Cabinets Sincerely Sara D Home Decor Diy Projects

Why I Repainted My Chalk Painted Cabinets Sincerely Sara D Home Decor Diy Projects

Chalk Painted Kitchen Cabinets 2 Years Later Our Storied Home

How 500 And Some Chalk Paint Totally Transformed This Kitchen

Why I Repainted My Chalk Painted Cabinets Sincerely Sara D Home Decor Diy Projects

Step By Kitchen Cabinet Painting With Annie Sloan Chalk Paint Jeanne Oliver

Cabinet Painting Nashville Tn Kitchen Makeover
Related Posts

