Painting Kitchen Cabinets White With Glaze: A Comprehensive Guide
Transforming your kitchen's aesthetics with a fresh coat of white paint and a stunning glaze can instantly elevate the space. However, embarking on this project requires careful preparation and attention to detail to achieve a professional-looking finish. Here's a comprehensive guide to help you paint kitchen cabinets white with glaze and achieve exceptional results:
Step 1: Preparation is Paramount
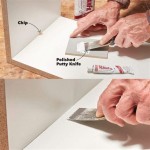
Thoroughly prepare your cabinets to ensure optimal paint adhesion. Remove all hardware, doors, and drawers. Clean the surfaces with a degreaser and TSP cleaner to eliminate any grease or dirt. Lightly sand the surfaces with fine-grit sandpaper to smooth any imperfections and promote paint bonding.
Step 2: Choose the Right Paint
Select a high-quality white paint specifically designed for kitchen cabinets. Opt for a durable and stain-resistant paint that can withstand wear and tear. Opt for a semi-gloss or satin finish for easy maintenance and a polished look.
Step 3: Primer Perfection
Apply a coat of primer to provide a uniform base for your white paint. Use a brush to apply the primer into corners and edges, then use a roller for larger surfaces. Allow the primer to dry completely before moving on to the next step.
Step 4: Paint with Confidence
Begin painting your cabinets with even and consistent strokes. Use a brush for detailed areas and a roller for larger surfaces. Apply thin coats of paint and allow each coat to dry thoroughly before applying the next. Sand lightly between coats to ensure a smooth finish.
Step 5: Glaze for Depth
To enhance the depth and texture of your painted cabinets, apply a glaze. Choose a glaze specifically designed for use over latex paint. Mix the glaze according to the manufacturer's instructions and apply it with a brush or sponge. Wipe off any excess glaze with a damp rag to control the transparency.
Step 6: Sealing for Protection
Once the glaze has dried, apply a protective sealant to ensure durability and resistance to moisture and wear. Use a brush or roller to apply a thin, even coat of polyurethane or varnish. Allow the sealant to dry completely before reinstalling your hardware and doors.
Step 7: Reassemble and Admire
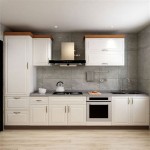
Reinstall your cabinet doors, drawers, and hardware. Step back and admire the stunning transformation of your kitchen. Your newly painted white cabinets with glaze will create a fresh and inviting atmosphere that will enhance your cooking and dining experiences.
Additional Tips
- Use a tack cloth to remove dust and debris before painting.
- Allow ample drying time between each step to ensure proper adhesion.
- Experiment with different glaze techniques to create unique effects.
- Protect your work surface with drop cloths or plastic sheeting.
- Ventilate the area well while painting and during the drying process.

How To Glaze Kitchen Cabinets Diyer S Guide Bob Vila

Rescuing And Reviving A Glazed Distressed Kitchen Bella Tucker

How To Glaze Cabinets At Home With The Barkers

How To Glaze Cabinets Like A Pro

How To Glaze Kitchen Cabinets

Glazed Cabinets Add Traditional Depth Dimension To Any Kitchen New Renovation Refacing

How To Glaze Cabinets At Home With The Barkers

Dover White With Brown Sugar Glaze 2 Cabinet Girls

Porchswings N Honeysuckle Paint And Glaze Cabinet Tutorial New Kitchen Cabinets Renovation Glazed

Is Your Cabinet Maker Still Ing Glazed Cabinets
Related Posts


