Painting Kitchen Cabinets With Rustoleum: A Comprehensive Guide
Are you considering giving your kitchen cabinets a new lease of life with Rustoleum paint? If so, you're in the right place. This guide will provide you with all the essential information you need to ensure a successful and professional-looking finish.
Preparing the Cabinets
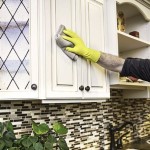
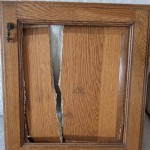
Before you start painting, it's crucial to prepare your cabinets properly. This involves cleaning them thoroughly with a degreaser to remove any dirt, grease, or grime that could interfere with the paint's adhesion. Once cleaned, sand the cabinets lightly with fine-grit sandpaper to create a smooth surface for the paint to adhere to. If there are any repairs or imperfections in the cabinets, such as dents or scratches, fill them in with wood filler and sand them smooth.
Choosing the Right Rustoleum Paint
Rustoleum offers a wide range of paints specifically formulated for kitchen cabinets. These paints are durable, resistant to wear and tear, and available in a variety of colors and finishes. Choose the paint that best suits your kitchen's style and decor. For a classic finish, opt for a semi-gloss or satin paint. If you prefer a more modern look, go for a high-gloss paint.
Applying the First Coat
Once you have chosen your paint, it's time to apply the first coat. Use a high-quality brush or roller for the best results. Start by painting the edges and corners of the cabinets, then work your way towards the center. Apply the paint in thin, even strokes, avoiding any drips or runs. Allow the first coat to dry completely before proceeding to the next.
Sanding Between Coats
After the first coat has dried, lightly sand the cabinets with fine-grit sandpaper. This will help to remove any imperfections or brush marks and ensure a smooth finish for the subsequent coats. Wipe away any dust created by sanding before applying the second coat.
Applying the Second and Third Coats
Apply the second coat of paint in the same manner as the first, paying attention to the edges and corners. Allow it to dry completely before applying a third coat if necessary. In most cases, two coats of paint will be sufficient for good coverage. However, if you're painting dark-colored cabinets over light-colored ones, you may need to apply additional coats.
Finishing Touches
Once the final coat of paint has dried, it's time to add the finishing touches. This includes replacing the cabinet hardware and applying a clear polyurethane finish. Polyurethane will protect the paint from scratches, stains, and wear and tear, ensuring the durability of your newly painted cabinets. Allow the polyurethane to dry completely before using the cabinets.
Tips for Success
To ensure the best possible results, follow these tips when painting your kitchen cabinets with Rustoleum:
- Use a high-quality brush or roller.
- Apply the paint in thin, even strokes.
- Allow each coat to dry completely before applying the next.
- Sand between coats to remove imperfections.
- Apply a clear polyurethane finish to protect the paint.
With proper preparation and attention to detail, you can achieve a professional-looking finish on your kitchen cabinets that will transform the look and feel of your kitchen. Rustoleum paints offer a durable and stylish solution for giving your cabinets a new lease of life.

5 Easy Steps To Using Rustoleum Cabinet Paint Rock Solid Rustic

Painted Kitchen Cabinets Rust Oleum

Painting Your Kitchen Cabinets You Can Do It And They Cooked Happily Ever After

Rustoleum Cabinet Transformations Kitchen Makeover Crafted N Transformation Colors

Painting Kitchen Cabinets With Rustoleum Cabinet Transformations

Rust Oleum Kitchen Cupboard Paint Launches In 110 Colours

Rustoleum Cabinet Transformations Review

Painting Kitchen Cabinets Rust Oleum Cabinet Transformations Home Construction Improvement

Painting Your Kitchen Cabinets You Can Do It And They Cooked Happily Ever After

Diva S Rust Oleum Cabinet Transformation Refinishing Cabinets Kitchen Colors
Related Posts

