Transform Your Kitchen with Painted Cupboard Handles: A Comprehensive Guide
Kitchen cupboard handles are often overlooked as a design element, but they can significantly elevate the aesthetics of your kitchen. Painting cupboard handles is a relatively easy and affordable way to refresh the look of your kitchen without undergoing a complete remodel. This guide will provide you with all the essential steps to ensure a successful and professional-looking paint job.
1. Disassemble the Handles
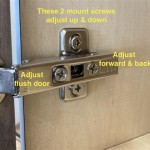
Before painting, it's crucial to remove the handles from the cupboard doors. Use a screwdriver or drill to detach the screws holding the handles in place. Label each handle and screw so that you can easily reassemble them later.
2. Clean and Prepare the Handles
Wash the handles thoroughly with soapy water to remove any dirt or grease. Use a degreaser if necessary to eliminate any stubborn residue. Once clean, allow the handles to dry completely.
3. Choose the Right Paint
For cupboard handles, enamel or oil-based paints are generally recommended. These paints provide durability and resistance to wear and tear. Choose a paint color that complements the existing kitchen design or introduces a contrasting accent.
4. Prime the Handles
Priming helps the paint adhere better to the metal surface of the handles. Apply a thin layer of primer to all sides of the handles and allow it to dry completely.
5. Paint the Handles
Using a small brush or sponge, apply thin, even coats of paint to the handles. Allow each coat to dry before applying the next. If desired, you can use multiple colors to create a two-tone or ombre effect.
6. Seal the Paint
Once the paint is completely dry, apply a clear sealer to protect the finish from wear and tear. Allow the sealer to dry according to the manufacturer's instructions.
7. Reassemble the Handles
Once all the paint and sealer have dried, it's time to reassemble the handles. Align the handles with the holes in the cupboard doors and secure them with the screws. Tighten the screws but avoid overtightening.
Additional Tips
- Use a high-quality brush or sponge for a smooth finish.
- Apply thin coats of paint to avoid drips or runs.
- Allow each coat to dry completely before applying the next.
- Handle the painted handles with care until the seal has fully cured.
- Consider using painter's tape to protect any surrounding areas from paint.
Conclusion
Painting kitchen cupboard handles is a simple yet impactful way to revitalize the look of your kitchen. By following these steps carefully, you can ensure a professional-looking finish that will enhance the overall design of your space. Whether you choose a bold color or a subtle accent, painted cupboard handles will instantly transform your kitchen and give it an updated, fresh appearance.

Painted Cabinet Hardware Rust Oleum

Spray Paint Brass Kitchen Knobs Cabinet Pulls

Spray Paint Brass Kitchen Knobs Cabinet Pulls

Diy Brass Painted Kitchen Hardware Lavender Julep

How To Spray Paint Kitchen Cabinet Hardware Thrifty Decor Diy And Organizing

Yes You Can Spray Paint Cabinet Hardware Porch Daydreamer

How To Spray Paint Cabinet Hardware And Hinges Life S Ahmazing

A Guide To Updating Your Kitchen Cabinet Hardware Bella Tucker

How To Paint Kitchen Cabinet Handles In 5 Steps The Lark

How To Spray Paint Kitchen Cabinet Hardware Thrifty Decor Diy And Organizing
Related Posts