Painting My Wood Kitchen Cabinets: A Comprehensive Guide
Transforming your kitchen cabinets with a fresh coat of paint is a cost-effective and rewarding home improvement project. Painting wood kitchen cabinets requires meticulous planning and execution to achieve a professional-looking finish. This guide will provide you with essential tips and step-by-step instructions to help you navigate this project successfully.
Planning the Project
Before diving into the painting process, it's crucial to plan thoroughly. Consider the following factors:
- Cabinet Style and Finish: Determine the style of your cabinets and the desired finish. Paint will adhere differently to various wood species and finishes.
- Color Selection: Choose a paint color that complements your kitchen's design and color scheme. Consider the lighting and natural light in the room.
- Materials: Gather the necessary supplies, including paint, primer, brushes, rollers, sandpaper, spackling paste, and a degreaser.
Preparing the Cabinets
Before applying paint, it's essential to prepare the cabinets properly. Follow these steps:
- Remove Hardware: Detach all cabinet doors, drawers, handles, and hinges.
- Clean Surfaces: Use a degreaser to remove grease and dirt from the cabinet surfaces. Allow the surfaces to dry thoroughly.
- Sand Surfaces: Lightly sand the cabinets using fine-grit sandpaper to remove any imperfections and create a smooth surface for the paint.
- Fill Holes and Cracks: Use spackling paste to fill any holes or cracks in the wood. Let it dry and sand the patched areas smooth.
Priming the Cabinets
Applying primer is crucial for ensuring a strong bond between the paint and the wood. Use a high-quality primer compatible with your paint and follow these steps:
- Apply Primer: Apply a thin coat of primer to all cabinet surfaces using a brush or roller. Allow the primer to dry completely.
- Sand Primer: Lightly sand the primed surfaces to smooth out any rough spots. This step will create a better surface for the paint.
Painting the Cabinets
Now it's time to apply the paint. Follow these instructions for a professional-looking finish:
- Apply First Coat: Apply a thin, even coat of paint to the cabinet surfaces. Use a brush for intricate areas and a roller for large surfaces.
- Second Coat: After the first coat has dried thoroughly, apply a second coat. Pay attention to the grain of the wood and avoid brushstrokes.
- Third Coat (Optional): If necessary, apply a third coat for full coverage and a durable finish.
Reattaching Hardware and Finishing Touches
Once the paint has dried completely, it's time to reattach the hardware and add finishing touches:
- Reattach Hardware: Screw back the handles, hinges, and other hardware you removed earlier.
- Touch Up: Inspect the cabinets for any imperfections. Use a brush or touch-up pen to correct any small flaws.
- Protect the Finish: Apply a clear protective finish, such as polyurethane, to seal the paint and prevent wear and tear.

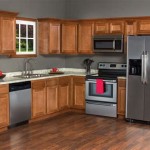
Should I Paint My Kitchen Cabinets

Tips Tricks To Paint Honey Oak Kitchen Cabinets Cottage Living And Style

How To Paint Kitchen Cabinets A Step By Guide Confessions Of Serial Do It Yourselfer

Diy Painted Oak Kitchen Cabinets Makeover
:strip_icc()/101671998-27cdf40f639448d0a56ff6c7eab609d7.jpg?strip=all)
Expert Tips For Painting Oak Cabinets

Should I Paint My Kitchen Cabinets Helix Painting

Tips Tricks To Paint Honey Oak Kitchen Cabinets Cottage Living And Style

Budget Kitchen Renovation With Diy Shaker Painted Cabinets I

Avoid These Mistakes How To Paint Cabinets That Are Already Painted Grace In My Space

Should I Paint Or Refinish My Kitchen Cabinets

