Painting Oak Kitchen Cabinets Gray: A Step-by-Step Guide and Expert Tips
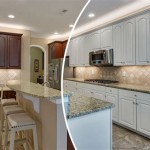
Transforming your oak kitchen cabinets from traditional to modern with a fresh coat of gray paint can breathe new life into your kitchen space. Painting oak cabinets is a DIY project that requires careful preparation, the right materials, and attention to detail. Discover the essential steps, expert techniques, and valuable tips to achieve a flawless gray finish on your oak cabinets.
Step 1: Preparation - Setting the Stage for Success
Preparation is the key to long-lasting results when painting oak cabinets. Begin by thoroughly cleaning the cabinets with a degreaser or TSP (trisodium phosphate) solution to remove grease and dirt. Repair any damage such as chips or cracks using wood filler. Lightly sand the cabinet surfaces with a fine-grit sandpaper to create a smooth base for the paint to adhere to.
Step 2: Choosing the Right Paint - Achieving the Perfect Gray Hue
Selecting the right paint is crucial for a professional-looking finish. Opt for a high-quality cabinet and furniture paint specifically designed for kitchen cabinets, as they offer superior adhesion and durability. Choose a gray shade that complements your kitchen's overall design and color scheme. Consider factors like the natural light, countertop color, and flooring to select the perfect gray hue.
Step 3: Priming the Cabinets - Creating a Strong Foundation
Applying a primer is essential to ensure the paint adheres properly to the oak surface. Opt for a bonding primer specifically designed for kitchen cabinets. Apply a thin, even coat using a high-density foam roller, ensuring complete coverage of the cabinets. Allow the primer to dry thoroughly according to the manufacturer's instructions.
Step 4: Painting the Cabinets - Achieving a Smooth, Flawless Finish
Once the primer is dry, it's time to add color to your cabinets. Use a high-quality cabinet and furniture paint and a high-density foam roller for smooth application. Apply a thin, even coat of paint using long, even strokes. Allow the first coat to dry thoroughly before applying the second coat for full coverage and a professional finish.
Step 5: Sanding Between Coats - Ensuring a Smooth Surface
Sanding lightly between coats of paint helps create a smooth, flawless finish. Use a fine-grit sandpaper and lightly sand the surface of the cabinets after each coat has dried. This step removes any imperfections and ensures the next coat adheres properly. Sanding also promotes a uniform and professional-looking final result.
Step 6: Finishing Touches - Enhancing the Beauty and Longevity
After the final coat of paint has dried completely, add finishing touches to enhance the beauty and longevity of your painted cabinets. Apply a clear topcoat or sealant specifically designed for kitchen cabinets. This will protect the paint from wear and tear, moisture, and stains. Consider adding new hardware like handles and knobs to complete the updated look of your kitchen.
Additional Tips for Success:
- Remove cabinet doors and drawers before painting for easier access and a more thorough job.
- Use painter's tape to protect areas like countertops, backsplash, and floors from paint spills.
- Open windows or use a fan to ensure proper ventilation while painting.
- Allow sufficient drying time between each step of the painting process to ensure a durable and long-lasting finish.
- Clean up any paint spills or drips immediately to prevent permanent staining.

Gray Stain Kitchen In Wilmington Ma Norfolk Bath

Gray Stain Kitchen Cabinet Design

Wolf Hanover Gray Stain Kitchen Cabinets Affordable

Gray Stain Kitchen Cabinet Design

Gray Stained Cabinets What Brand Kitchen Decor Modern New

Gray Stain Kitchen In Wilmington Ma Norfolk Bath

Gray Ready To Assemble Kitchen Cabinets Cabinet Depot

Oak Kitchen Cabinets Painted Chelsea Gray Funcycled Painting Grey

Kitchen Renovation With Grey Stained Oak Cabinets Home Bunch Interior Design Ideas

Wolf Dartmouth Grey Stain Kitchen Cabinets Modern Look
Related Posts

