```html
Painting Of Kitchen Cabinets: A Comprehensive Guide
Painting kitchen cabinets is a cost-effective and impactful method of revitalizing a kitchen's appearance. Rather than undertaking a complete cabinet replacement, homeowners can achieve a refreshed aesthetic through careful preparation, application, and finishing. This article outlines the processes involved in painting kitchen cabinets, from initial assessment to final touches, while highlighting crucial considerations for a professional-looking result.
The decision to paint kitchen cabinets often stems from a desire to update the kitchen's style, address wear and tear, or increase the home's value. Considerations against painting often include the perceived time commitment and the potential for an unsatisfactory outcome if the process is not executed correctly. However, with diligent planning and execution, painting cabinets can yield a significant return on investment, both financially and aesthetically.
Assessing Existing Cabinets and Planning the Project
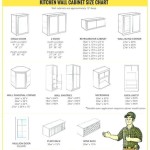
Before embarking on the painting process, a thorough assessment of the existing cabinets is essential. This involves evaluating the cabinet material, structural integrity, and existing finish. Cabinet materials commonly include solid wood, wood veneer, laminate, and melamine. Solid wood cabinets are generally the most suitable for painting, while laminate and melamine can present challenges due to their slick surfaces and potential for chipping.
Structural issues, such as warped doors, loose hinges, or damaged frames, should be addressed prior to painting. Repairing these issues ensures a stable and consistent surface for the new paint finish. The existing finish also dictates the necessary preparation steps. Glossy finishes require more aggressive sanding and priming to ensure proper paint adhesion, while matte finishes may require less intensive preparation.
Planning also involves selecting the appropriate paint type and color. Alkyd (oil-based) paints offer durability and a smooth finish but require longer drying times and more stringent cleaning procedures. Acrylic (water-based) paints are easier to clean, dry faster, and have lower VOC (volatile organic compound) emissions, making them a more environmentally conscious choice. However, they may require more coats to achieve the desired coverage and durability. Acrylic-alkyd hybrids offer a balance of both, providing enhanced durability with easier cleanup.
Color selection is highly subjective and should align with the overall kitchen design and aesthetic preferences. Light colors can brighten a space and make it appear larger, while darker colors can add depth and drama. It's crucial to test paint samples in the kitchen under various lighting conditions before making a final decision. This helps ensure the selected color complements the existing countertops, backsplash, and flooring.
Finally, planning includes gathering all necessary materials and tools. These typically include drop cloths, painter's tape, sandpaper (various grits), a scraper, a degreaser, a tack cloth, primer, paint, paintbrushes, rollers, paint trays, and potentially a paint sprayer.
Preparing the Cabinets for Painting
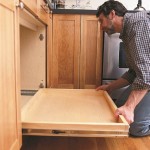
Proper preparation is the cornerstone of a successful cabinet painting project. This stage involves meticulous cleaning, sanding, and priming to create a smooth and receptive surface for the paint. The first step is to remove all cabinet doors and drawers. Labeling each door and drawer with its corresponding location is critical to ensure proper reinstallation.
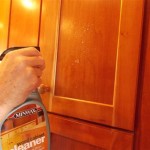
Hardware, such as knobs, pulls, and hinges, should also be removed. This prevents paint from accumulating on the hardware and allows for a cleaner paint application. If desired, homeowners can choose to replace the hardware with new styles to further update the kitchen's appearance. After removing the hardware, the cabinets and doors should be thoroughly cleaned with a degreaser to remove any grease, grime, or residue. Trisodium phosphate (TSP) is a common degreaser, but alternatives are available for those seeking more environmentally friendly options.
Once the cabinets are clean and dry, sanding is the next crucial step. Sanding roughens the surface, creating "tooth" for the primer and paint to adhere to. Start with coarser grit sandpaper (e.g., 120-grit) to remove any existing imperfections or glossy finishes. Then, move to a finer grit sandpaper (e.g., 220-grit) to smooth the surface. Sanding blocks or orbital sanders can be used to expedite the process, particularly for larger surfaces. However, care should be taken not to over-sand, as this can damage the cabinet material.
After sanding, thoroughly remove all dust with a tack cloth or a vacuum cleaner with a brush attachment. Dust particles can compromise the paint finish, resulting in a bumpy or uneven surface. Finally, apply a high-quality primer. Primer seals the surface, provides a uniform base for the paint, and improves paint adhesion. Choose a primer specifically designed for the cabinet material (e.g., wood primer, laminate primer). Apply the primer evenly with a brush or roller, following the manufacturer's instructions. Allow the primer to dry completely before proceeding to the painting stage.
Applying Paint and Finishing Touches
With the cabinets properly prepared, the application of paint can begin. Applying thin, even coats is crucial for achieving a professional-looking finish. Avoid overloading the brush or roller, as this can lead to drips and runs. Multiple thin coats are preferable to one thick coat.
A high-quality paintbrush or roller is essential for achieving a smooth and even finish. Foam rollers are often preferred for cabinets as they minimize brush strokes and create a smoother surface. However, natural bristle brushes can be used for more detailed areas or to add texture. A paint sprayer can also be used to achieve a very smooth, factory-like finish, but it requires practice and proper ventilation.
Apply the first coat of paint, working in the direction of the wood grain (if applicable). Allow the paint to dry completely, as per the manufacturer's instructions. Once dry, lightly sand the surface with fine-grit sandpaper (e.g., 320-grit) to remove any imperfections and create a smooth surface for the second coat. Remove dust with a tack cloth before applying the second coat of paint.
Repeat the painting process until the desired coverage and color saturation are achieved. Typically, two to three coats of paint are required. Allow the final coat of paint to dry completely before reassembling the cabinets. Once the paint is fully cured (which may take several days), reattach the hardware and rehang the doors and drawers. Adjust the hinges as needed to ensure the doors align properly.
A clear topcoat can be applied to protect the paint finish and enhance its durability. This is particularly beneficial for cabinets in high-traffic areas. Choose a topcoat that is compatible with the paint type. Apply the topcoat evenly with a brush or roller, following the manufacturer's instructions. Allow the topcoat to dry completely before using the cabinets.
Proper cleanup is essential after the painting process. Dispose of paint and cleaning supplies according to local regulations. Clean paintbrushes and rollers thoroughly to ensure they can be reused for future projects. Store leftover paint in an airtight container in a cool, dry place.
Painting kitchen cabinets is a labor-intensive project, but it can be a rewarding one. By following these guidelines and paying attention to detail, homeowners can achieve a professional-looking finish that transforms their kitchen. While this article covers the fundamental aspects of painting kitchen cabinets, specific techniques and product recommendations may vary depending on the cabinet material and desired aesthetic.
```
7 Expert Tips For Flawless Kitchen Cabinet Painting

Durable Kitchen Cabinet Painting 10 Year Warranty Columbus Oh

How To Paint Kitchen Cabinets In 7 Simple Steps

How To Paint Kitchen Cabinets Best Color Ideas Cost

How To Paint Kitchen Cabinets The Love Notes Blog

Painted Kitchen Cabinets One Year Later The Palette Muse

Should I Paint Or Refinish My Kitchen Cabinets

Should I Paint My Kitchen Cabinets Lily Ann

How To Paint Kitchen Cabinets

Pro Tips For Painting Cabinets In Your Home Paintzen
Related Posts