Painting Old Kitchen Cabinets With Chalk Paint
Tired of your outdated kitchen cabinets? Give them a fresh and stylish makeover with chalk paint. This versatile paint is easy to use and can transform your cabinets without the need for sanding or priming. In this article, we'll explore the essential aspects of painting old kitchen cabinets with chalk paint.
Step 1: Prepare Your Cabinets
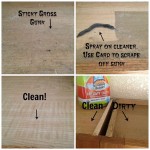
Before you start painting, it's crucial to prepare your cabinets. This involves removing all hardware, cleaning the surfaces thoroughly with a degreaser, and repairing any damages. If your cabinets have a glossy finish, lightly sand them with fine-grit sandpaper to create a surface for the paint to adhere to.
Step 2: Choose Your Chalk Paint Color
Chalk paint comes in a wide range of colors, so you can easily find the perfect shade to match your kitchen décor. Consider the overall style of your kitchen, as well as the existing colors in the room. Chalk paint can be mixed to create custom colors, giving you even more flexibility.
Step 3: Apply the First Coat
Stir the chalk paint thoroughly before using it. Apply the first coat using a brush or foam roller. Use smooth, even strokes and avoid applying too much paint at once. Allow the first coat to dry completely before proceeding to the next step.
Step 4: Apply Additional Coats
Depending on the desired coverage and the color of your cabinets, you may need to apply multiple coats of paint. Sand lightly between coats using fine-grit sandpaper to remove any imperfections. Allow each coat to dry completely before applying the next.
Step 5: Seal Your Cabinets
Once you're satisfied with the paint job, it's essential to seal your cabinets to protect the finish. Apply a clear wax or polyurethane sealant using a brush or rag. Allow the sealant to dry completely before reattaching the hardware.
Tips for Success
Here are a few tips to help you achieve the best results when painting old kitchen cabinets with chalk paint:
* Use a good quality chalk paint brush or foam roller. * Apply thin, even coats of paint and avoid overloading the brush. * Allow each coat to dry completely before applying the next. * Sand lightly between coats to remove any imperfections. * Seal your cabinets with a clear wax or polyurethane sealant to protect the finish. * Experiment with different colors and techniques to create a unique and personalized look. With careful preparation and attention to detail, you can transform your old kitchen cabinets into a stunning focal point for your home. Chalk paint is a versatile and user-friendly option that makes it easy to achieve a professional-looking finish without the hassle of sanding or priming.
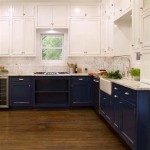
Painting Kitchen Cabinets With Chalk Paint Simply Today Life

Chalk Painted Kitchen Cabinets 2 Years Later Our Storied Home

Chalk Painted Kitchen Cabinets 2 Years Later Our Storied Home

Why I Repainted My Chalk Painted Cabinets Sincerely Sara D Home Decor Diy Projects

Chalk Paint Furniture Kitchen Cabinets Painting Remodel

How To Paint A Kitchen With Chalk Maison De Pax

Step By Kitchen Cabinet Painting With Annie Sloan Chalk Paint Jeanne Oliver

Why I Repainted My Chalk Painted Cabinets Sincerely Sara D Home Decor Diy Projects

Painting Kitchen Cabinets With Chalk Paint The Kelly Homestead

Step By Kitchen Cabinet Painting With Annie Sloan Chalk Paint Jeanne Oliver
Related Posts

