Painting Kitchen Cabinets: A Comprehensive Guide
Transforming your kitchen can be as simple as giving your cabinets a fresh coat of paint. Whether you're updating the look of your existing cabinets or replacing worn-out ones, painting is an economical solution that can significantly enhance your kitchen's aesthetics.
However, painting kitchen cabinets requires meticulous preparation and attention to detail to achieve a professional-looking finish. Here are the essential aspects to consider when painting your kitchen cabinets:
1. Preparation is Key
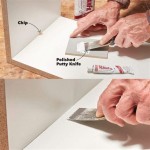
Thoroughly clean the cabinets with a degreaser to remove grease and grime. Repair any cracks or dents with wood filler and sand them smooth. Remove all hardware, such as knobs, pulls, and hinges. Protect the surrounding surfaces with painter's tape.
2. Choose the Right Paint
For kitchen cabinets, opt for a durable, water-resistant paint that can withstand heat, moisture, and frequent cleaning. Enamel, latex, and acrylic paints are commonly used for cabinets. Consider your desired finish, whether it's matte, satin, or glossy.
3. Prime for Better Adhesion
Applying a primer helps create a smooth surface for the paint to adhere to, preventing chipping or peeling. Use a primer specifically designed for kitchen cabinets to enhance durability and prevent stains.
4. Follow the Painting Process
Start by painting the inside of the cabinets first. Use a brush for corners, edges, and raised areas, and a roller for larger surfaces. Apply multiple thin coats, sanding lightly between each coat to achieve a smooth finish.
5. Let it Cure Properly
Allow the paint to cure for several days before reassembling the cabinets and hardware. This will help the finish reach its full hardness and durability. Avoid using the cabinets heavily during this period to prevent damage to the paint.
6. Protect with Topcoat
For added protection and durability, apply a topcoat or sealer. This will create a barrier against stains, scratches, and wear. Use a polyurethane or varnish that is specifically designed for kitchen cabinets.
7. Detailing and Finishing Touches
Once the paint has fully cured, reattach the hardware and remove the painter's tape. Finish with touch-ups as needed to conceal any imperfections.
By following these steps, you can achieve a professional-looking paint job on your kitchen cabinets, transforming your kitchen into a stylish and functional space.

How To Paint Kitchen Cabinets In 7 Simple Steps

How To Paint Kitchen Cabinets

Painted Kitchen Cabinets One Year Later The Palette Muse

7 Expert Tips For Flawless Kitchen Cabinet Painting

Durable Kitchen Cabinet Painting 10 Year Warranty Columbus Oh

How To Paint Kitchen Cabinets Forbes Home

Before After Grey Kitchen Makeover Diy Cabinets Renovation Remodel Small

Avoid These Mistakes How To Paint Cabinets That Are Already Painted Grace In My Space

How To Paint Kitchen Cabinets

How To Prep And Paint Kitchen Cabinets Lowe S
Related Posts


