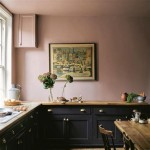
Painting Ugly Kitchen Cabinets: A Refreshing Transformation
When it comes to kitchen makeovers, painting outdated cabinets can be a transformative and budget-friendly solution. However, the prospect of tackling ugly kitchen cabinets can seem daunting if you're not sure where to start. This comprehensive guide will walk you through the essential aspects of painting kitchen cabinets, empowering you to achieve a stunning finish that will revitalize your kitchen space.
1. Preparation: The Cornerstone of Success
Thorough preparation ensures a smooth and professional-looking paint job. Start by removing all cabinet doors and drawers for easy access. Clean the cabinets thoroughly with a degreaser to remove grease and grime. Fill in any holes or scratches with wood filler and sand the surfaces until smooth.
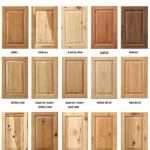
2. Choosing the Right Paint and Primer
Selecting the right paint and primer is crucial for durability and a flawless finish. Opt for a water-based latex paint specifically designed for kitchen cabinets, as it offers excellent adhesion and resistance to moisture. Primer is essential for blocking stains and ensuring the paint adheres well to the surface.
3. Priming for Perfection
Applying primer creates a solid foundation for the paint. Apply a thin, even coat of primer using a brush or roller, ensuring you cover every nook and cranny. Allow the primer to dry completely before moving on to painting.
4. Painting with Precision
Start by painting the edges and corners with a brush for precision. Use a roller for the flat surfaces, applying thin, even coats. Allow each coat to dry thoroughly before applying the next. For a durable finish, apply at least two coats of paint.
5. Distressing for a Vintage Appeal
If you prefer a distressed or antique look, create a thin glaze by mixing paint with water. Apply a thin coat of the glaze to the painted surface and wipe it off partially with a cloth, creating a weathered effect. Allow the glaze to dry completely before applying a sealant.
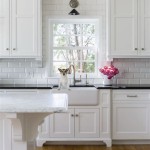
6. Finishing Touches for a Professional Look
Once the paint has dried, reattach the cabinet doors and drawers. Install new hardware, such as knobs or handles, to complete the refreshed look. A sealant can be applied to the painted surfaces for added protection and longevity.

Paint Kitchen Cabinets Without Sanding Six Simple Steps

My Painted Cabinets Two Years Later The Good Bad Ugly

How To Paint Ugly Oak Strip Cabinetry The Sweetest Digs

Painting Ugly Cabinets White Money Saving Tips Sipping Ping

Paint Kitchen Cabinets Without Sanding Six Simple Steps

What To Do About Ugly Kitchen Cabinets Hometalk

How To Paint Kitchen Cabinets Without Sanding Or Priming

How To Paint Kitchen Cabinets Like The Pros

Why I Repainted My Chalk Painted Cabinets Sincerely Sara D Home Decor Diy Projects

Painted Pine Kitchen Cabinets
Related Posts