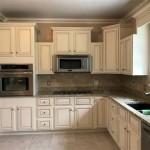
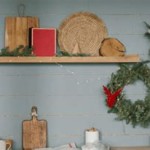
Painting Varnished Kitchen Cupboards: A Step-by-Step Guide to a Stunning Transformation
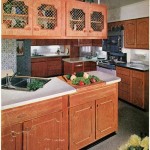
Varnished kitchen cupboards have a classic charm that can add character to any home. However, over time, the varnish may start to yellow or chip, making the cupboards look tired and outdated. If you're looking to give your kitchen a fresh new look, painting your varnished kitchen cupboards is a great option. Here's a comprehensive guide on how to do it right:
1. Preparation is Key
Before you start painting, it's essential to prepare your cupboards properly. This will ensure a smooth and even finish. Begin by removing all hardware, such as knobs and handles, and then thoroughly clean the cupboard surfaces with a degreaser. Once cleaned, sand the cupboards lightly using fine-grit sandpaper to create a slightly rough surface for the paint to adhere to.
2. Choosing the Right Paint
Selecting the right paint is crucial for a durable and professional-looking finish. Opt for a high-quality, water-based paint specifically designed for kitchen cabinets. These paints are typically more resistant to wear and tear and offer better coverage and adhesion. For a classic look, choose a semi-gloss or satin finish, which provides a subtle shine and is easy to clean.
3. Prime First
Primer acts as a base coat and helps the paint adhere better to the surface. Use a high-quality primer specifically designed for kitchen cabinets or varnished surfaces. Apply one coat of primer and allow it to dry completely before moving on to the paint.
4. Paint the Cupboards
Once the primer has dried, it's time to apply the paint. Use a high-quality brush or roller and apply thin, even coats. Allow each coat to dry completely before applying the next. Depending on the color and coverage you desire, you may need two to three coats of paint.
5. Applying a Topcoat
To protect your freshly painted cupboards from wear and moisture, apply a clear topcoat. This can be a polyurethane or a water-based clear finish. Apply a thin, even coat and allow it to dry completely.
6. Reinstall Hardware
Once the paint and topcoat have dried, reinstall the hardware. Make sure the screws are tightened securely to prevent any rattling or movement.
Tips for Success
* Use a sanding block or orbital sander for larger surfaces to ensure even sanding. * Allow ample drying time between each step to prevent smudging or peeling. * Protect your work area with drop cloths and ventilation. * Clean your brushes and rollers thoroughly after each use to prevent paint build-up and drying. * Consider using a cabinet painting kit for all necessary tools and materials. * If you're unsure about any step, don't hesitate to consult a professional painter for guidance.
How To Paint Kitchen Cabinets Without Sanding Or Priming

Refinish Kitchen Cabinets With Kilz Restoration Primer

How To Paint Laminate Cabinets Without Sanding The Palette Muse

How To Paint Kitchen Cabinets Cupboard Guide Stillorgan Decor

How To Paint Kitchen Cabinets A Step By Guide Confessions Of Serial Do It Yourselfer

Avoid These Mistakes How To Paint Cabinets That Are Already Painted Grace In My Space

How To Paint Kitchen Cabinets In 7 Simple Steps

How To Paint Laminate Kitchen Cabinets Perfect Finish Tips

How To Re Varnish Cabinets Dans Le Lakehouse Refinishing Wood Kitchen Refinish

How To Paint Your Cabinets In A Weekend Without Sanding Them Chris Loves Julia
Related Posts