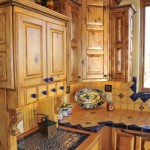
Essential Aspects of Painting Your Kitchen Cabinets With Chalk Paint
Updating your kitchen cabinets with chalk paint can be an exciting and rewarding project that adds a touch of charm and personality to your space. However, several crucial aspects should be considered to ensure a successful outcome. This article will delve into the essential steps and considerations involved in painting your kitchen cabinets with chalk paint, providing valuable guidance for achieving the best results.
Preparation
Adequate preparation is paramount in any painting project. Before applying chalk paint to your kitchen cabinets, thoroughly clean their surfaces to remove dirt, grease, and any existing finishes. Use a degreasing agent and a gentle abrasive cleaner to ensure proper adhesion. Additionally, remove all hardware, such as knobs and handles, for easier painting and a more professional-looking finish.
Choosing the Right Primer
Many different types of primers are available, and selecting the right one is crucial for the longevity and adhesion of your chalk paint. For kitchen cabinets, where durability and moisture resistance are essential, an oil-based primer is highly recommended. Oil-based primers penetrate the wood's surface, creating a strong bond and providing a stable base for the chalk paint.
Application of Chalk Paint
When applying chalk paint to your kitchen cabinets, use a high-quality brush or roller specifically designed for chalk paint. Apply thin, even coats, allowing each coat to dry completely before applying the next. This technique helps prevent brushstrokes and ensures a smooth, professional-looking finish. Multiple coats may be necessary to achieve the desired coverage and opacity.
Distressing and Finishing
Chalk paint offers the unique ability to create distressed or antiqued finishes. To achieve this effect, lightly sand the painted surface with fine-grit sandpaper once the paint has dried. This process removes paint from the raised areas of the wood, creating a weathered and charming look. For added durability and protection, apply a clear wax or polyurethane finish. These finishes seal the paint, protect it from wear and tear, and enhance its overall appearance.
Hardware Selection
Once the chalk paint has been applied and finished, it is time to reinstall the hardware. Choose hardware that complements the color and style of your newly painted cabinets. Consider using decorative knobs and pulls to add a touch of elegance or opting for more modern and sleek hardware for a contemporary look.
Conclusion
Painting your kitchen cabinets with chalk paint can be a transformative experience, offering a cost-effective and customizable way to refresh your kitchen's aesthetics. By following the essential steps and considerations outlined in this article, you can achieve a professional-looking finish that will bring beauty and functionality to your home.

Painting Kitchen Cabinets With Chalk Paint Simply Today Life

Chalk Painted Kitchen Cabinets 2 Years Later Our Storied Home

How To Paint A Kitchen With Chalk Maison De Pax

Why I Repainted My Chalk Painted Cabinets Sincerely Sara D Home Decor Diy Projects

Chalk Painted Kitchen Cabinets 2 Years Later Our Storied Home

Chalk Paint Kitchen Cabinets 2 Amazing Before Afters And How To The Interiors Addict

Step By Kitchen Cabinet Painting With Annie Sloan Chalk Paint Jeanne Oliver

Painting Kitchen Cabinets With Chalk Paint Simply Today Life

Why I Repainted My Chalk Painted Cabinets Sincerely Sara D Home Decor Diy Projects

Paint Your Kitchen Cabinets With Chalkboard Jessica Rayome
Related Posts

