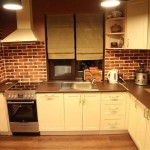
Professional Tips for Painting Kitchen Cabinets
Painting kitchen cabinets represents a significant undertaking that can dramatically transform the aesthetic of a kitchen. A successful outcome requires meticulous preparation, the right materials, and a strategic approach. This article outlines professional tips to guide individuals through the process, ensuring a durable and visually appealing finish.
Thorough Preparation: The Foundation of a Lasting Finish
Prior to applying any paint, the existing cabinet surfaces must be properly prepared. This stage is arguably the most critical, influencing the adhesion of the paint and the longevity of the finish. Neglecting proper preparation will inevitably lead to paint chipping, peeling, and an overall unprofessional appearance.
The first step involves removing all cabinet doors and drawers. Label each door and drawer with its corresponding cabinet frame location. A simple numbering system using painter's tape on both the door/drawer and the frame can save significant time and frustration during reinstallation. Remove all hardware, including knobs, pulls, hinges, and any decorative elements. Store the hardware in labeled bags to prevent loss or mixing of components.
Clean the cabinet doors, drawers, and frames thoroughly. Kitchen cabinets accumulate grease, grime, and food splatters over time. Use a degreasing cleaner specifically designed for kitchen surfaces. Trisodium phosphate (TSP) is a powerful cleaner but requires careful handling and proper ventilation. Alternatively, a phosphate-free cleaner can be used, often considered safer for both the user and the environment. Follow the manufacturer's instructions for the chosen cleaner, ensuring adequate rinse with clean water.
Sanding is a crucial step to create a surface that the primer and paint can effectively adhere to. If the cabinets have a glossy finish, sanding is even more critical. Use a medium-grit sandpaper (around 120-180 grit) to lightly scuff the entire surface. Focus on removing the sheen without completely removing the existing finish. For cabinets with intricate details, use sanding sponges or flexible sanding pads to reach difficult areas. After sanding, thoroughly remove all sanding dust with a tack cloth or a damp cloth. Ensure the surface is completely dry before proceeding.
For cabinets with multiple layers of paint or a particularly difficult to remove finish, consider using a chemical stripper. Follow the manufacturer's instructions carefully, wearing appropriate protective gear, including gloves and eye protection. Chemical strippers can be effective but require patience and proper disposal procedures.
After cleaning and sanding, inspect the cabinets for any imperfections, such as cracks, dents, or chips. Fill these imperfections with wood filler, applying it smoothly and evenly with a putty knife. Allow the wood filler to dry completely according to the manufacturer's instructions. Once dry, sand the filled areas smooth, ensuring they are flush with the surrounding surface. Remove any remaining dust before proceeding to the next step.
Selecting the Right Materials: Paint, Primer, and Application Tools
The choice of paint and primer significantly impacts the final appearance and durability of the painted kitchen cabinets. Opting for high-quality products is an investment that will pay off in the long run, reducing the likelihood of premature wear and tear.
Primer serves several crucial functions: it improves paint adhesion, blocks stains (especially important with older cabinets), and creates a uniform surface for the paint. An oil-based primer is effective for blocking stains and providing a durable base coat, but it requires mineral spirits for cleanup and can have a strong odor. A water-based primer is a good alternative, offering easier cleanup and lower VOCs (volatile organic compounds). Consider a bonding primer designed for use on difficult-to-adhere surfaces, such as laminate or melamine. Apply the primer in thin, even coats, allowing it to dry completely between coats according to the manufacturer's recommendations.
For kitchen cabinets, alkyd or acrylic enamel paints are commonly recommended. Alkyd paints provide a hard, durable finish that is resistant to scratches and stains, but they require mineral spirits for cleanup and can have a strong odor. Acrylic enamel paints offer good durability, easy cleanup, and lower VOCs. Consider a paint specifically formulated for cabinets and trim, as these paints typically have better leveling properties and provide a smoother finish. Choose a sheen that is appropriate for kitchen cabinets. Semi-gloss and gloss finishes are durable and easy to clean, but they can highlight imperfections. Satin and eggshell finishes are more forgiving but may require more frequent cleaning. Sample different sheens in your kitchen to determine your preferred look.
The application tools used can significantly impact the final outcome. A high-quality brush, specifically designed for use with the chosen paint, is essential for painting intricate details and edges. Use a fine-tipped brush for cutting in around trim and corners. For larger, flat surfaces, a small, dense foam roller or a short-nap roller will provide a smooth, even finish. Consider using a paint sprayer for a professional, factory-like finish. If using a sprayer, practice on a scrap piece of wood to adjust the settings and technique. Ensure proper ventilation and wear appropriate safety gear when using a sprayer.
Always use painter's tape to protect adjacent surfaces, such as walls, countertops, and flooring. Choose a high-quality tape that provides a clean, crisp line and doesn't leave behind residue. Apply the tape carefully, pressing it firmly along the edges to prevent paint bleed. Remove the tape shortly after applying the final coat of paint, before the paint is completely dry, to avoid pulling off the paint.
The Painting Process: Application and Technique
Proper application techniques are essential for achieving a smooth, even, and durable finish. Rushing the process or applying paint too thickly can lead to drips, runs, and an overall unprofessional appearance.
Begin by priming all surfaces of the cabinet doors, drawers, and frames. Apply the primer in thin, even coats, using a brush for detailed areas and a roller for larger surfaces. Allow the primer to dry completely according to the manufacturer's instructions. Lightly sand the primed surfaces with fine-grit sandpaper (around 220-grit) to smooth out any imperfections and create a better surface for the paint to adhere to. Remove all sanding dust before proceeding.
Apply the paint in thin, even coats, using the same techniques as with the primer. Avoid applying too much paint at once, as this can lead to drips and runs. Allow each coat of paint to dry completely according to the manufacturer's instructions. Lightly sand between coats with fine-grit sandpaper to remove any imperfections and create a smoother finish. Remove all sanding dust before applying the next coat.
For cabinet doors and drawers, consider painting the back sides first. This will allow you to handle the doors and drawers without smudging the freshly painted front sides. Allow the back sides to dry completely before flipping them over to paint the front sides.
When painting cabinet frames, start with the inside edges and corners. Use a brush to cut in around trim and other details. Then, use a roller to paint the larger, flat surfaces. Work in small sections, maintaining a wet edge to prevent lap marks.
If using a paint sprayer, apply the paint in thin, overlapping coats. Maintain a consistent distance from the surface and move the sprayer at a steady pace. Avoid holding the sprayer in one place for too long, as this can lead to runs and drips. Overlap each pass by about 50% to ensure complete coverage.
After applying the final coat of paint, carefully inspect the cabinets for any imperfections, such as drips, runs, or missed spots. Touch up any imperfections with a small brush. Allow the paint to dry completely before reassembling the cabinets.
When reinstalling the hardware, consider using new hardware to update the look of your kitchen. If reusing the existing hardware, clean it thoroughly before reinstalling it. Use a screwdriver to tighten the screws securely, but avoid overtightening, which can strip the screws or damage the cabinets.
Reattach the cabinet doors and drawers, using the labels to ensure they are placed in their correct locations. Adjust the hinges and drawer slides as needed to ensure the doors and drawers open and close smoothly. Allow the paint to fully cure according to the manufacturer’s instructions before subjecting the cabinets to heavy use. This curing time is crucial for the paint to reach its maximum hardness and durability.

How To Paint Kitchen Cabinets Like The Pros

How To Paint Kitchen Cabinets Without Sanding Or Priming

How To Paint Kitchen Cabinets Like The Pros

How To Paint Kitchen Cabinets

6 Tips For Painting Your Kitchen Cabinets

Avoid These Mistakes How To Paint Cabinets That Are Already Painted Grace In My Space

Cabinet Refinishing Guide

Pro Tips For Painting Cabinets In Your Home Paintzen
How To Paint Kitchen Cabinets Like The Pros

How To Paint Kitchen Cabinets Like A Pro The Design Twins
Related Posts