Raising Kitchen Cabinets: A Comprehensive Guide
Raising kitchen cabinets can dramatically enhance both the aesthetic and functional aspects of a kitchen. This renovation project can create a more modern look, increase storage space, and improve the overall ergonomics of the workspace. However, it’s crucial to carefully plan and execute this project to achieve optimal results.
Assessing the Feasibility of Raising Kitchen Cabinets
Before embarking on this project, certain factors should be considered to determine its feasibility. These factors include the existing cabinet construction, ceiling height, and the presence of obstructions such as ductwork or electrical wiring.
Key considerations include:
- Cabinet Construction: Sturdy cabinets made of solid wood or durable composites are ideal candidates for raising.
- Ceiling Height: Adequate ceiling height is essential to accommodate the raised cabinets and maintain a comfortable workspace.
- Obstructions: Identifying potential obstructions like pipes, wiring, or vents is crucial for planning the raising process.
- Structural Support: Evaluate whether the existing wall framing can support the additional weight of the raised cabinets.
Planning the Elevation and Design
Determining the desired cabinet height is a key aspect of the planning phase. Careful consideration should be given to factors like countertop height, backsplash dimensions, and the overall visual balance of the kitchen.
Key design elements include:
- Ergonomics: The elevated cabinets should create a comfortable and efficient work triangle within the kitchen.
- Aesthetics: The increased height should complement the overall kitchen design and create a sense of visual harmony.
- Storage Optimization: The added space above the cabinets can be utilized for additional storage solutions.
Gathering Necessary Tools and Materials
Assembling the necessary tools and materials beforehand streamlines the raising process. This includes safety equipment, measuring tools, construction materials, and appropriate fasteners.
Essential tools and materials often include:
- Safety Glasses and Gloves: Protecting eyes and hands during the project is paramount.
- Measuring Tape and Level: Accurate measurements ensure proper alignment and fit.
- Stud Finder: Locating wall studs is necessary for secure attachment of the cabinets.
- Circular Saw or Jigsaw: These tools are used for cutting filler pieces or adjusting cabinet dimensions.
- Drill and Screwdriver: Essential for attaching cabinets and mounting hardware.
- Shims and Wood Filler: These materials help achieve level installation and fill gaps.
- Molding and Trim: These finishing touches create a polished and professional appearance.
Preparing the Cabinets and Kitchen
Thorough preparation is crucial for a successful cabinet raising project. This involves removing cabinet contents, disconnecting appliances, and protecting countertops and flooring.
Preparation steps include:
- Emptying Cabinets: Removing all items from the cabinets prevents damage and reduces weight.
- Disconnecting Appliances: Detaching appliances like microwaves and range hoods provides access to the cabinet mounting points.
- Protecting Surfaces: Covering countertops and flooring with drop cloths or cardboard protects them from scratches and debris.
- Removing Existing Molding: This step allows for easier access to the cabinet tops and facilitates the installation of new molding.
Raising and Securing the Cabinets
The actual raising of the cabinets requires careful lifting and securing to ensure stability and proper alignment. Using appropriate lifting techniques and secure fastening methods is essential.
Key steps for raising and securing include:
- Lifting Safely: Utilizing proper lifting techniques prevents injuries and ensures the cabinets are handled carefully.
- Securing to Wall Studs: Attaching the cabinets securely to wall studs provides structural integrity.
- Using Shims for Leveling: Shims allow for precise adjustments to ensure the cabinets are perfectly level.
- Reinforcing with Brackets: Adding additional support brackets provides extra stability for heavier cabinets.
Installing Filler Pieces and Molding
Filling gaps between the raised cabinets and the ceiling creates a seamless and finished look. Carefully measured and cut filler pieces, combined with appropriate molding, enhance the overall aesthetic.
Steps for installing filler pieces and molding:
- Measuring and Cutting Filler Pieces: Accurate measurements are essential for creating a snug fit.
- Attaching Filler Pieces Securely: Using adhesive and nails or screws ensures the filler pieces are securely attached.
- Installing Molding: Applying molding to cover the gaps and create a finished edge enhances the visual appeal.
- Caulking and Painting: Caulking and painting the filler pieces and molding creates a seamless and polished look.
Finishing Touches and Considerations
Final touches, such as patching and painting the wall, installing new hardware, and reconnecting appliances, complete the transformation. Addressing any remaining details ensures a professional and cohesive result.
Final steps and considerations include:
- Patching and Painting Walls: Addressing any wall damage caused by the removal of the old cabinets creates a uniform surface.
- Installing New Hardware: Replacing old hardware with new knobs or pulls complements the updated cabinets.
- Reconnecting Appliances: Carefully reconnecting appliances ensures they function properly and safely.
- Cleaning and Organizing: Cleaning the newly raised cabinets and organizing their contents completes the project.

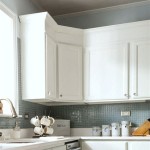
Raised Kitchen Cabinet Makeover Sawdust 2 Stitches

Genius Diy Raising Kitchen Cabinets And Adding An Open Shelf The Crazy Craft Lady

Raised Kitchen Cabinet Makeover Sawdust 2 Stitches

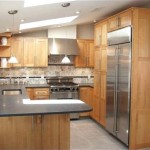
How To Raise Your Kitchen Cabinets The Ceiling Wildfire Interiors

Raised Kitchen Cabinet Makeover Sawdust 2 Stitches

Raised Kitchen Cabinet Makeover Sawdust 2 Stitches

Simple Kitchen Upgrade Raise Your Cabinets To The Ceiling Old Barn

Shaker Cabinets Vs Raised Panel Choice Cabinet

How To Raise Your Kitchen Cabinets The Ceiling Wildfire Interiors

How To Raise Your Kitchen Cabinets The Ceiling Wildfire Interiors
Related Posts