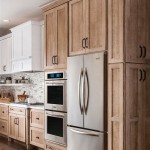
Re-Laminating Kitchen Cabinets in Singapore: A Comprehensive Guide
Kitchen cabinets are a vital component of any Singaporean home, contributing significantly to both functionality and aesthetics. Over time, however, the laminate surfaces of these cabinets can become worn, faded, or damaged, detracting from the overall appearance of the kitchen. Re-laminating kitchen cabinets offers a cost-effective and sustainable alternative to complete cabinet replacement, allowing homeowners to revitalize their kitchens without incurring substantial renovation expenses. This article provides a comprehensive guide to re-laminating kitchen cabinets in Singapore, covering the process, material options, considerations, and overall benefits.
The process of re-laminating kitchen cabinets involves removing the existing laminate (if necessary), preparing the cabinet surfaces, and applying a new layer of laminate material. This updated surface provides a fresh look, improving the kitchen’s visual appeal and protecting the underlying cabinet structure. Before embarking on a re-lamination project, it is crucial to understand the different types of laminates available, the preparation steps required, and the installation techniques necessary for a successful outcome.
Key Point 1: Understanding Laminate Types and Their Properties
Laminate is a composite material made of multiple layers pressed together under high heat and pressure. The top layer, known as the decorative layer, is a printed sheet that provides the desired color, pattern, or texture. Underneath this layer are layers of kraft paper impregnated with resin, which contribute to the laminate's strength and durability. The type of laminate chosen significantly impacts the final appearance, durability, and cost of the re-laminated cabinets. Here are some common types of laminates used in Singaporean kitchens:
High-Pressure Laminate (HPL): HPL is the most commonly used type of laminate for kitchen cabinets due to its durability and resistance to scratches, heat, and moisture. It is manufactured under high pressure and temperature, resulting in a dense and robust material. HPL is available in a wide range of colors, patterns, and textures, including wood grain, solid colors, and abstract designs. Its durability makes it ideal for high-traffic areas like kitchens.
Low-Pressure Laminate (LPL) or Melamine Faced Boards (MFB): LPL is a thinner and less expensive alternative to HPL. It is created by directly bonding a decorative paper to a substrate, typically particleboard or MDF (Medium Density Fiberboard), using melamine resin. While LPL is easier to work with and more affordable, it is less resistant to scratches, heat, and moisture compared to HPL. It is often used in less demanding applications, such as cabinet interiors or doors that are not frequently used.
Compact Laminate: Compact laminate is a thicker and more robust option than HPL. It consists of multiple layers of kraft paper impregnated with phenolic resin, creating a self-supporting and water-resistant material. Compact laminate is often used for countertops, backsplashes, and areas exposed to high moisture levels. However, it is also suitable for kitchen cabinets, providing exceptional durability and a sleek, modern look.
Acrylic Laminate: Acrylic laminate offers a high-gloss, glass-like finish that enhances the visual appeal of kitchen cabinets. It consists of an acrylic sheet bonded to a substrate material like MDF. Acrylic laminates are available in a range of vibrant colors and offer excellent scratch resistance and UV protection. However, they can be more expensive than HPL and require careful handling during installation.
Choosing the Right Laminate: The best type of laminate for a kitchen cabinet re-lamination project depends on factors such as budget, desired aesthetics, and the level of wear and tear the cabinets will experience. HPL is generally recommended for its durability and wide range of options. If cost is a major concern, LPL might be considered for less critical areas. Acrylic laminates provide a premium look but come at a higher price. Ultimately, the homeowner must carefully weigh these factors to make an informed decision.
Key Point 2: The Re-Lamination Process: Step-by-Step
Re-laminating kitchen cabinets is a multi-stage process that requires careful planning and execution. While it is possible to undertake this project as a DIY task, engaging professional contractors ensures a higher quality finish and reduces the risk of errors. Here is a detailed breakdown of the process:
1. Preparation and Assessment: The first step involves assessing the condition of the existing cabinets. Identify any structural damage, loose hinges, or other issues that need to be addressed before re-laminating. Remove all cabinet doors and drawers, and detach any hardware such as knobs and handles. Thoroughly clean the cabinet surfaces to remove dirt, grease, and grime. If the existing laminate is peeling or damaged, it needs to be carefully removed using a heat gun and scraper.
2. Surface Preparation: After removing the old laminate, the underlying cabinet surfaces need to be properly prepared. This involves sanding the surfaces to create a smooth and even base for the new laminate. Use sandpaper with a grit of around 120-180 to remove any imperfections and create a slightly textured surface that will promote better adhesion. Fill any holes or cracks with wood filler and allow it to dry completely before sanding again.
3. Cutting and Applying the Laminate: Measure the cabinet surfaces accurately and cut the laminate sheets to the required dimensions. It is essential to add a slight allowance (approximately 1/4 inch) to each side of the laminate to allow for trimming after installation. Apply contact adhesive to both the cabinet surface and the back of the laminate sheet. Allow the adhesive to dry for the recommended time, usually around 15-20 minutes, until it is tacky but not wet. Carefully align the laminate sheet with the cabinet surface and press it firmly into place. Use a roller or a rubber mallet to ensure uniform adhesion and eliminate any air bubbles.
4. Trimming and Finishing: Once the laminate is securely bonded to the cabinet surface, use a laminate trimmer or a router with a flush-trim bit to trim the excess laminate along the edges. Then use a file to smooth any sharp edges and ensure a clean, professional finish. For edges that are difficult to access with a trimmer, use a utility knife to carefully score and break off the excess laminate.
5. Reassembling and Installing: After the laminate is completely adhered and the edges are trimmed, reassemble the cabinet doors and drawers. Reattach the hinges and hardware, ensuring they are properly aligned. Clean the newly re-laminated surfaces with a damp cloth to remove any dust or debris. This concluding step will reveal the revitalized appearance of the cabinets.
Important Considerations: Throughout the re-lamination process, it is critical to work in a well-ventilated area and wear appropriate safety gear, including gloves and a dust mask. Proper preparation and careful execution are essential for achieving a durable and aesthetically pleasing result. Seeking professional assistance is highly recommended for complex projects or if you lack experience with laminate installation.
Key Point 3: Benefits and Considerations of Re-Laminating vs. Replacing
Choosing between re-laminating and completely replacing kitchen cabinets involves considering various aspects, including cost, time, environmental impact, and design preferences. Re-laminating offers several advantages, but potential drawbacks also need to be acknowledged.
Cost-Effectiveness: Re-laminating is generally significantly more affordable than replacing kitchen cabinets. Purchasing new cabinets involves the cost of materials, manufacturing, and installation, whereas re-laminating only requires the cost of the laminate material and adhesive, plus the labor cost if professional assistance is sought. This difference in cost makes re-laminating an attractive option for homeowners on a budget.
Reduced Disruption: Re-laminating is typically faster and less disruptive than replacing cabinets. Replacing involves removing the old cabinets, which can damage walls and flooring, and installing new cabinets, which can take several days or even weeks. Re-laminating, on the other hand, can often be completed within a few days, minimizing disruption to the household.
Sustainable Option: Re-laminating is a more sustainable option than replacing cabinets. It extends the lifespan of existing cabinets, reducing the need for new materials and minimizing waste that ends up in landfills. This aligns with environmentally conscious practices and contributes to a more sustainable lifestyle.
Design Flexibility: Re-laminating allows homeowners to update the look of their kitchen cabinets without completely changing the layout or design. With a wide variety of laminate colors, patterns, and textures available, it is possible to achieve a fresh and modern look that complements the existing kitchen décor.
Potential Limitations: Re-laminating is not suitable for cabinets that have significant structural damage or are made of low-quality materials. If the cabinet frames are warped, rotted, or severely damaged, it is best to replace them altogether. Furthermore, re-laminating only addresses the surface of the cabinets and does not change their underlying structure or layout. If you desire a complete kitchen renovation with a different cabinet configuration, replacement is the better option.
Hiring Professionals: While DIY re-lamination is possible, achieving a professional finish requires skill and experience. Improper installation can lead to peeling laminate, uneven edges, and other imperfections. Hiring professional contractors ensures a high-quality result and peace of mind. When selecting a contractor, ensure they have relevant experience, positive reviews, and are licensed and insured.
In conclusion, re-laminating kitchen cabinets in Singapore presents a practical and appealing option for homeowners seeking to rejuvenate their kitchens without the expense and upheaval of a full renovation. By carefully considering the available laminate types, understanding the re-lamination process, and weighing the benefits against the potential limitations, homeowners can make an informed decision that aligns with their needs and budget. Whether opting for DIY installation or engaging professional services, prioritizing proper preparation and diligent execution is crucial for realizing the desired outcome: refreshed and visually enhanced kitchen cabinets.

Re Laminate Over Existing Cabinet Jennings

Adhesive Laminate Stirling Road Quads

Adhesive Laminates Mount Faber Apartment Quads

Kitchen Cabinets With Laminate Makeover Jennings

How To Choose The Best Kitchen Cabinet Design In Singapore

Kitchen Cabinets With Laminate Makeover Jennings

How To Choose The Best Kitchen Cabinet Design In Singapore

Kitchen Cabinets With Laminate Makeover Jennings

How To Choose The Best Kitchen Cabinet Design In Singapore

Laminate Kitchen Cabinets For Your Jennings
Related Posts


