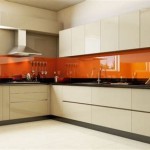
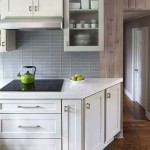
Redo Laminate Kitchen Cabinets: A Comprehensive Guide
Laminate kitchen cabinets, popular for their affordability and versatility, often become dated or worn over time. Redoing them can significantly transform the aesthetic of a kitchen without the expense and disruption of a complete cabinet replacement. This article outlines various methods for updating laminate cabinets, addressing preparation, material selection, and application techniques.
Preparation: The Foundation for Success
Proper preparation is crucial for achieving a durable and visually appealing finish when redoing laminate kitchen cabinets. This phase ensures that the new coating adheres correctly and the final result is smooth and professional-looking. The initial step involves meticulous cleaning. Use a degreasing cleaner to remove any grease, dirt, or grime that has accumulated on the cabinet surfaces. A clean surface allows for better adhesion of primers and paints. Avoid harsh abrasive cleaners that could scratch or damage the laminate.
After cleaning, the next step is sanding. Laminate surfaces are typically smooth and non-porous, making it difficult for paint to adhere directly. Sanding creates a slightly rougher surface, providing the necessary "tooth" for the primer and paint to grip. Use a fine-grit sandpaper, typically around 220-grit, and lightly sand all surfaces that will be painted. Focus on creating a uniform, matte finish across the cabinet doors, drawers, and frames. Avoid applying excessive pressure, which could damage the laminate. After sanding, remove all dust particles using a tack cloth or a vacuum cleaner with a soft brush attachment. This prevents imperfections from being trapped under the new coating.
Once the cabinets are clean and sanded, inspect them for any damage, such as chips, dents, or scratches. Fill these imperfections with wood filler or a specialized laminate filler, following the manufacturer's instructions. Allow the filler to dry completely and then sand it smooth to blend with the surrounding surface. This step ensures a seamless and uniform appearance after painting. Remove any remaining dust after sanding the filler.
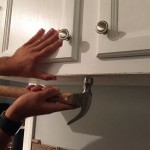
Finally, before applying primer, remove all hardware, such as knobs, pulls, and hinges. This prevents paint from getting on the hardware and ensures a clean, professional finish. If you are planning to reuse the existing hardware, clean it thoroughly and store it in a safe place. If you are replacing the hardware, this is an ideal time to select new pieces that complement the updated cabinet finish. Label the hardware and its corresponding location to ensure easy reinstallation.
Material Selection: Choosing the Right Products
Selecting the right materials is essential for achieving a durable and aesthetically pleasing finish on laminate kitchen cabinets. Primer, paint, and topcoats play crucial roles in the success of the project. The choice of primer is paramount, as it promotes adhesion between the laminate surface and the paint. Opt for a high-quality bonding primer specifically designed for non-porous surfaces like laminate. These primers contain additives that enhance adhesion and prevent peeling or chipping. Epoxy primers are also a good option, offering excellent adhesion and durability. Apply the primer according to the manufacturer's instructions, ensuring a thin, even coat. Allow the primer to dry completely before proceeding to the next step.
The choice of paint depends on the desired aesthetic and durability requirements. Acrylic latex paints are a popular choice for kitchen cabinets due to their durability, ease of application, and water-based formulation, which makes them easy to clean up. Oil-based paints offer superior durability and a smoother finish but require more effort to apply and clean up. Alkyd paints, a hybrid of oil-based and latex paints, provide a good balance of durability and ease of use. Consider the sheen of the paint as well. Semi-gloss or gloss finishes are more durable and easier to clean than matte finishes, making them ideal for kitchen cabinets. Apply two to three thin coats of paint, allowing each coat to dry completely before applying the next. Use a high-quality brush or roller for a smooth, even finish.
A topcoat provides an extra layer of protection and enhances the durability of the painted surface. Polyurethane topcoats are a popular choice for kitchen cabinets due to their resistance to scratches, stains, and water damage. Apply a thin, even coat of topcoat, following the manufacturer's instructions. Allow the topcoat to dry completely before reinstalling the hardware and using the cabinets.
Beyond primers, paints, and topcoats, other materials can contribute significantly to the overall outcome. Consider investing in high-quality brushes, rollers, and painting tools. Foam rollers are particularly effective for achieving a smooth, even finish on laminate surfaces. Painter's tape is essential for masking off areas that you do not want to paint, such as countertops, walls, and appliances. Drop cloths protect flooring from paint splatters. Adequate ventilation is also important, especially when working with oil-based paints or strong primers. Wear appropriate safety gear, such as gloves and a mask, to protect yourself from harmful fumes and chemicals.
Application Techniques: Achieving a Professional Finish
Proper application techniques are essential for achieving a professional-looking finish when redoing laminate kitchen cabinets. Start by thoroughly stirring the primer and paint to ensure a uniform consistency. Avoid shaking the can, as this can create air bubbles that can affect the finish. Use a high-quality brush or roller to apply the primer and paint in thin, even coats. Overlapping strokes slightly to avoid leaving gaps or streaks. Work in small sections at a time, maintaining a wet edge to prevent lap marks.
When painting cabinet doors, it is often easier to remove them from the frames and paint them separately. This allows you to work on a flat surface and achieve a more even finish. Place the doors on a flat surface covered with drop cloths or newspaper. Use painter's tape to mask off any edges or areas that you do not want to paint. Apply the primer and paint in thin, even coats, allowing each coat to dry completely before applying the next. Use a brush for detail work and a roller for larger surfaces.
When painting cabinet frames, use painter's tape to mask off any adjacent surfaces, such as countertops, walls, and appliances. Apply the primer and paint in thin, even coats, paying attention to corners and edges. Use a brush for tight spaces and a roller for larger surfaces. Work in small sections at a time, maintaining a wet edge to prevent lap marks. Allow each coat to dry completely before applying the next.
Sanding between coats is crucial for achieving a smooth, professional finish. After each coat of primer and paint has dried completely, lightly sand the surface with a fine-grit sandpaper, typically around 320-grit. This removes any imperfections, such as brush strokes or drips, and creates a smoother surface for the next coat to adhere to. Remove all dust particles after sanding before applying the next coat. This step is especially important for achieving a high-gloss finish.
After the final coat of paint has dried completely, apply a topcoat to protect the painted surface and enhance its durability. Apply the topcoat in a thin, even coat, following the manufacturer's instructions. Allow the topcoat to dry completely before reinstalling the hardware and using the cabinets. Avoid using the cabinets for at least 24 hours after applying the topcoat to allow it to fully cure.
If employing methods beyond painting, consider applying new laminate sheets or using peel-and-stick options. New laminate sheets necessitate precise measurements and cutting, along with the use of contact cement for secure adhesion. Peel-and-stick options offer simpler application but may not provide the same level of durability as traditional laminate sheets or professionally applied paint. Carefully consider the level of expertise and the desired outcome when selecting the method.

How To Paint Laminate Cabinets The Interiors Addict

How To Paint Laminate Kitchen Cabinets Perfect Finish Tips

Painting Laminate Cupboards Crowies Paints

Painted Laminate Cupboards Kitchen Painting Cabinets

How To Add Trim And Paint Your Laminate Cabinets

How To Paint Laminate Cabinets Everything You Need Know

A Year In Review Of How I Painted My Laminate Cabinets With Two Methods

How To Paint Laminate Cabinets Before After Almost Exactly Like My Kitchen Makeover

How To Paint Laminate Cabinets The Interiors Addict

How To Paint Laminate Kitchen Cabinets Angela Marie Made
Related Posts