Redo Old Kitchen Cabinets: A Comprehensive Guide
Kitchen cabinets often represent a significant portion of the overall kitchen aesthetic and functionality. Over time, these cabinets can become worn, outdated, or simply no longer align with evolving design preferences. Instead of undertaking a complete kitchen remodel, redoing existing cabinets offers a cost-effective and environmentally conscious alternative. This article provides a comprehensive guide to redoing old kitchen cabinets, covering preparation, various methods, and key considerations.
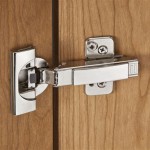
Before embarking on the cabinet redoing project, a thorough assessment of the existing cabinets is crucial. This assessment will help determine the appropriate strategy and identify any underlying issues that need to be addressed. Evaluate the structural integrity of the cabinets, checking for signs of warping, water damage, or pest infestation. Inspect the hardware, including hinges, knobs, and drawer pulls, to determine if replacement or refurbishment is necessary. Furthermore, consider the existing finish and its condition, as this will influence the preparation steps and the choice of refinishing method.
Preparation: The Foundation for a Successful Redo
Proper preparation is paramount to achieving professional-looking results when redoing kitchen cabinets. This stage involves several critical steps, starting with the removal and organization of cabinet doors and drawers. Carefully label each piece to ensure accurate reinstallation later. Remove all hardware, such as hinges, knobs, and pulls, and store them in a secure location. Clean the cabinet doors, drawers, and frames thoroughly to remove grease, dirt, and grime. A degreasing cleaner is highly recommended for this task. Rinse thoroughly with clean water and allow the surfaces to dry completely.
Once the cabinets are clean and dry, the next step is to prepare the surfaces for refinishing. This typically involves sanding or using a chemical stripper to remove the existing finish. Sanding is a common method, using progressively finer grits of sandpaper to create a smooth, even surface. For cabinets with intricate details or multiple layers of paint, a chemical stripper may be a more efficient option. Always follow the manufacturer's instructions and wear appropriate safety gear when using chemical strippers. After sanding or stripping, thoroughly clean the surfaces again to remove any dust or residue.
Addressing imperfections is a crucial part of the preparation process. Fill any holes, dents, or scratches with wood filler, allowing it to dry completely before sanding it smooth. For larger gaps or cracks, wood putty may be necessary. Ensure the wood filler or putty is compatible with the intended finish. Once the filler is dry and sanded, prime the cabinets with a high-quality primer. Primer helps to create a uniform surface for the new finish and improves adhesion. Apply two coats of primer, allowing each coat to dry completely before applying the next. Lightly sand the primed surfaces with fine-grit sandpaper before proceeding to the refinishing stage.
Methods for Redoing Kitchen Cabinets
Several methods can be employed to redo kitchen cabinets, each offering different aesthetics and levels of complexity. Painting is a popular and relatively straightforward option, allowing for a wide range of color choices and finishes. Refacing involves replacing the cabinet doors and drawer fronts while keeping the existing cabinet boxes. Refinishing, on the other hand, involves stripping and reapplying a new finish to the existing doors and frames. Each method offers unique advantages and considerations.
Painting: Painting is a versatile and cost-effective way to transform the appearance of kitchen cabinets. Choose a high-quality paint specifically formulated for use on cabinets, typically a durable acrylic or enamel paint. Apply the paint in thin, even coats, using a brush, roller, or sprayer. Several thin coats are preferable to one thick coat, as this minimizes drips and ensures a smooth, professional finish. Allow each coat of paint to dry completely before applying the next. Lightly sand between coats with fine-grit sandpaper to remove any imperfections and improve adhesion.
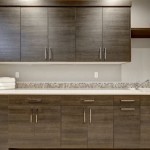
Refacing: Refacing kitchen cabinets involves replacing the cabinet doors and drawer fronts with new ones, while leaving the existing cabinet boxes in place. This method offers a significant visual upgrade without the expense and disruption of a complete cabinet replacement. Choose new doors and drawer fronts that match the style and color of your desired aesthetic. Veneer the exposed cabinet boxes with matching material for a seamless look. This method requires careful measurements and precise installation to ensure a proper fit.
Refinishing: Refinishing involves stripping the existing finish from the cabinet doors, drawer fronts, and frames, and then applying a new finish. This method is ideal for cabinets made from high-quality wood that are in good structural condition. After stripping the old finish, sand the wood smooth and apply a stain or clear coat to enhance the natural beauty of the wood. Apply several thin coats of the finish, allowing each coat to dry completely before applying the next. Lightly sand between coats to remove any imperfections and create a smooth, durable surface.
Key Considerations During the Process
Several factors should be considered throughout the process of redoing kitchen cabinets to ensure a successful outcome. Ventilation is crucial when working with paints, stains, and chemical strippers. Ensure adequate ventilation to minimize exposure to harmful fumes. Wear appropriate safety gear, including gloves, eye protection, and a respirator, to protect yourself from potential hazards.
Choosing the right materials is essential for achieving a durable and long-lasting finish. Select high-quality paints, stains, primers, and sealers that are specifically formulated for use on cabinets. Consider the type of wood the cabinets are made from when choosing stains and finishes. Different types of wood may react differently to various finishes. For example, oak cabinets have a prominent grain that can be enhanced or minimized depending on the chosen stain and finish.
Proper reassembly is critical to restoring the functionality of the kitchen cabinets. Carefully reattach the hinges, knobs, and pulls to the doors and drawers. Ensure that the doors and drawers align properly and operate smoothly. Adjust the hinges as needed to achieve a perfect fit. Use the labels created during the disassembly process to ensure that each door and drawer is reinstalled in its original location. Taking the time to reassemble the cabinets carefully will ensure a professional and functional result.
The choice to DIY or hire a professional depends on various factors, including skill level, time availability, and budget. Redoing kitchen cabinets can be a time-consuming and labor-intensive project. If one lacks the necessary skills or experience, hiring a professional may be a worthwhile investment. Professionals have the expertise and tools to achieve a high-quality finish and can often complete the project more quickly and efficiently. However, DIY projects can be a cost-effective option for those with the necessary skills and time.

25 Easy Ways To Update Kitchen Cabinets

15 Diy Kitchen Cabinet Makeovers Before After Photos Of Cabinets

21 Diy Affordable Ways To Redo Kitchen Cabinets Extra Space Storage

21 Diy Affordable Ways To Redo Kitchen Cabinets Extra Space Storage

Our Family Moved To Virginia So My Husband Could Attended Dental School The Home We Purchased Was Built In Redo Kitchen Cabinets Diy Cabinet Remodel

Cabinet Refinishing Guide

How To Paint Kitchen Cabinets In 7 Simple Steps

Diy Inexpensive Cabinet Updates Kitchen Cabinets Makeover Renovation

15 Amazing Ways To Redo Kitchen Cabinets

21 Diy Affordable Ways To Redo Kitchen Cabinets Extra Space Storage
Related Posts