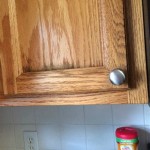
Redoing Oak Kitchen Cabinets: A Comprehensive Guide
Oak kitchen cabinets, a staple in many homes for decades, possess a timeless appeal rooted in their durability and natural grain. However, their characteristic warm, honey-toned finish can sometimes feel dated in contemporary kitchens. Redoing oak cabinets offers a cost-effective alternative to a complete kitchen remodel, allowing homeowners to update the aesthetics without the significant expense of replacing the entire cabinetry system. This process involves careful planning, preparation, and execution to achieve a professional and lasting result.
Refinishing or painting oak cabinets is a manageable project for adept DIY enthusiasts. However, the specific approach and level of complexity vary depending on the desired outcome and the existing condition of the cabinets. Understanding the nuances of working with oak, including its porous nature and potential for grain texture variations, is crucial for a successful transformation. This article provides a comprehensive overview of the process, from initial assessment to final touches, empowering homeowners to make informed decisions and achieve their desired aesthetic.
Key Point 1: Assessing the Condition and Determining the Best Approach
Before embarking on a cabinet makeover, a thorough assessment of the existing oak cabinets is paramount. This evaluation includes identifying any structural damage, such as loose hinges, warped doors, or water damage. Addressing these issues proactively will provide a solid foundation for the refinishing or painting process. Minor repairs, such as tightening screws or patching small imperfections, can often be done with basic tools and materials. However, more significant damage might necessitate professional intervention.
The existing finish on the oak cabinets plays a significant role in determining the appropriate refinishing or painting method. If the cabinets have a clear coat finish that is in good condition, simply scuff-sanding the surface might suffice to create a suitable base for a new coat of paint or stain. However, if the finish is peeling, cracked, or heavily damaged, complete removal is generally recommended. This can be achieved through chemical stripping, sanding, or a combination of both. The choice of method often depends on the type of finish and the homeowner's comfort level with each technique.
Consider the desired aesthetic outcome when choosing between refinishing and painting. Refinishing typically involves stripping the existing finish and applying a new stain or clear coat to enhance the natural beauty of the oak grain. This approach preserves the wood's character and emphasizes its inherent texture. Painting, on the other hand, completely covers the wood grain, providing a smooth, uniform surface. The choice depends on personal preference and the desired overall style of the kitchen. If the goal is a more modern or contemporary look, painting is often the preferred option.
The type of wood also influences the approach. Oak is a relatively porous wood, meaning it has open grain patterns. When painting, filling the grain is often necessary to achieve a smooth, professional finish. This can be done using a grain filler, which is applied before priming and painting. Without grain filling, the wood grain may be visible through the paint, resulting in a less refined appearance. Refinishing typically does not require grain filling, as the natural texture of the wood is desired.
Finally, budget considerations are crucial. Stripping and refinishing are generally more labor-intensive than painting, and the cost of materials can vary depending on the chosen stain or clear coat. Painting may be a more cost-effective option, especially if the cabinets are in good condition and require minimal preparation. Obtain quotes from professional refinishers or painters to compare costs and make an informed decision.
Key Point 2: Preparing Oak Cabinets for Refinishing or Painting
Proper preparation is essential for achieving a professional and durable finish on oak cabinets. This involves several key steps, including cleaning, sanding, and priming (or grain filling, if applicable). Neglecting any of these steps can compromise the final result and lead to premature chipping, peeling, or uneven color distribution.
The first step is thoroughly cleaning the cabinets to remove any grease, dirt, or grime. A degreasing cleaner specifically designed for kitchen cabinets is recommended. Apply the cleaner with a soft cloth or sponge, paying particular attention to areas around handles and hinges where grease tends to accumulate. Rinse the cabinets with clean water and allow them to dry completely before proceeding to the next step.
Sanding is crucial for creating a smooth and receptive surface for the new finish. The grit of sandpaper used depends on the condition of the existing finish. If the finish is relatively smooth, a fine-grit sandpaper (e.g., 220-grit) may suffice for scuff-sanding. However, if the finish is peeling or heavily damaged, a coarser grit sandpaper (e.g., 120-grit) may be necessary to remove the old finish. Sand in the direction of the wood grain to avoid scratching or damaging the surface. Use a sanding block or orbital sander for larger surfaces and a detail sander for corners and crevices.
After sanding, thoroughly remove all sanding dust with a tack cloth or vacuum cleaner. Dust particles can interfere with the adhesion of the primer or paint, resulting in a bumpy or uneven finish. A tack cloth is a sticky cloth specifically designed for removing dust from surfaces. Wipe the cabinets with the tack cloth, ensuring that all dust particles are removed.
If painting the oak cabinets, consider using a grain filler to minimize the visibility of the wood grain. Apply the grain filler according to the manufacturer's instructions. Typically, the grain filler is applied with a putty knife or scraper, pressing it into the grain pores. Allow the grain filler to dry completely before sanding it smooth. Sand the grain filler with fine-grit sandpaper to remove any excess and create a smooth, even surface.
Priming is an essential step for both refinishing and painting oak cabinets. Primer helps to seal the wood, provide a uniform surface for the new finish, and improve adhesion. Choose a primer specifically designed for wood, and apply it according to the manufacturer's instructions. For painting, a stain-blocking primer is often recommended to prevent tannins from the oak wood from bleeding through the paint. Apply one or two coats of primer, allowing each coat to dry completely before applying the next. Lightly sand the primer with fine-grit sandpaper to create a smooth surface for the paint.
Key Point 3: Applying the New Finish: Painting or Staining
The application of the new finish, whether paint or stain, is the final and most visible step in the process. This requires careful attention to detail and the use of appropriate tools and techniques to achieve a professional-looking result. The chosen finish should be durable, easy to clean, and compatible with the existing kitchen environment.
When painting oak cabinets, consider using a high-quality paint specifically designed for cabinets and trim. These paints are typically formulated to be durable, chip-resistant, and easy to clean. Choose a paint with a sheen that is appropriate for the kitchen environment. Semi-gloss or gloss finishes are more durable and easier to clean than matte finishes, but they also tend to highlight imperfections. Satin or eggshell finishes offer a good balance between durability and aesthetics.
Apply the paint in thin, even coats, using a brush, roller, or sprayer. A brush is ideal for painting intricate details and corners, while a roller is more efficient for painting larger surfaces. A sprayer can provide the smoothest and most uniform finish, but it requires practice and proper ventilation. If using a brush or roller, apply the paint in the direction of the wood grain to minimize brushstrokes or roller marks. Allow each coat of paint to dry completely before applying the next. Typically, two or three coats of paint are required to achieve full coverage.
When staining oak cabinets, choose a stain that complements the existing décor and enhances the natural beauty of the wood grain. Test the stain on a small, inconspicuous area of the cabinet to ensure that the color is satisfactory. Apply the stain with a brush, cloth, or sponge, following the manufacturer's instructions. Allow the stain to penetrate the wood for the recommended amount of time, then wipe off any excess stain with a clean cloth. Apply multiple coats of stain to achieve the desired color intensity, allowing each coat to dry completely before applying the next.
After painting or staining, apply a protective topcoat to seal the finish and enhance its durability. For painted cabinets, a clear topcoat can help to prevent chipping and scratching. For stained cabinets, a clear topcoat can protect the stain and enhance the wood's natural beauty. Choose a topcoat that is compatible with the paint or stain used, and apply it according to the manufacturer's instructions. Apply one or two coats of topcoat, allowing each coat to dry completely before applying the next.
Finally, reassemble the cabinets, attaching the doors, drawers, and hardware. Inspect the finished cabinets for any imperfections, and touch up any areas as needed. Clean the cabinets with a mild detergent and water to remove any dust or debris. Allow the cabinets to cure for the recommended amount of time before using them. With proper preparation and execution, redoing oak kitchen cabinets can transform the look of the kitchen and add value to the home.

Diy Painted Oak Kitchen Cabinets Makeover

Cabinet Refinishing Guide

Diy Staining Oak Cabinets Eclectic Spark

Should I Paint Or Refinish My Kitchen Cabinets

How To Stain Oak Cabinetry Tutorial The Kim Six Fix

Diy Painted Oak Kitchen Cabinets Makeover

Refinishing Kitchen Cabinets Modern Refacing Made Easy Wisewood

Staining Your Wood Cabinets Darker Young House Love

Naperville Kitchen Cabinet Refinishers 630 922 9714 Geneva Refacing Resurfacing

How To Make An Oak Kitchen Cool Again Copper Corners
Related Posts


