Reface Your Kitchen Cabinets Yourself: A Comprehensive Guide
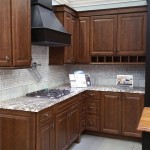
The kitchen is the heart of any home, and the cabinets are a major part of its functionality and aesthetic appeal. Replacing outdated or damaged cabinets can be expensive, but there is a more affordable option: refacing. Cabinet refacing involves replacing the doors and drawer fronts while retaining the existing cabinet boxes. This not only saves money but also allows you to update the look of your kitchen without the need for a complete remodel.
Benefits of Refacing Kitchen Cabinets
- Cost-effective: Refacing is significantly less expensive than replacing entire cabinets.
- Convenience: Refacing does not require removing existing cabinets, minimizing disruption to your kitchen.
- Time-saving: Refacing can be completed in a matter of days, unlike a complete kitchen remodel.
- Customization: Refacing allows you to choose from a wide range of door styles, finishes, and hardware to create a custom look for your kitchen.
Materials Needed
Before starting your cabinet refacing project, gather the following materials:
- New cabinet doors and drawer fronts
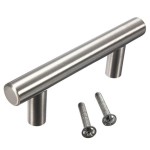
- Door and drawer hardware
- Adhesive or screws
- Caulk
- Paint or stain (optional)
- Safety glasses
- Drill or screwdriver
- Level
Step-by-Step Guide to Refacing Kitchen Cabinets
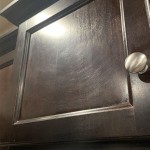
1. Remove Existing Doors and Drawer Fronts:Start by removing the old doors and drawer fronts. Use a screwdriver or drill to unscrew the hinges or brackets. Carefully lift the doors and drawer fronts off the cabinets.
2. Prepare the Cabinet Boxes:Clean the cabinet boxes with a damp cloth to remove any grease or dirt. If necessary, fill any holes or gaps with wood filler and let it dry completely.
3. Attach the New Doors and Drawer Fronts:Apply adhesive or screw the new doors and drawer fronts to the cabinet boxes. Use a level to ensure that the doors are aligned correctly. Drill pilot holes if using screws to prevent splitting the wood.
4. Install the Hardware:Install the door handles and drawer pulls. Use screws to secure them in place.
5. Caulk the Joints:Apply a bead of caulk around the edges of the new doors and drawer fronts to prevent moisture from getting inside the cabinets.
6. Paint or Stain (Optional):If desired, you can paint or stain the new doors and drawer fronts to match the existing cabinetry or create a new look for your kitchen.
Additional Tips
- Use a sharp utility knife to score the caulk around the old doors and drawer fronts before removing them.
- If your cabinet boxes are in poor condition, consider replacing them with new ones before refacing.
- If you are not confident in your DIY skills, it is advisable to hire a professional cabinet refacing company.
Conclusion
Refacing your kitchen cabinets yourself can be a rewarding project that can save you money while updating the look of your kitchen. By following the steps outlined in this guide and taking your time, you can achieve a professional-looking result that will enhance the functionality and beauty of your home for years to come.

Diy Cabinet Refacing Budget Friendly Made Easy Wisewood

Diy Cabinet Refacing Budget Friendly Made Easy Wisewood

How To Reface Kitchen Cabinets Affordable Cabinet Update On A Budget Anika S Diy Life

Painted Furniture Ideas Diy Refacing Kitchen Cabinets

Cabinet Refacing Ideas Diy Projects Craft How To S For Home Decor With

Cabinet Refacing Ideas Diy Projects Craft How To S For Home Decor With

Kitchen Cabinet Refacing How To Redo Cabinets

Professional Kitchen Cabinet Refacing Services Magic

5 Best Diy Kitchen Cabinet Refacing Ideas To Try

Painted Furniture Ideas Diy Refacing Kitchen Cabinets
Related Posts