Refacing Kitchen Cabinets with Contact Paper: The Ultimate Guide
Are you looking for an affordable and easy way to update your kitchen without breaking the bank? Consider refacing your kitchen cabinets with contact paper! This simple and budget-friendly solution can transform your kitchen's aesthetics, adding a fresh look and feel to your space.
Why Choose Contact Paper?
Contact paper is a self-adhesive vinyl material that comes in various colors, patterns, and textures. It's incredibly versatile and can be used to cover almost any surface, including kitchen cabinets. Here are some key advantages:
- Affordable: Contact paper is significantly cheaper than replacing or refinishing kitchen cabinets.
- Easy to Install: With a little care and precision, anyone can apply contact paper to cabinets without professional help.
- Durable: While not as durable as traditional cabinet finishes, contact paper can withstand normal wear and tear in the kitchen.
- Variety of Designs: Choose from a wide selection of colors and patterns to find the perfect match for your kitchen décor.
Materials and Tools You'll Need
- Contact paper
- Scissors
- Utility knife
- Measuring tape
- Smoothing tool (e.g., credit card or plastic squeegee)
- Cleaner or rubbing alcohol
- Clean cloth
Step-by-Step Guide
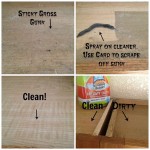
- Clean the Cabinet Doors and Frames: Wipe down all surfaces with cleaner or rubbing alcohol to remove dirt and grease.
- Measure and Cut the Contact Paper: Measure the cabinet doors and frames, and cut the contact paper accordingly. Leave about 2-3 inches of overhang on all sides.
- Apply the Contact Paper: Starting at one corner, peel back a section of the contact paper backing and carefully align it with the cabinet door or frame. Press down firmly to adhere the contact paper.
- Smooth the Contact Paper: Use a smoothing tool to gently press out any air bubbles or wrinkles. Work your way from the center outward.
- Trim the Excess Contact Paper: Once the contact paper is applied, use a utility knife to trim any excess around the edges.
- Repeat for Remaining Cabinets: Repeat the process for all remaining cabinet doors and frames.
- Allow the Contact Paper to Set: Allow the contact paper to fully adhere for at least 24 hours before using the cabinets.
- Use a clean surface when measuring and cutting the contact paper to prevent any dust or debris from getting trapped underneath.
- Take your time when applying the contact paper to avoid air bubbles or wrinkles.
- If you do encounter air bubbles, use a pin to puncture them and gently press the area back down.
- Overlap the contact paper slightly at corners and edges to ensure a secure bond.
- Be careful not to stretch the contact paper too much, as this can cause it to tear or wrinkle.
Tips for Success
Conclusion
Refacing kitchen cabinets with contact paper is a simple, affordable, and transformative project that can update your kitchen's appearance while saving you money. With a little care and patience, you can achieve professional-looking results that will breathe new life into your kitchen.

How To Update Cabinets Using Contact Paper Al Kitchen Makeover Cover Apartment

I Used Contact Paper On My Whole Kitchen Makeover And Al S Part 2

How To Update Cabinets With Contact Paper The Handyman S Daughter

How To Make Over A Kitchen With Contact Paper Covering Cabinets Countertops And Appliances Cover Wallpaper For

The Best Contact Paper For Kitchen Cabinets Hunker

Kitchen Cabinet Refacing Using Wall Paper Hometalk

How To Reface A Kitchen Cabinet With Contact Paper Glass Doors Refacing Cabinets Clean

Veelike Glossy White Contact Paper For Cabinets 15 7 X118 L And Stick Countertops Self Adhesive Kitchen Wallpaper Removable Waterproof Vinyl On Glitter Bedroom Walls Com

When Your Landlord Says Paint Is Out Of The Question Try Contact Paper For Cabinets Domino

How To Make Over A Kitchen With Contact Paper Covering Cabinets Countertops And Appliances
Related Posts

