Refinish Your Kitchen Cabinets: A Comprehensive Guide
Kitchen cabinets are a focal point in any home, significantly impacting the overall aesthetic and functionality of the space. Over time, however, they can become worn, outdated, or simply no longer match the evolving style of the homeowner. While replacing cabinets can be a costly and disruptive undertaking, refinishing offers a viable and often more budget-friendly alternative. Refinishing involves updating the existing cabinet surfaces, refreshing their appearance without completely replacing the underlying structures. This process can breathe new life into a kitchen, transforming its ambiance and boosting its value.
This article provides a comprehensive guide to refinishing kitchen cabinets, covering the key steps, materials, and considerations involved. It aims to equip homeowners with the knowledge needed to make informed decisions and potentially undertake this project themselves, or to understand the process more clearly when hiring professionals.
Key Considerations Before Beginning
Before embarking on a cabinet refinishing project, several factors must be carefully assessed to ensure a successful outcome. These include evaluating the condition of the existing cabinets, choosing the appropriate refinishing method, and planning the workflow effectively.
The first and most crucial step is to thoroughly inspect the cabinets. Examine the doors, drawer fronts, and cabinet frames for signs of damage such as warping, cracking, delamination, or water damage. While minor imperfections can often be addressed during the refinishing process, severely damaged cabinets may necessitate replacement of certain components or even the entire unit. Pay close attention to areas around the sink and dishwasher, as these are typically more prone to water damage. Assess the structural integrity of the cabinets; if they are unstable or significantly deteriorated, refinishing may not be a worthwhile investment.
Choosing the right refinishing method is equally important. The existing finish, the type of wood, and the desired aesthetic will all influence this decision. Common refinishing options include painting, staining, and applying a new coat of varnish or lacquer. Painting is a versatile option that allows for a wide range of color choices and can effectively conceal imperfections. Staining enhances the natural grain of the wood and provides a more traditional look. Varnish and lacquer offer durable and protective finishes that highlight the existing wood tone. Consider the existing kitchen design and the desired outcome when selecting the refinishing method. For example, if the cabinets are currently stained and the homeowner prefers a painted finish, thorough preparation will be essential to ensure proper paint adhesion. Conversely, if the cabinets are already painted and the homeowner wishes to stain them, the existing paint must be completely removed, which can be a more labor-intensive process.
Effective planning is essential for a smooth and efficient refinishing process. This includes gathering all necessary materials and tools, establishing a dedicated workspace, and developing a detailed schedule. Create a list of materials, including sandpaper, primer, paint, stain, varnish, brushes, rollers, drop cloths, and cleaning supplies. Ensure that you have the appropriate safety gear, such as gloves, masks, and eye protection. Designate a well-ventilated area for sanding, painting, and staining. This space should be protected from dust and debris. Break down the project into manageable tasks, such as removing hardware, cleaning the cabinets, sanding, priming, painting or staining, and applying a protective topcoat. Allocate sufficient time for each task and allow for drying time between coats. A well-organized plan will minimize errors and ensure a more professional-looking result.
The Refinishing Process: A Step-by-Step Guide
The process of refinishing kitchen cabinets involves several key steps, each requiring careful attention to detail. These steps typically include preparation, cleaning, sanding, priming, painting or staining, and applying a protective topcoat.
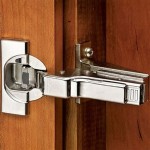
The initial step, preparation, is crucial for achieving a smooth and durable finish. Begin by removing all hardware, such as knobs, pulls, hinges, and latches. Label each piece of hardware and store them in separate containers to ensure that they can be easily reinstalled in their original locations. Remove the cabinet doors and drawers from the cabinet frames. Lay down drop cloths to protect your work surface from spills and splatters. Inspect the cabinets for any repairs that need to be made. Fill any holes, cracks, or dents with wood filler. Allow the wood filler to dry completely and then sand it smooth.
Cleaning the cabinets is essential for removing grease, dirt, and grime that can prevent proper adhesion of the new finish. Use a degreasing cleaner specifically designed for kitchen cabinets. Apply the cleaner with a sponge or cloth and scrub the surfaces thoroughly. Rinse the cabinets with clean water and allow them to dry completely. For stubborn grease stains, consider using a stronger cleaner or a degreasing solvent. Be sure to follow the manufacturer's instructions and wear appropriate safety gear when using these products.
Sanding is a critical step for creating a smooth and even surface for the new finish. Use sandpaper with varying grits, starting with a coarser grit (such as 120-grit) to remove the existing finish and smooth out any imperfections. Gradually move to finer grits (such as 220-grit or 320-grit) to create a smooth surface for priming and painting or staining. Sand in the direction of the wood grain. Use a sanding block or orbital sander for larger surfaces. Pay close attention to corners and edges, as these areas are often more difficult to sand. After sanding, remove all dust and debris with a tack cloth or a vacuum cleaner.
Priming is an important step for ensuring proper adhesion of the paint or stain and for sealing the wood. Choose a primer that is specifically designed for the type of finish you will be using. Apply the primer in thin, even coats, using a brush, roller, or sprayer. Allow the primer to dry completely according to the manufacturer's instructions. Lightly sand the primed surface with fine-grit sandpaper to create a smooth base for the paint or stain. Remove all dust and debris before proceeding.
Painting or staining is the step where the cabinets are transformed with the desired color and finish. For painting, apply the paint in thin, even coats, using a brush, roller, or sprayer. Allow each coat to dry completely before applying the next. Two or three coats of paint are typically required for full coverage. For staining, apply the stain with a brush or cloth, following the grain of the wood. Allow the stain to penetrate the wood for the recommended time, and then wipe off any excess stain. The longer the stain is left on the wood, the darker the color will be. Apply a second coat of stain if a darker color is desired.
Applying a protective topcoat is essential for protecting the paint or stain and for providing a durable and long-lasting finish. Choose a topcoat that is compatible with the paint or stain you have used. Options include varnish, lacquer, polyurethane, and water-based topcoats. Apply the topcoat in thin, even coats, using a brush, roller, or sprayer. Allow each coat to dry completely before applying the next. Two or three coats of topcoat are typically recommended for maximum protection.
Choosing the Right Materials and Tools
The success of a cabinet refinishing project heavily relies on selecting the appropriate materials and tools. Opting for high-quality products not only facilitates the process but also contributes to the longevity and aesthetics of the finished cabinets.
Consider the type of wood and the desired finish when choosing paints, stains, and primers. Water-based paints are generally easier to clean up and have lower VOC (volatile organic compound) emissions, making them a more environmentally friendly choice. Oil-based paints offer greater durability and a smoother finish but require more extensive cleanup and have higher VOC emissions. For stains, consider the color and opacity. Gel stains are often preferred for vertical surfaces as they are less likely to drip. Consult with paint store professionals for advice on the best products for your specific project.
The choice of brushes and rollers significantly impacts the smoothness and evenness of the finish. High-quality brushes with synthetic bristles are recommended for water-based paints, while natural bristle brushes are better suited for oil-based paints. Foam rollers provide a smooth, even finish, particularly for large, flat surfaces. Invest in a good quality paint sprayer for a professional-looking finish, especially if refinishing a large number of cabinets.
Essential tools include sandpaper in various grits (coarse, medium, fine), a sanding block or orbital sander, a scraper, a tack cloth, drop cloths, painter's tape, a putty knife for applying wood filler, safety glasses, gloves, and a respirator or mask. Having the right tools readily available streamlines the refinishing process and ensures optimal results. Invest in quality tools that will last and make the work easier and more efficient.
Beyond the basic tools, consider specialized tools for specific tasks. A paint can opener, a stirring stick, and paint trays are essential for managing paint. A drill with various drill bits is helpful for removing and reinstalling hardware. A level is necessary for ensuring that cabinet doors and drawers are properly aligned. A good workbench provides a stable and convenient surface for working on the cabinets.
Prioritize safety when selecting materials and tools. Always wear safety glasses to protect your eyes from dust and debris. Wear gloves to protect your hands from chemicals and solvents. Use a respirator or mask to avoid inhaling paint fumes and dust. Ensure that the workspace is well-ventilated to minimize exposure to harmful chemicals. Properly dispose of used rags, brushes, and containers according to local regulations.

Cabinet Refinishing An 8 Step Guide For Pro Painters Ppc

How To Refinish Cabinets Like A Pro

How To Refinish Kitchen Cabinets Diy

Cabinet Refinishing Guide

Refinishing Kitchen Cabinets Modern Refacing Made Easy Wisewood

Should I Refinish Or Replace My Kitchen Cabinets

Cabinet Refinishing N Hance

Refinishing Kitchen Cabinets A Beautiful Mess

Should I Paint Or Refinish My Kitchen Cabinets

How To Refinish Kitchen Cabinets N Hance