Refinish Your Own Kitchen Cabinets
A kitchen renovation can significantly enhance a home's value and aesthetic appeal. While replacing cabinets is a popular option, refinishing existing cabinets can be a more affordable and rewarding alternative. By refinishing your kitchen cabinets yourself, you can customize their look, save money, and gain a sense of accomplishment. This article will guide you through the process of refinishing your kitchen cabinets, outlining essential steps and considerations for a successful project.
1. Preparation: The Foundation for a Successful Finish
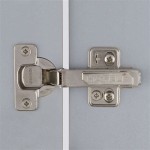
The success of your cabinet refinishing project hinges on meticulous preparation. Begin by removing all cabinet doors and hardware, including hinges, knobs, and pulls. Clean the cabinet surfaces thoroughly with a degreaser to remove any grease, grime, or residue. If you're dealing with old paint or varnish, sanding is essential to create a smooth surface for the new finish. Use sandpaper in progressively finer grits, starting with a coarse grit to remove rough patches and ending with a fine grit to achieve a smooth, even surface.
After sanding, wipe down the cabinets with a tack cloth to remove dust particles. This step ensures that the new finish adheres properly and avoids imperfections. If you're working with bare wood, consider applying a wood conditioner to even out the porosity of the wood and prevent the finish from absorbing unevenly. These steps lay the groundwork for a beautiful and lasting finish.
2. Painting or Staining: Choosing the Right Finish
Once your cabinets are prepped, you can decide on the desired finish. Painting offers endless color options and allows you to transform the look of your kitchen dramatically. If you're using a dark paint color, consider applying a primer first to ensure proper coverage and prevent the original cabinet color from bleeding through. For a more natural and rustic appearance, staining is a great choice. Choose a stain color that complements your kitchen's decor and consider applying a topcoat of polyurethane or varnish to protect the color and enhance its durability.
When painting or staining, it's crucial to apply thin, even coats. Allow each coat to dry thoroughly before applying the next to prevent dripping or uneven coverage. Consider using a brush for detailed areas and a roller for larger surfaces. For a professional-looking finish, use high-quality brushes and rollers designed for painting cabinets.
3. Finishing Touches: Adding Detail and Refinement
After the paint or stain has dried completely, it's time to add the finishing touches. If you're painting, consider adding a protective topcoat of polyurethane or varnish to enhance durability and resist scratches. For a more polished appearance, you can lightly sand the topcoat with fine-grit sandpaper to smooth out any imperfections.
After the finish has cured, reinstall the cabinet doors and hardware. Be sure to use new screws or consider upgrading to decorative hardware for a fresh look. Once everything is in place, clean the cabinets with a soft cloth and admire your handiwork. Your kitchen will have a renewed sense of style and elegance thanks to your refinishing project.

Cabinet Refinishing Guide

How To Paint Kitchen Cabinets In 7 Simple Steps

How To Refinish Cabinets Like A Pro

How To Paint Kitchen Cabinets Without Sanding Sustain My Craft Habit

A Diy Project Painting Kitchen Cabinets

Diy Painting Your Kitchen Cabinets The Right Way

Painting Your Kitchen Cabinets White

The Right Way To Paint Your Kitchen Cabinets And Save Factory Finish Guaranteed Emily Henderson

Diy Cabinet Refacing Budget Friendly Made Easy Wisewood

Diy Painted Oak Kitchen Cabinets Makeover
Related Posts

