Refinishing Golden Oak Kitchen Cabinets: A Guide to Updating Your Space
Golden oak cabinets were a popular choice in the 1990s and early 2000s. However, as tastes have evolved, many homeowners find themselves wanting a change from the warm, heavy tones of golden oak. Refinishing golden oak cabinets can be a cost-effective way to update your kitchen without the expense of a full remodel. It allows you to personalize your space and achieve a style that reflects your current preferences.
When considering refinishing golden oak cabinets, it's important to weigh your options and understand the process involved. This article will provide a comprehensive guide to refinishing golden oak kitchen cabinets, covering essential steps, key considerations, and different approaches to achieve a desired result.
Understanding the Process
Refinishing golden oak cabinets involves stripping the existing finish, sanding the wood, and applying a new stain and finish. This process requires time, patience, and some basic DIY skills. Depending on the desired outcome, you can opt for a simple paint job, a more complex stain and glaze technique, or even a complete stripping and re-staining process.
Before embarking on refinishing, it's crucial to assess the condition of your cabinets. Are there any significant scratches, dents, or water damage? This will help determine the necessary preparations and steps involved. If extensive damage is present, it's best to consult a professional for expert advice and guidance.
Key Considerations for Choosing a Finish
Once you decide to refinish your cabinets, the next step is choosing the right finish. This decision will be influenced by your personal preferences and the overall aesthetic you envision for your kitchen. Consider the following factors:
Color and Style
The choice of color and style will greatly impact the final look of your cabinets. Popular options include:
- White Cabinets: These are a timeless choice that creates a clean and airy ambiance. They also work well with various countertop and backsplash materials.
- Gray Cabinets: Grays offer a sophisticated and modern feel. They provide a neutral canvas for incorporating colorful accents and accessories.
- Painted Cabinets with a Distressed Finish: This style adds character and a touch of rustic charm to the kitchen. Achieving a distressed finish involves carefully sanding and applying paint to create a worn appearance.
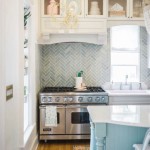
- Stained Cabinets: If you want to retain the wood grain, staining is an excellent option. You can choose from a wide array of colors to match your existing decor or create a new look.
Durability and Maintenance
Consider the durability and maintenance requirements of different finishes. Some finishes are more resistant to scratches, stains, and moisture than others. For example, a high-gloss polyurethane finish offers excellent protection but requires regular cleaning to maintain its luster. A matte finish, while more durable, may show fingerprints more easily.
Budget
The cost of refinishing cabinets can vary significantly depending on the chosen finish and the complexity of the project. Painting cabinets is generally the most affordable option, while stripping and re-staining can be more expensive. Consider your budget and prioritize features that are essential to you.
Conclusion
Refinishing golden oak cabinets can be a transformative project that breathes new life into your kitchen. By understanding the process, considering your preferences, and carefully choosing the right finish, you can achieve a stunning transformation that complements your lifestyle and enhances your home's appeal.

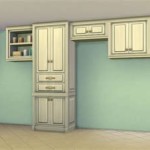
Refinishing Golden Oak Cabinets Pinnacle Homes Inc

Why You Should Keep Your Old Golden Oak Cabinets Sound Finish Cabinet Painting Refinishing Seattle Kitchen Layout New Renovation

How I Updated My Oak Cabinets Without Paint By Using Briwax Easy Budget Kitchen Makeover Only 24

Why You Should Keep Your Old Golden Oak Cabinets Sound Finish Cabinet Painting Refinishing Seattle Rustic Kitchen New
:strip_icc()/101671998-27cdf40f639448d0a56ff6c7eab609d7.jpg?strip=all "Expert Tips For Painting Oak Cabinets")
Expert Tips For Painting Oak Cabinets

Tips Tricks To Paint Honey Oak Kitchen Cabinets Cottage Living And Style

Diy Painted Oak Kitchen Cabinets Makeover

How To Work With Your Honey Oak Cabinets And Trim Carla Bast Design

Honey Oak Cabinets Restained With Genera Finishes American Gel Stain Are Just A Shade Kitchen Remodel

Helpful Tips For Painting Golden Oak Kitchen Cabinets Interior Frugalista
Related Posts