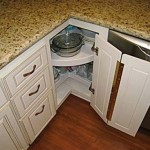
Honey Oak Cabinets: A Timeless Treasure, Refined
Honey oak kitchen cabinets are a timeless classic, known for their warm undertones and rich character. As they age, it's natural for these cabinets to darken or develop scratches and dings. However, with careful refinishing, you can restore their original beauty and enhance your kitchen's aesthetic appeal.
Assessment and Planning: A Crucial Step
Before starting any refinishing project, it's essential to thoroughly assess the condition of your honey oak cabinets. Check for any damage, such as deep scratches, gouges, or delamination. If any significant repairs are needed, it's best to consult a professional. Once you have assessed the condition of your cabinets, create a detailed plan that includes choosing the appropriate materials and techniques.
Materials You'll Need: A Comprehensive List
To refinish your honey oak cabinets, you'll need the following materials:
- Wood cleaner
- Sandpaper in various grits (120, 180, 220)
- Tack cloth li>Primer (optional)
- Paint brush (if painting)
- Roller (if painting)
- Paint in your desired color (if painting)
- Polyurethane finish
- Clean rags
Step-by-Step Refinishing Guide:
Follow these steps for a successful refinishing project:
- Cleaning: Use a wood cleaner to remove any dirt or grease from the cabinets. Allow them to dry completely.
- Sanding: Sand the cabinets with 120-grit sandpaper to remove the old finish. Gradually work your way up to finer grits (180 and 220) to create a smooth surface.
- Tack Cloth: Wipe down the cabinets with a tack cloth to remove any dust or debris.
- Priming (Optional): If you're painting the cabinets, apply a coat of primer to ensure better paint adhesion.
- Painting (Optional): If you're changing the color of your cabinets, apply two coats of paint. Allow each coat to dry completely before applying the next.
- Finishing: Apply a polyurethane finish to protect the cabinets from wear and tear. Allow the finish to dry completely. If desired, apply a second coat for extra durability.
Additional Tips for a Flawless Finish:
- If your cabinets have intricate details, use a small brush to apply the finish in those areas.
- Allow ample drying time between each step to ensure optimal results.
- Use a clean rag to remove any excess finish from the cabinets.
- Once the finish is completely dry, you'll have beautifully refinished honey oak cabinets that will enhance your kitchen's elegance.

Tips And Ideas How To Update Oak Or Wood Cabinets Paint Stain More

6 Ideas For Refreshing Honey Oak Cabinets To Liven Up Those Golden Oldies Woodiwiss Painting

Tips And Ideas How To Update Oak Or Wood Cabinets Paint Stain More

Do You Have Honey Oak Cabinets In Your House Here S What To Napolis Business Journal
How To Work With Your Honey Oak Cabinets And Trim Carla Bast Design

Exactly How To Paint Oak Cabinets Written By A Pro Painted Kayla Payne

Painted Wood Cabinets Vs Stained A Questionnaire Kylie M Interiors

How To Update Oak Cabinets With Briwax

Pin Page

Diy Staining Oak Cabinets Eclectic Spark
Related Posts


