Refinishing Metal Kitchen Cabinets: A Comprehensive Guide to Transform Your Kitchen
Metal kitchen cabinets offer a sleek and durable option for modern kitchens. However, over time, they can become scratched, dented, or discolored, detracting from their aesthetic appeal and functionality. Refinishing metal kitchen cabinets is an excellent way to restore their beauty and extend their lifespan. Here's a comprehensive guide to help you achieve professional-looking results in your own kitchen:
1. Preparation: The Foundation for Success
Before you begin, ensure the cabinets are thoroughly cleaned and free of grease and grime. Use a mild detergent and avoid abrasive cleaners that could damage the metal finish. Remove all hardware, such as handles, knobs, and hinges, for easier access and a more professional finish.
2. Surface Repair: Addressing Imperfections
If there are any dents or scratches on the metal surface, it's essential to repair them before repainting. Use a metal filler or epoxy putty to fill in the imperfections and sand them smooth once dry. For larger or more severe damage, consult a professional for repair options.
3. Primer: Ensuring Adhesion and Durability
Applying an appropriate primer is crucial for ensuring the paint adheres properly and provides a durable finish. Choose a primer specifically designed for metal surfaces and apply it evenly over the entire surface using a brush or spray gun. Allow the primer to dry completely before moving on to painting.
4. Painting: Enhancing Aesthetics and Protection
When it comes to painting metal kitchen cabinets, select a high-quality paint specifically formulated for metal surfaces. Apply thin, even coats and allow each coat to dry thoroughly before applying the next. For a more durable finish, consider using a spray gun instead of a brush. Multiple coats may be necessary to achieve desired coverage and opacity.
5. Sealing: Protecting the Finish
Once the paint is completely dry, applying a clear sealer is essential to protect the finish from wear and tear. Choose a sealer specifically designed for metal surfaces and apply it evenly over the painted surface. Allow the sealer to dry completely, ensuring a protective layer that enhances the durability and longevity of your refinished cabinets.
6. Reinstallation: Putting it All Back Together
Once the cabinets are completely dry, it's time to reinstall the hardware. Use appropriate screws and ensure they are tightened securely. Be careful not to overtighten, as this could damage the metal surface or the hardware itself. Adjust the hinges to ensure proper alignment and smooth operation.
Additional Tips for a Professional Finish:
• Use high-quality materials and tools throughout the process.
• Allow ample time for drying between each step.
• Ventilate the area well while working with paints and sealers.
• If you're not confident in your DIY skills, consider hiring a professional for the task.
By following these steps and incorporating these additional tips, you can refinish your metal kitchen cabinets to achieve a professional-looking finish that will enhance the aesthetics and functionality of your kitchen for years to come.

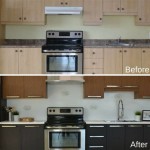
How To Refinish Metal Kitchen Cabinets Hunker Cabinet Remodel

How Can I Change Up Old Metal Kitchen Cabinets Besides Painting Them Hometalk

Garth And Martha Have Pro S Soda Blast Electrostatically Paint Their Vintage Crosley Steel Kitchen Cabinets Retro Renovation

How To Paint Metal Cabinets Kitchen Painting

How To Refurbish Steel Kitchen Cupboards

Ann Recreates The Look Of Vintage Metal Kitchen Cabinets In Wood

Nancy S Metal Kitchen Cabinets Get A Fresh Coat Of Paint And Lots New Red Accents Retro Renovation

48 Best Steel Metal Kitchen Cabinets Beautiful Photos Vintage

Our 50s Kitchen Renovation Cabinet Restoration Natalie Curtiss Ilration

Are My Cabinets Too Far Gone For Refacing


