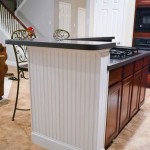
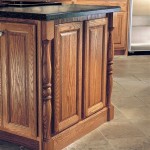
Refinishing Oak Kitchen Cabinets: A Comprehensive Guide to Before and After
Oak kitchen cabinets are renowned for their timeless appeal and durability. However, over time, they may show signs of wear and tear, leaving you with the dilemma of whether to replace or refinish them. Refinishing can be a cost-effective and transformative solution, restoring your cabinets to their former glory while adding a touch of personal style.
Refinishing oak kitchen cabinets involves several essential steps that require careful preparation and execution. Here's a comprehensive guide to help you navigate this project successfully:
Assessment and Preparation
Before embarking on the refinishing process, thoroughly inspect your cabinets for any damage or structural issues that may need to be addressed. Remove all hardware, including hinges, knobs, and drawer pulls, to avoid any harm during the refinishing.
Clean the cabinets thoroughly using a degreasing cleaner to remove grease, grime, and any other contaminants. This will ensure better adhesion of the new finish. Allow the cabinets to dry completely before proceeding.
Stripping the Old Finish
To remove the existing finish, you can use a chemical stripper or a heat gun. If using a chemical stripper, follow the manufacturer's instructions carefully, ensuring proper ventilation and wearing appropriate protective gear.
A heat gun requires caution and patience. Hold it at a distance and move it steadily over the surface, softening the old finish. Use a scraper to gently remove the softened finish, taking care not to damage the wood beneath.
Sanding
Sanding is crucial for achieving a smooth and even surface. Start with coarse-grit sandpaper and gradually move to finer grits until you reach the desired smoothness. Pay attention to corners, edges, and raised panels to ensure thorough sanding.
After sanding, wipe down the cabinets with a tack cloth to remove any sanding dust. This will prepare the surface for staining or painting.
Staining or Painting (Optional)
If you want to change the color or enhance the natural grain of your cabinets, staining is the solution. Choose a stain that complements your kitchen's style and apply it evenly using a clean cloth or brush.
If you prefer a solid color finish, you can paint your cabinets. Use a primer before painting to ensure better adhesion and coverage. Apply two or three coats of paint, allowing each coat to dry completely before applying the next.
Applying a Clear Finish
To protect the new finish and enhance the durability of your cabinets, apply a clear finish such as polyurethane or varnish. Use a brush or a spray gun to apply multiple thin layers, allowing each layer to dry before applying the next.
Sand lightly between coats using fine-grit sandpaper to ensure a smooth and glossy finish. Allow the final coat to cure completely before reinstalling the hardware.
Refinishing oak kitchen cabinets is a rewarding project that can transform your kitchen's aesthetics and functionality. By carefully following these steps and using high-quality materials, you can achieve a professional-looking finish that will elevate your home's style and add value for years to come.

Refinishing Kitchen Cabinets Modern Refacing Made Easy Wisewood

Cabinet Refinishing Guide

Want To Stain Our Builder S Grade Oak Cabinets So They Re Warmer Must Find Motivation Stained Kitchen Home Kitchens Design

Tips Tricks To Paint Honey Oak Kitchen Cabinets Cottage Living And Style

How To Refinish Wood Cabinets The Easy Way Love Remodeled

The Fast Affordable Way To Upgrade Your Kitchen Cabinet Refinishing

Naperville Kitchen Cabinet Refinishers 630 922 9714 Geneva Refacing Resurfacing

Kitchen Cabinet Refinishing Before After

Beautifully Refinished Oak Cabinets By Grande Finale

Cabinetry Refinishing Starlily Design Studio Old Kitchen Cabinets New Before And After
Related Posts


