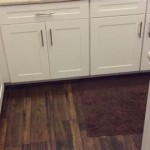
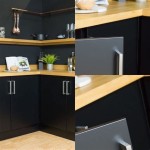
Repainting Kitchen Cupboard Ideas to Transform Your Space
Kitchen cabinets are central to the overall aesthetic and functionality of your kitchen. Repainting them is an effective way to update the look of your space and give it a fresh, new feel. Here are some essential aspects to consider when embarking on a kitchen cupboard repainting project:
1. Preparation is Key
Before you start painting, it's crucial to prepare the cabinets thoroughly. Remove all hardware, including knobs, handles, hinges, and drawers. Thoroughly clean the cabinet surfaces using a degreasing cleaner to remove any dirt, grease, or residue that could interfere with the paint's adhesion.
2. Choose the Right Paint
For kitchen cabinets, it's essential to choose a durable and moisture-resistant paint. Semi-gloss or satin finishes are ideal as they offer a balance between durability and easy cleaning. Consider using a premium quality paint specifically formulated for kitchen cabinets to ensure longevity and resistance to everyday wear and tear.
3. Use Primer for Better Adhesion
Applying a coat of primer before painting is highly recommended. Primer helps to seal the surface, promote paint adhesion, and create a more even finish. Choose a primer that is compatible with your chosen paint and the cabinet material.
4. Sanding for a Smooth Surface
Lightly sanding the cabinet surfaces before painting will create a smooth and even base for the paint. Use fine-grit sandpaper (220 or higher) and sand in the direction of the grain. Wipe away any sanding dust before applying primer or paint.
5. Paint in Thin Coats
Avoid applying thick coats of paint, as they can lead to runs, drips, and uneven drying. Instead, apply thin, even coats and allow each coat to dry completely before applying the next. This approach ensures a smooth and professional-looking finish.
6. Protect with Polyurethane
Once the paint has thoroughly dried, apply a clear protective finish to safeguard the painted surface from scratches, stains, and moisture. Polyurethane is a popular choice as it provides durability and a glossy, protective layer.
7. Reinstall Hardware and Enjoy
After the polyurethane has cured, reinstall the hardware you removed before painting. Stand back and admire your newly transformed kitchen cabinets. Enjoy the fresh, updated look and the satisfaction of completing a successful DIY project.
Note: If you are not confident in your DIY skills or have complex cabinet designs, consider hiring a professional painter to ensure a high-quality finish.
:strip_icc()/painted-kitchen-cabinet-ideas-20-becca-interiors-southampton-0b04a571a07649deb33edae1e89d9c41.jpeg?strip=all "29 Painted Kitchen Cabinet Ideas You Can Easily Copy")
29 Painted Kitchen Cabinet Ideas You Can Easily Copy

Painted Kitchen Cabinet Ideas Architectural Digest

How To Paint Kitchen Cabinets In 7 Simple Steps

15 Best Painted Kitchen Cabinets Ideas For Transforming Your With Color
:max_bytes(150000):strip_icc()/DearLillieCabinets-5c64643b46e0fb0001f090ca.jpg?strip=all "30 Painted Kitchen Cabinet Ideas")
30 Painted Kitchen Cabinet Ideas

31 Kitchen Color Ideas To Elevate Your Cabinetry Without A Full Remodel Architectural Digest

14 Green Kitchen Cabinet Ideas 2024 Top Paint Colors For Kitchens

Painted Kitchen Cabinet Ideas The Best Colors And Finishes

Kitchen Cupboard Paint Ideas How To Cabinets Like A Professional House Garden

38 Popular Colors To Paint Kitchen Cabinets Amber Oliver
Related Posts