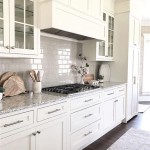
Repairing Damaged Kitchen Cabinets: A Step-by-Step Guide
Kitchen cabinets are an essential component of any home, providing storage and organization for essential items. However, over time, these cabinets may become damaged due to wear and tear, water exposure, or other factors. If you're dealing with damaged kitchen cabinets, fret not - with the right tools and know-how, you can easily restore them to their former glory.
Here's a comprehensive guide to help you repair damaged kitchen cabinets step by step:
1. Assess the Damage
First and foremost, it's crucial to thoroughly assess the extent of the damage to determine the best repair approach. Whether it's a minor scratch or a gaping hole, identifying the severity of the issue will help you gather the necessary materials and plan the repair process accordingly.
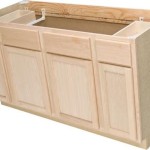
2. Gather the Required Materials
Once you know what you're dealing with, it's time to gather the necessary materials for the repair. This may include wood filler, sandpaper, paint, brushes, and any specialized tools as per the damage type. Ensure you have everything you need on hand before starting the repair to avoid interruptions.
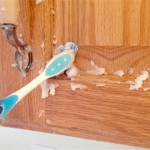
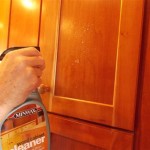
3. Prepare the Damaged Area
Before applying any repairs, prepare the damaged area by cleaning it thoroughly and removing any loose debris. If there's any loose paint or splintered wood, use sandpaper to smooth the surface. This step ensures a strong bond between the repair materials and the cabinet surface.
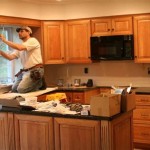
4. Repair the Damage
Now comes the actual repair. Depending on the nature of the damage, you may need to fill holes with wood filler, glue loose joints, or touch up scratches with paint. Follow the instructions on the repair materials carefully to achieve optimal results.
5. Allow Time to Dry
Once you've applied the repair materials, allow sufficient time for them to dry and cure. This drying time varies depending on the type of materials used, so refer to the product instructions for specific recommendations. Patience during this step is key to ensuring a durable repair.
6. Sand and Finish
After the repair has dried, use sandpaper to smooth out any rough edges or imperfections. This step helps to blend the repaired area seamlessly with the rest of the cabinet. Finally, apply paint or touch-up the finish to match the original cabinet surface.
7. Enjoy Your Restored Cabinets
With the repair complete, you can now enjoy your restored kitchen cabinets. By following these steps, you've successfully addressed the damage and given your cabinets a fresh lease on life. Your kitchen will once again be a functional and aesthetically pleasing space that you'll love using.

Discover Everything You Need To Know About Cabinet Repair

How To Repair Kitchen Cabinets With Water Damage Drywall Blue Springs Mo

What To Do When Your Cabinets Are Damaged Beyond Repair

Discover Everything You Need To Know About Cabinet Repair

Should I Repair Or Replace Smoke Damaged Kitchen Cabinets

How To Paint Water Damaged Laminate Kitc Bunnings Work Community

Water Damaged Kitchen Cabinets Restoration Furniture Medic

How To Repair Damaged Kitchen Cabinet Doors Handhills Cabinets

How To Repair Gouges In Kitchen Cabinets Ron Hazelton

How To Repair Ling Veneer On Particle Board Cabinets Handhills
Related Posts