Repair Kitchen Cabinet Paint: A Step-by-Step Guide to Restore Their Beauty
Kitchen cabinets are a crucial part of a kitchen's functionality and aesthetics. Over time, however, their paint can become damaged, chipped, or faded, making them look unsightly and detracting from the overall look of the space. Repairing kitchen cabinet paint is a relatively simple and inexpensive project that can help restore their original beauty and extend their life.
Materials Required:
- Sandpaper (various grits: 120, 180, 220)
- Tack cloth
- Primer (oil-based or water-based)
- Paint (oil-based or water-based, matching the original finish)
- Paintbrush or roller
- Painter's tape
- Putty knife (optional)
Step-by-Step Guide:
1. Preparation
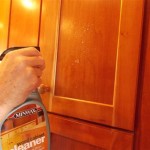
Begin by thoroughly cleaning the cabinets with a damp cloth to remove any dirt or grease. Use painter's tape to protect any areas you don't want to paint, such as countertops or hardware.
2. Sanding
Sand the damaged areas using 120-grit sandpaper. This will remove any loose or peeling paint and create a smooth surface for the new paint to adhere to. Gradually progress to finer grits (180 and 220) to create a refined finish.
3. Cleaning
Wipe away any sanding dust using a damp tack cloth. This will ensure a clean surface for the primer and paint to adhere properly.
4. Priming
Apply a thin coat of primer using a paintbrush or roller. This will help seal the surface and provide a base for the paint to bond to. Allow the primer to dry completely according to the manufacturer's instructions.
5. Painting
Apply two thin coats of paint using a brush or roller, allowing each coat to dry completely before applying the next. Use light, even strokes and overlap each stroke slightly to avoid visible brush marks.
6. Touch-Ups
Once the paint is completely dry, inspect the cabinets for any missed spots or imperfections. Use a fine-grit sandpaper (220 or higher) to lightly sand any rough areas and apply touch-up paint as needed.
Additional Tips:
- Sand in the direction of the wood grain to avoid further damage.
- Apply thin, even coats of paint and allow each coat to dry thoroughly before applying the next.
- Use a high-quality paintbrush or roller for a professional-looking finish.
- If the damage is extensive or deep, consider using a wood filler or putty knife to fill in the gaps before painting.
- Allow the cabinets to cure for a week or more before using them heavily to ensure the paint has fully set.

Avoid These Mistakes How To Paint Cabinets That Are Already Painted Grace In My Space

How To Repaint Kitchen Cabinets Painted By Kayla Payne

Painting Kitchen Cabinets

Kitchen Cabinets Chipped Or Baseboards Ling Here S What To Do Porch Daydreamer

How To Repaint Kitchen Cabinets Painted By Kayla Payne

How To Touch Up Chipped Cabinet Paint

How To Fix A Bad Kitchen Cabinet Paint Job The Wood Whisperer

How To Paint Pressed Wood Kitchen Cabinets Choice Cabinet

How To Touch Up Chipped Cabinet Paint

How To Paint Laminate Cabinets Everything You Need Know


