Replace Hinges Kitchen Cabinets: An Essential Guide
Kitchen cabinets are an integral part of any kitchen, providing storage and organization for all your kitchen essentials. Over time, the hinges on these cabinets can become worn or damaged, affecting the functionality and appearance of your kitchen. Replacing hinges on kitchen cabinets is a relatively straightforward task that can be completed with the right tools and materials.
In this comprehensive guide, we will walk you through the essential aspects of replacing hinges kitchen cabinets, ensuring a successful and professional-looking result.
Essential Tools and Materials
To replace hinges kitchen cabinets, you will need the following tools and materials:
- New cabinet hinges
- Screwdriver (Phillips or flathead, depending on the hinge type)
- Measuring tape or ruler
- Pencil or marking tool
- Drill (optional for installing new holes)
- Countersink bit (optional for countersinking screws)
- Wood filler (optional for filling old hinge holes)
Step-by-Step Guide
Follow these steps to replace hinges kitchen cabinets:
1. Remove the Old Hinges
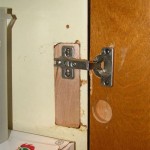
Using a screwdriver, remove the screws that hold the old hinges in place. Carefully lift the old hinges off the cabinet door and frame.
2. Mark the Hinge Placement
If you are installing hinges in a new location, use a measuring tape or ruler to mark the desired hinge placement on the cabinet door and frame. Make sure the hinges are positioned evenly and aligned properly.
3. Install the New Hinges
Place the new hinges onto the marked locations on the cabinet door and frame. Secure the hinges with screws using a screwdriver. Make sure to tighten the screws snugly but avoid overtightening.
4. Adjust the Hinges (Optional)
Once the hinges are installed, you may need to adjust them to ensure the cabinet door opens and closes smoothly. There are typically two adjustment screws on each hinge: one for side-to-side adjustment and one for up-and-down adjustment. Adjust the screws gradually until the door is aligned and operates properly.
5. Fill Old Hinge Holes (Optional)
If you are replacing hinges in an existing location, there may be visible holes from the old hinges. To conceal these holes, fill them with wood filler using a putty knife or your finger. Allow the wood filler to dry completely and sand it smooth once dry.
Tips for Success
Here are some tips to ensure a successful hinge replacement:
- Use the correct type of hinges for your cabinet doors.
- Make sure the hinges are positioned evenly and aligned properly before securing them.
- Tighten the screws snugly but avoid overtightening.
- Adjust the hinges as needed to ensure smooth operation.
- Fill old hinge holes with wood filler if necessary.
Conclusion
Replacing hinges kitchen cabinets is an important task for maintaining the functionality and appearance of your kitchen. By following the steps outlined in this guide, you can successfully replace hinges on kitchen cabinets, ensuring a professional-looking and durable result. With the right tools and materials, you can keep your kitchen cabinets looking great and functioning smoothly for years to come.

Replacing Cabinet Hinges With Overlay Self Closing The Palette Muse

Kitchen Hinge Fix

Hinges Installation Trick For Cabinets Young House Love

Replacing Outdated Cabinet Hinges The Hardware Hut

How To Install Overlay Kitchen Cabinet Hinges Roots Wings Furniture Llc

How To Fit Or Replace A Kitchen Hinge

How To Repair Or Replace Cabinet Hinges The Geek Pub

Wood Mode Cabinet Hinge And Adjustment Better Kitchens

Replacing Rusty Kitchen Cabinet Hinges Handyman Singapore

At Home With The Barkers Kitchen Cabinet Hinge Upgrade


