Essential Aspects of Replacing the Rotted Out Bottom of a Kitchen Sink Cabinet
A kitchen sink cabinet is a crucial part of any kitchen, providing storage space and supporting the sink. However, water damage is a common issue that can lead to the bottom of the cabinet rotting out. If this occurs, it is essential to replace the damaged section to maintain the functionality and integrity of the cabinet.
Identifying the Rot
The first step is to determine the extent of the damage. Inspect the bottom of the cabinet for soft, spongy areas or visible holes. Probe the affected areas with a screwdriver or awl to check for weakness. If the wood crumbles or breaks apart easily, it needs to be replaced.
Gathering Materials
To replace the rotted bottom of the cabinet, gather the following materials:
- New plywood or MDF (medium-density fiberboard) cut to the size of the damaged area
- Wood screws
- Waterproof wood glue
- Caulk
- Saw
- Drill
- Countersink bit
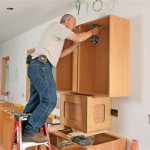
Removing the Rotted Section
Use a saw to carefully cut out the rotted section of the cabinet bottom. Ensure to cut along the edges of the damaged area, leaving clean and straight edges.
Fitting the New Bottom
Apply a layer of waterproof wood glue to the edges of the new bottom piece and position it in place. Use wood screws to secure the new bottom to the cabinet frame. Countersink the screws slightly below the surface of the wood to create a smooth finish.
Sealing and Caulking
To prevent future water damage, apply a bead of caulk around the edges of the new bottom piece, where it meets the cabinet frame. Use a caulk gun and smooth the caulk with your finger or a caulking tool.
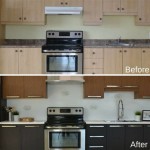
Finishing Touches
Once the caulk has dried, sand any rough edges or splinters. If desired, you can paint or stain the new bottom to match the existing cabinet.
Tips for Prevention
To prevent the bottom of the kitchen sink cabinet from rotting out again, consider these tips:
- Keep the area around the sink dry. Wipe up any spills or water droplets promptly.
- Use a dehumidifier in the kitchen to reduce moisture levels.
- Inspect the cabinet regularly for any signs of damage or leaks.
Conclusion
Replacing the rotted out bottom of a kitchen sink cabinet is a straightforward task that can restore the functionality and aesthetics of your kitchen. By following the steps outlined above and using the right materials, you can effectively prevent further damage and ensure the longevity of your kitchen cabinetry.

How To Replace Rotted Wood Under A Kitchen Sink Diy Guide Dengarden

Under Sink Cabinet Repair Our Bright Road

Rotted Sink Cabinet Floor How To Fix

When Repairing The Bottom Of Cabinet Below Kitchen Sink Do I Need To Take Damaged Section Out Or Can Simply Put Plywood On Top It Quora

How To Replace Rotted Sink Base Cabinet Floor Bottom Easy Home Mender

Under Sink Cabinet Repair Our Bright Road

How To Fix Rotted Cabinet Bottom Floor Much Sink Install House Remodeling Decorating Construction Energy Use Kitchen Bathroom Bedroom Building Rooms City Data Forum

We Repair Water Damaged Sink Base Cabinet Floor

How Do I Repair My Water Damaged Sink Cabinet Hometalk

Rotted Sink Cabinet Floor How To Fix
Related Posts